Domains, SSL and Cloudflare
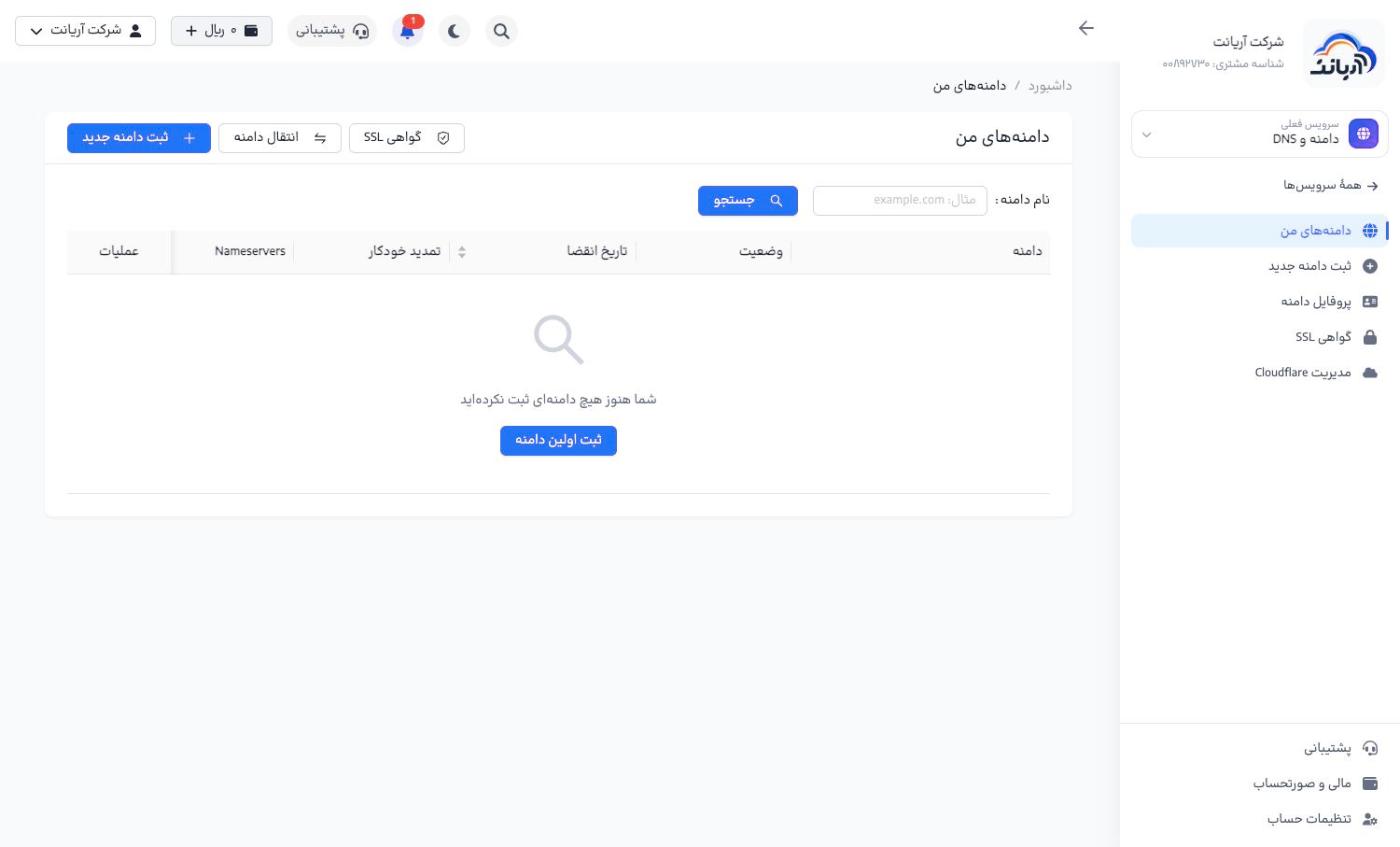
In the Domains and DNS («دامنه و DNS») menu, the My domains («دامنههای من») page shows all your domains with their status, expiry date, auto-renewal and name servers. The Register new domain («ثبت دامنه جدید»), Transfer domain («انتقال دامنه») and SSL certificate («گواهی SSL») buttons are at the top of this page.
Domain profile
To register a domain you first need a domain profile («پروفایل دامنه»): the owner's details and default name servers, which are sent to the registry with the same details for every domain.
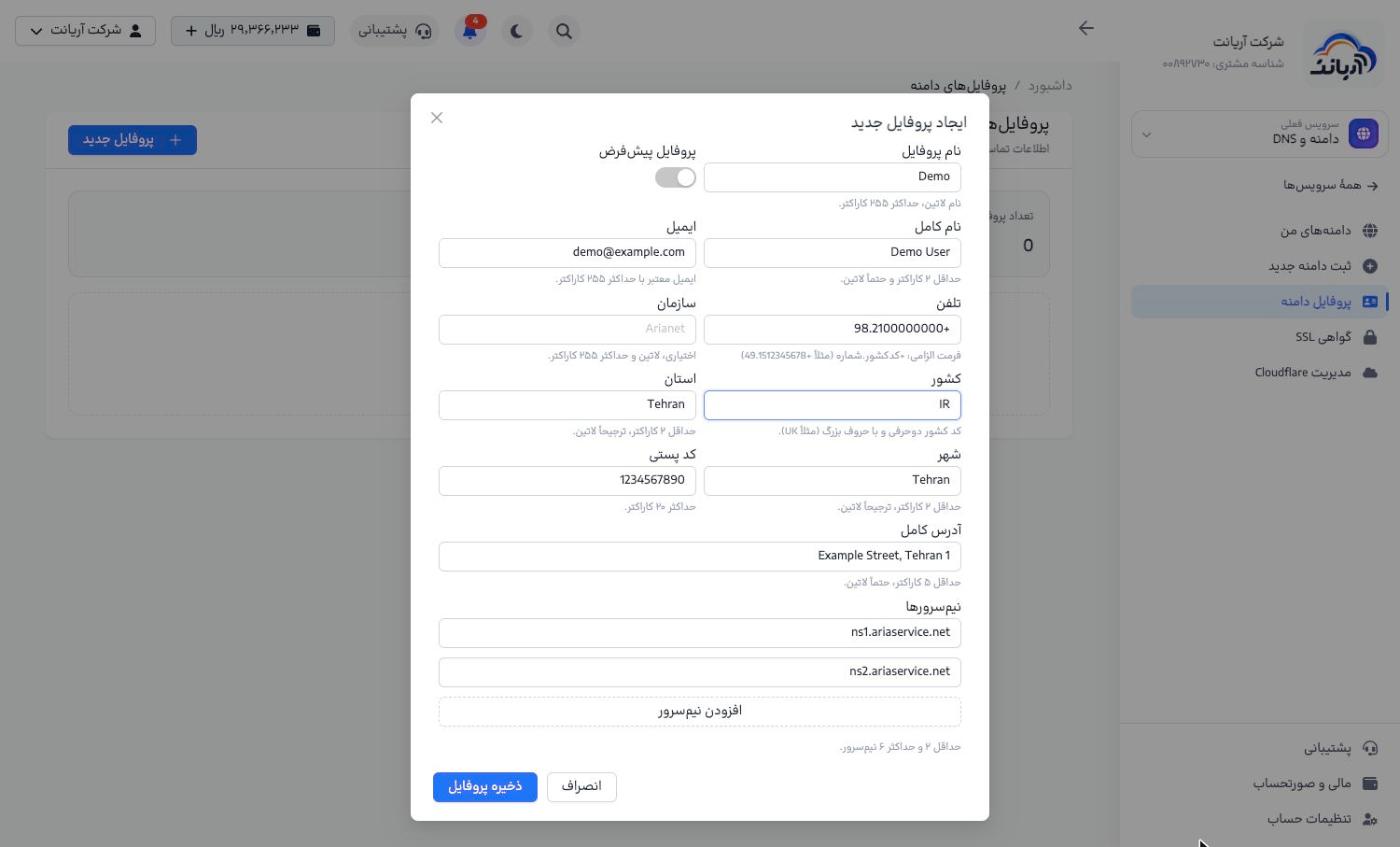
- In Domains and DNS → Domain profile («دامنه و DNS ← پروفایل دامنه»), click New profile («پروفایل جدید»).
- Fill in the form in Latin characters:
- Profile name (to recognize it in the panel) and, optionally, Default profile («پروفایل پیشفرض»)
- the owner's full name and email
- Phone in the format
+countrycode.number, for example+98.2112345678 - Organization (optional), Country (two-letter uppercase code, for example
IR), State/province, City, Postal code and Full address - Name servers: at least 2 and at most 6; add more with Add name server («افزودن نیمسرور»)
- Click Save profile («ذخیره پروفایل»).
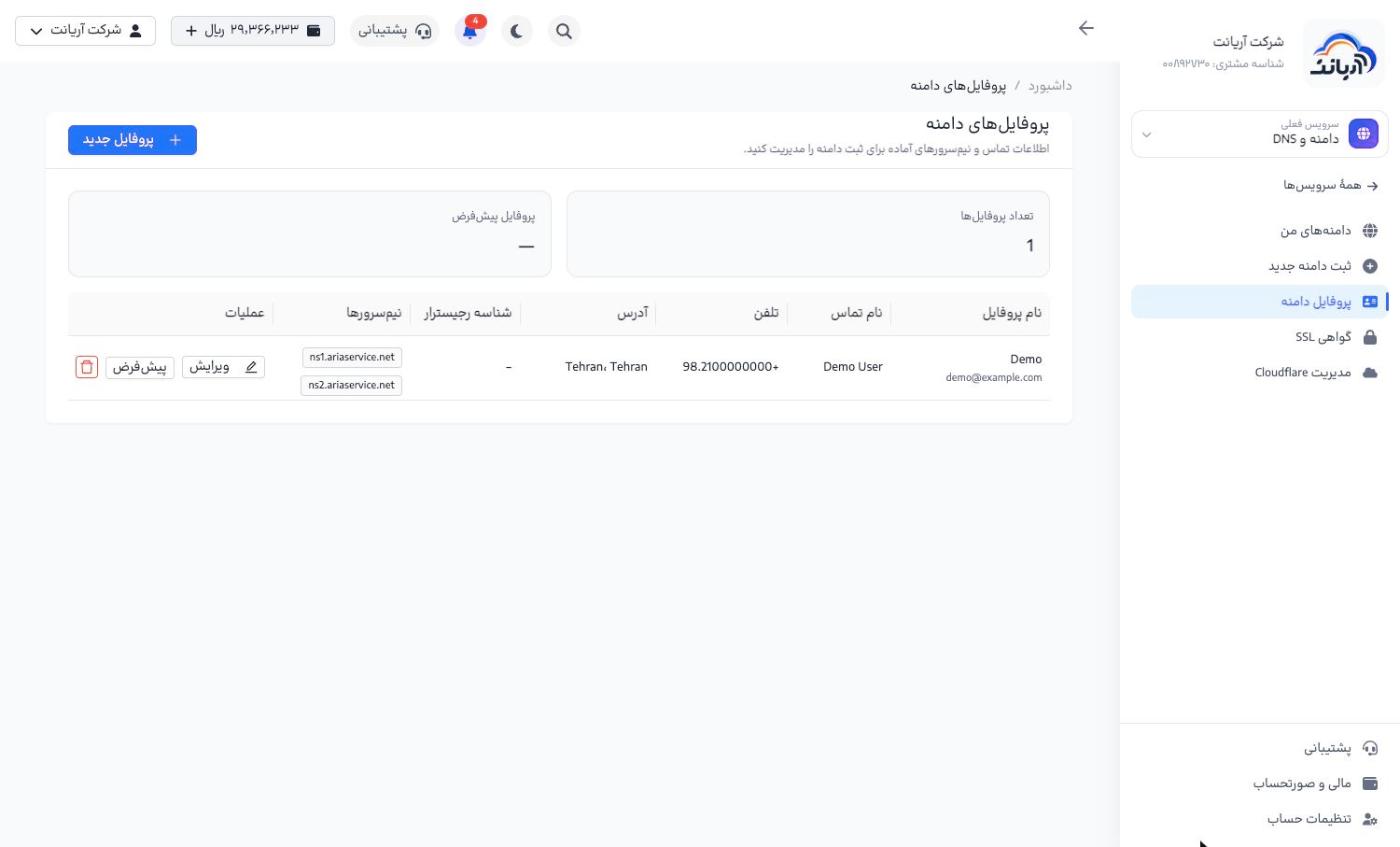
Profiles are listed with their contact name, phone, address and name servers, and are managed with Edit («ویرایش»), Default («پیشفرض») and the delete button.
Enter the domain owner's details correctly and in your own name; legal ownership of the domain is based on these details, and they are needed to transfer or recover the domain. The owner's email must be reachable; the registry's confirmation messages are sent to it.
Registering a domain
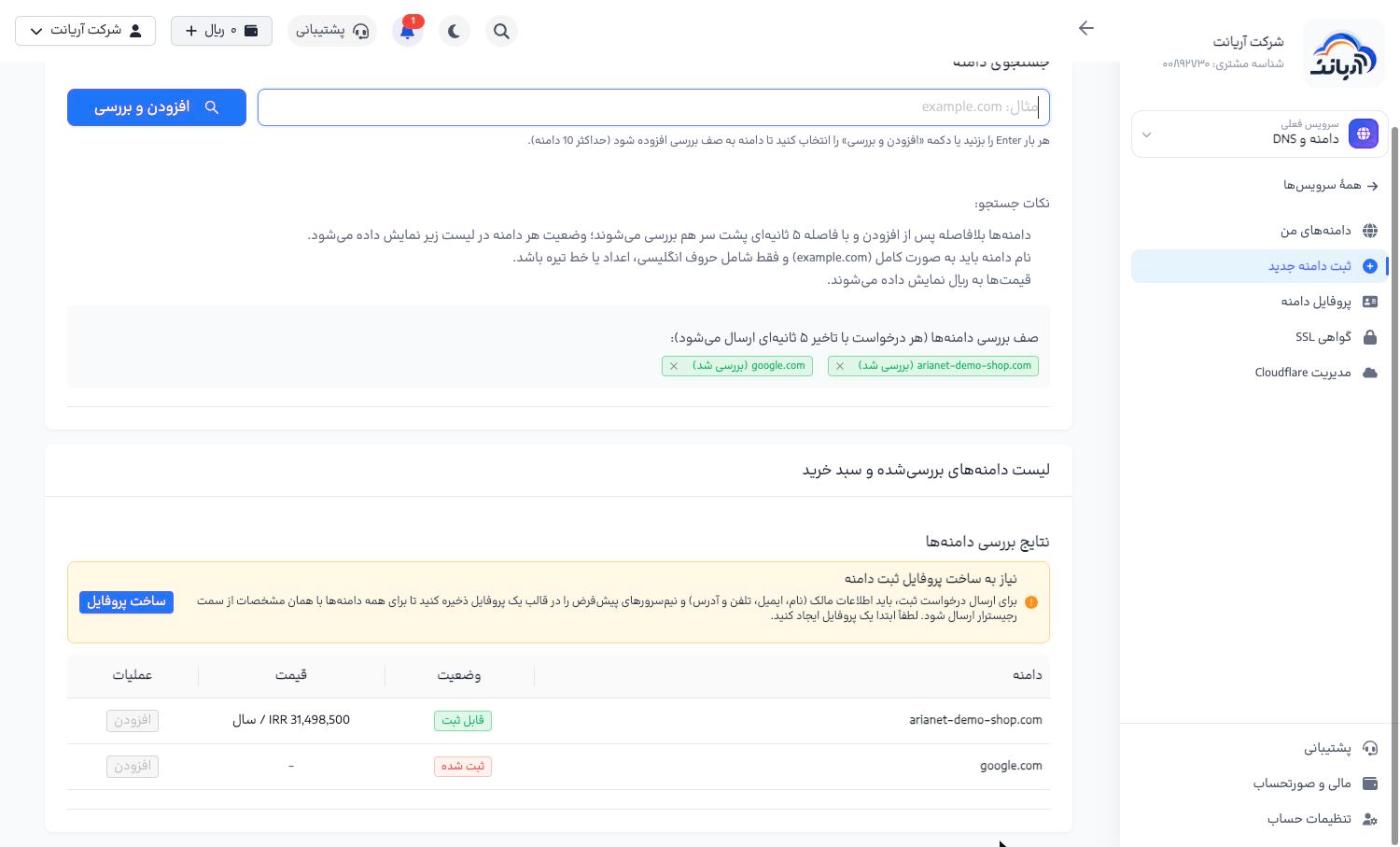
- In Domains and DNS → Register new domain («دامنه و DNS ← ثبت دامنه جدید»), type the full domain name (for example
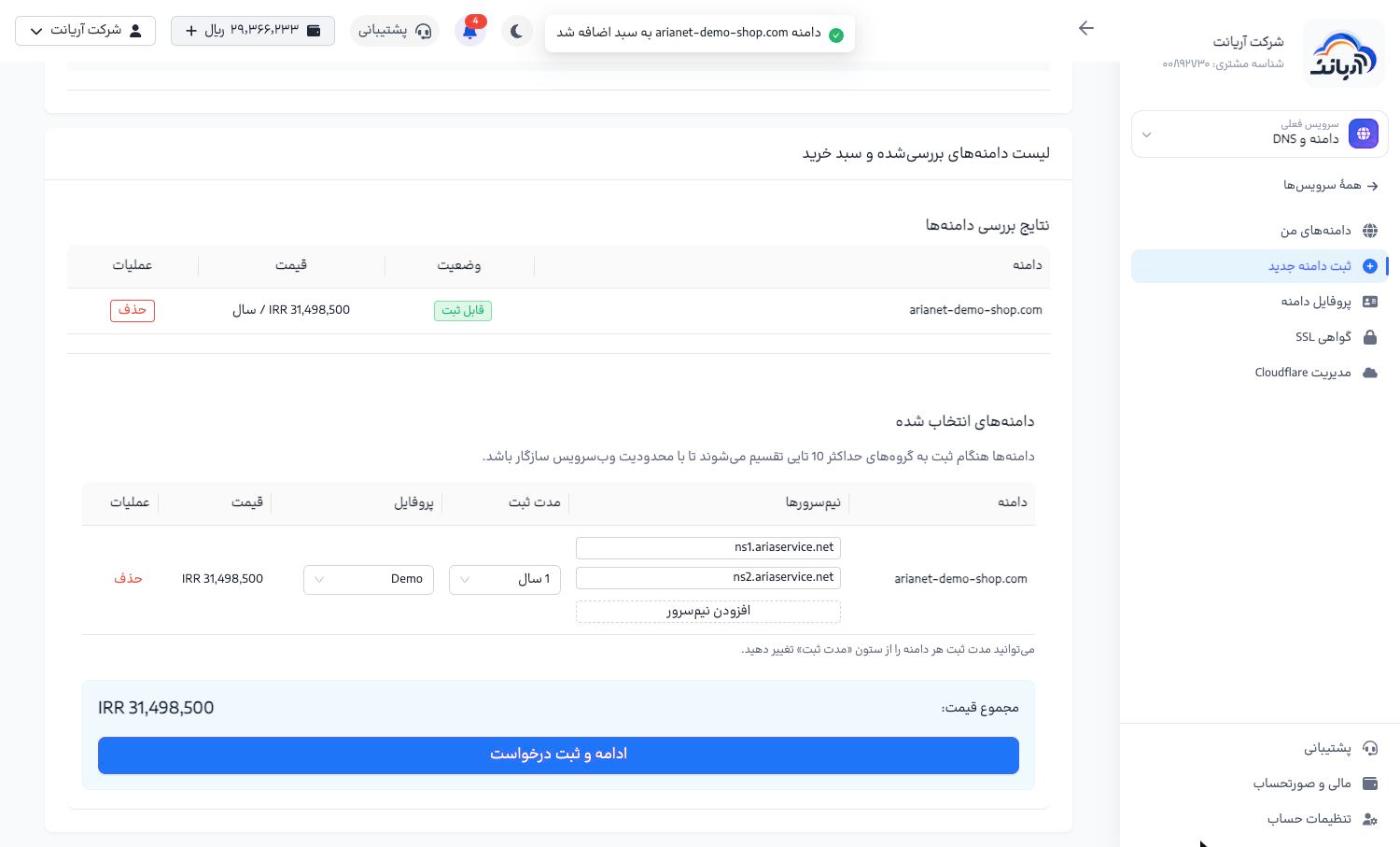
example.com) and press Enter or click Add and check («افزودن و بررسی»). You can add up to 10 domains in a row to the check queue; each domain is checked 5 seconds apart. - Domain check results («نتایج بررسی دامنهها») shows each domain's status (Available «قابل ثبت», Registered «ثبت شده» or Premium «پرمیوم») and its yearly price in Rials. Add («افزودن») the available domains.

- In Selected domains («دامنههای انتخاب شده»), set the name servers, registration period (1 to 10 years) and profile for each domain. Each domain's price and the total price at the bottom of the table are updated.
- Click Continue and submit request («ادامه و ثبت درخواست»). The amount is deducted from your wallet and the registration status is updated in Domain registration status («وضعیت ثبت دامنهها»).
- Top up your account before registering; your balance must be at least the total price.
- If the domain is for Arianet hosting, use Arianet's name servers so the domain connects to the hosting with no extra work.
- Domains are sent for registration in groups of at most 10.
Transferring a domain to Arianet
In Transfer domain («انتقال دامنه»), enter the domain name and the transfer code (EPP / Auth Code), choose a profile and click Submit transfer request («ثبت درخواست انتقال»). Get the transfer code from your current registrar and remove the domain lock there.
Managing a domain
- Domain renewal and auto-renewal
- Name servers: change the domain's DNS
- Privacy protection: hide the owner's details in WHOIS
- Security and operations: domain lock, requesting an EPP code for a transfer
- DNSSEC management
- Events: the history of actions taken on the domain
SSL certificate
- In SSL certificate («گواهی SSL»), click Request SSL («درخواست SSL») and choose a plan (to cover all subdomains, choose a plan with Wildcard support).
- Enter the domain. Validation is done through DNS.
- After you place the order, the required DNS records are shown. Add them to the domain's DNS and click Check DNS and issue certificate («بررسی DNS و صدور گواهی»).
- Once issued, download the certificate.
Cloudflare
In Cloudflare management («مدیریت Cloudflare»), connect your Cloudflare account with an API token and click Test connection («تست اتصال»). You can then add domains to Cloudflare and manage their DNS records from this panel.