Profile and security
All of these pages are in the Account settings («تنظیمات حساب») menu (at the bottom of the sidebar) and in the user menu (your name in the top corner of the panel).
Profile
Open Account settings → Profile («تنظیمات حساب ← پروفایل»). The top of the page shows an account summary: name, email, mobile, Customer ID («شناسه مشتری»), status labels (Account active «حساب فعال», Identity verified / not verified «هویت تأیید شده / نشده», Email verified «ایمیل تأیید شده») and the account balance.
The profile page has four tabs.
Details
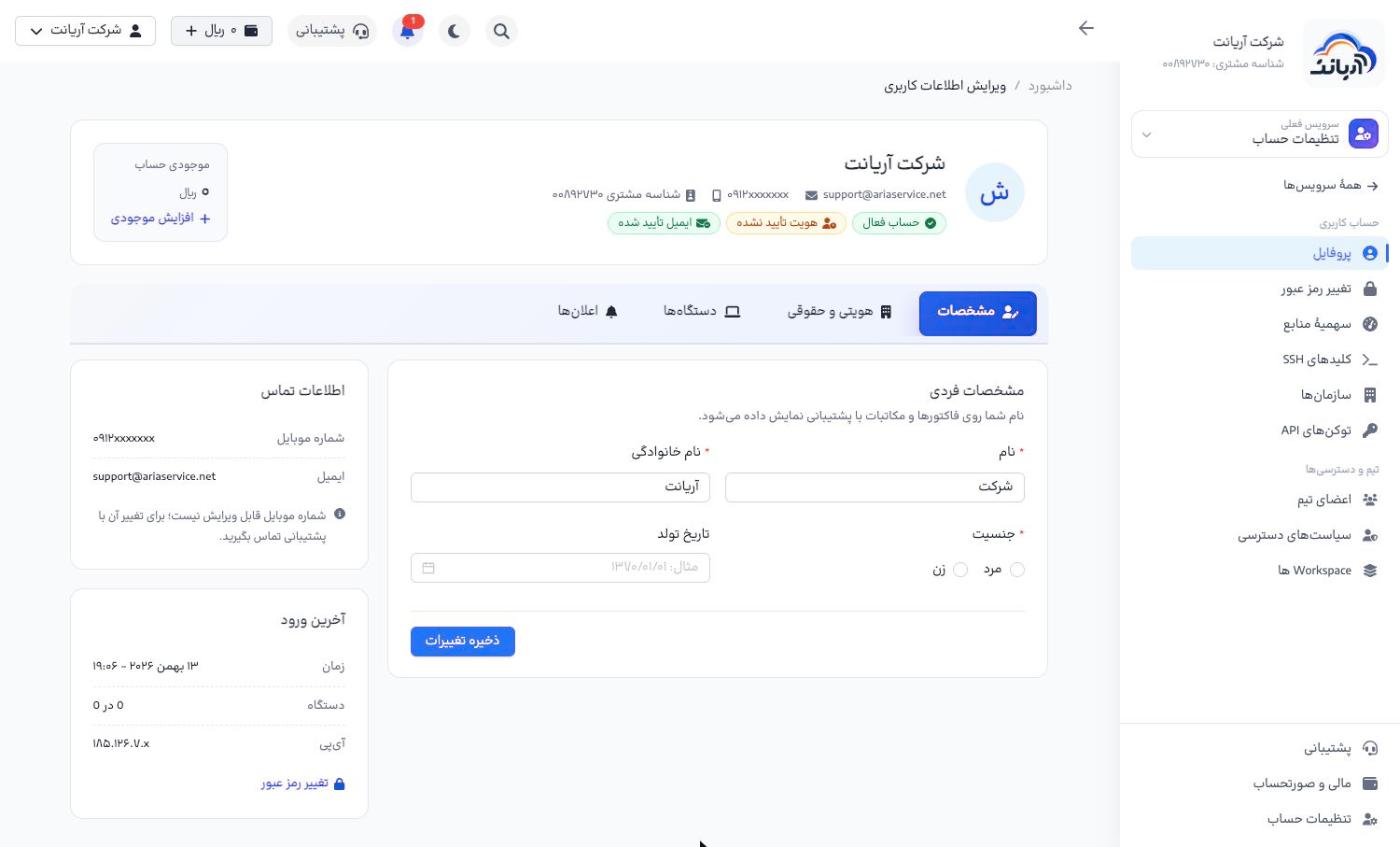
- Personal details («مشخصات فردی»): first name, last name, gender and date of birth. After making changes, click Save changes («ذخیره تغییرات»). This name appears on invoices and in support correspondence.
- Contact details («اطلاعات تماس»): mobile number and email.
- Last sign-in («آخرین ورود»): the time, device and IP of the last sign-in to the account.
The mobile number cannot be edited. To change it, open a ticket (Identity verification department, «احراز هویت»).
If Last sign-in shows a time or IP that was not you, immediately change your password and turn on two-step sign-in.
Identity and legal
The details needed to register Iran services in the Shahkar system (a regulatory requirement) and to issue invoices:
- Individual details («اطلاعات شخص حقیقی»): national ID number and mobile number. Until these are complete the section is labelled Incomplete («ناقص»).
- Legal entity (company) details («اطلاعات شخص حقوقی»): if you buy in a company's name, tick I have legal (company) details («اطلاعات حقوقی دارم») and enter the company's details.
- Address («نشانی»): province, county, street, building number, 10-digit postal code, landline and full address.
When you are done, click Save details («ذخیره اطلاعات»).
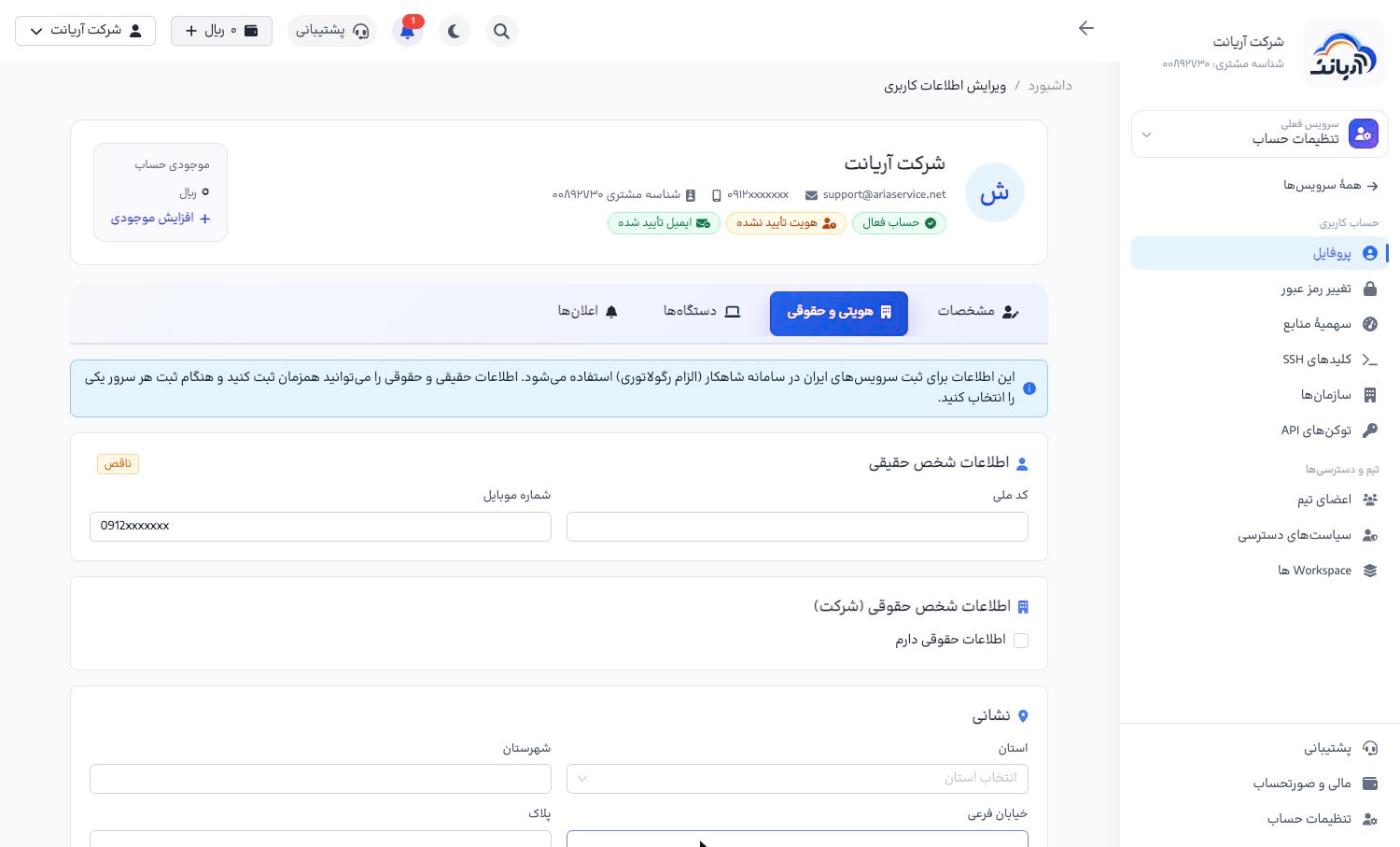
You can save both individual and legal entity details at the same time and choose one when registering each server. Account identity verification is separate; see Identity verification.
Devices
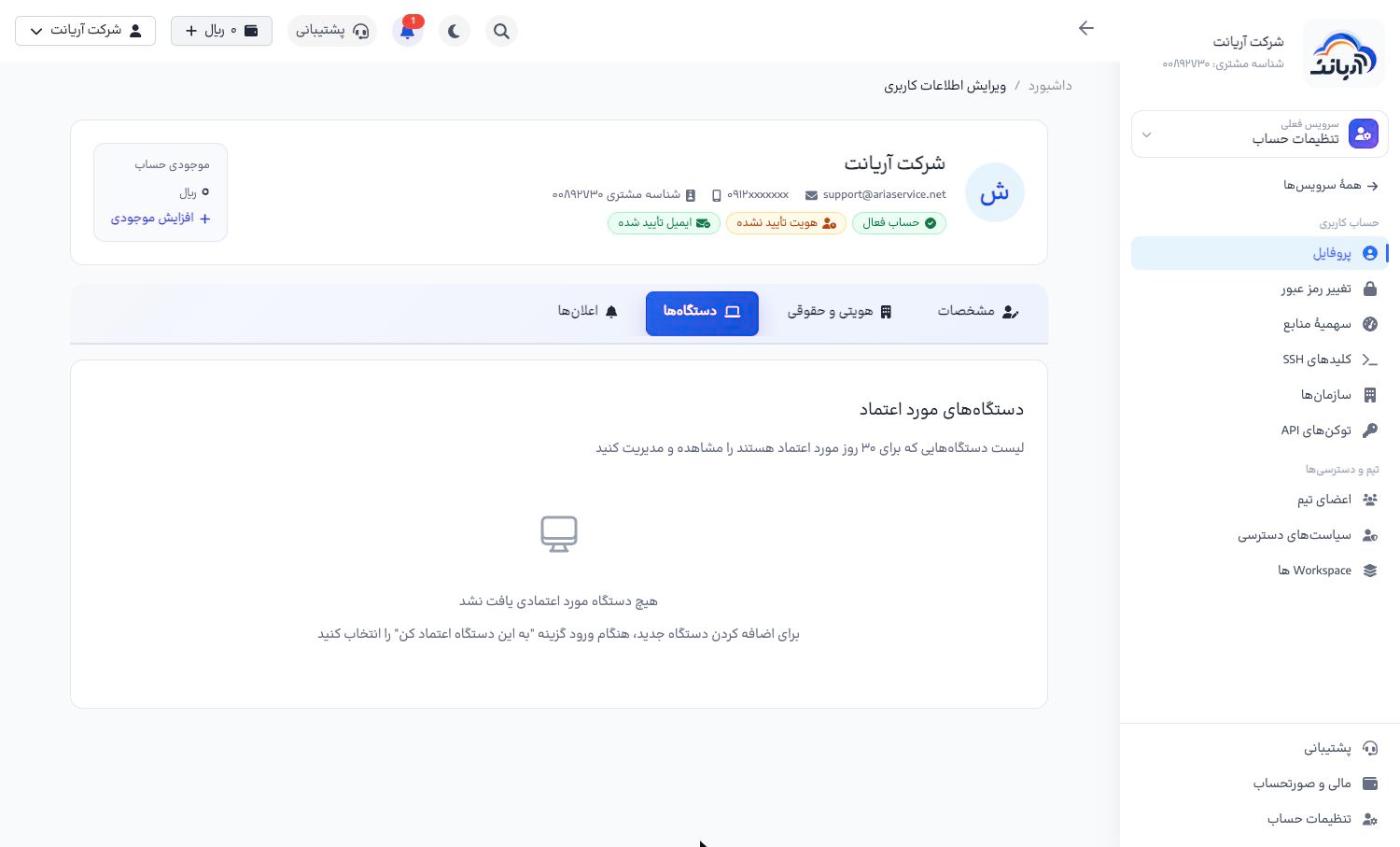
Devices on which you chose Remember this device for 30 days («این دستگاه را برای ۳۰ روز به خاطر بسپار») when signing in are listed under Trusted devices («دستگاههای مورد اعتماد»). These devices can sign in without a code for 30 days. If you do not recognize a device, or no longer use it, remove it.
Notifications
In Notification settings («تنظیمات اعلانها»), choose which channel each service event (such as connecting a domain to Cloudflare, a low balance or a server being created) is delivered on. Events are grouped by service. The icons next to each event show which channels are on; click an event to turn each channel on or off:
| Channel | Cost |
|---|---|
| SMS | the cost per message is shown next to it (for example 2,000 Rials) |
| free | |
| Telegram | free; you must connect your Telegram account first |
| Panel notification | free |
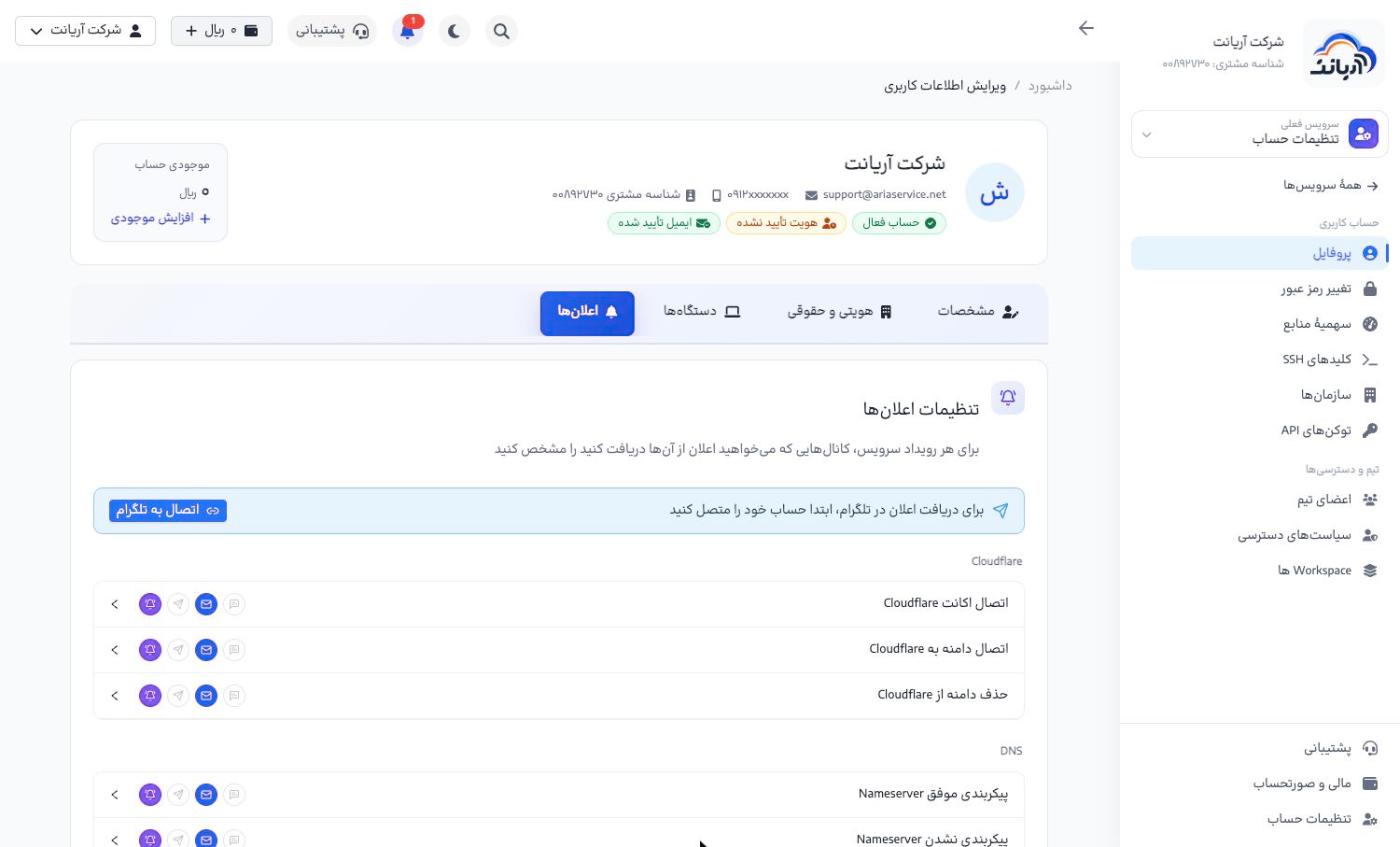
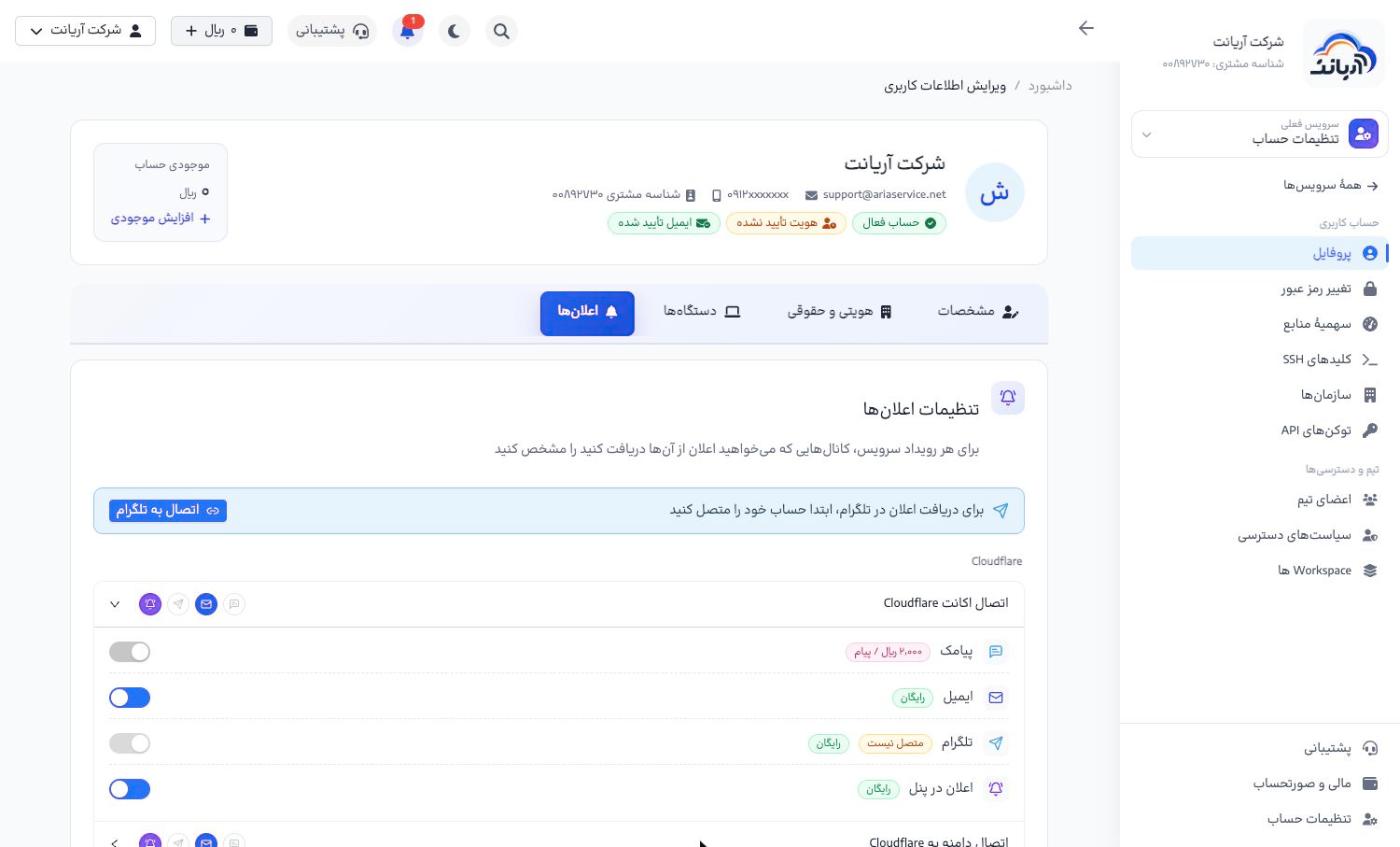
To receive notifications in Telegram, click Connect to Telegram («اتصال به تلگرام») and press Start on the bot in Telegram.
Always keep financial notifications (low balance, bill issued) on for at least one free channel such as email or Telegram, so that your services are not suspended because your balance ran out.
Change password
Open Account settings → Change password («تنظیمات حساب ← تغییر رمز عبور»), enter your current password and the new password twice, then click Change password («تغییر رمز عبور»). The new password must have:
- at least 8 characters
- at least one uppercase and one lowercase English letter
- at least one digit
- at least one special character (such as
!@#$)
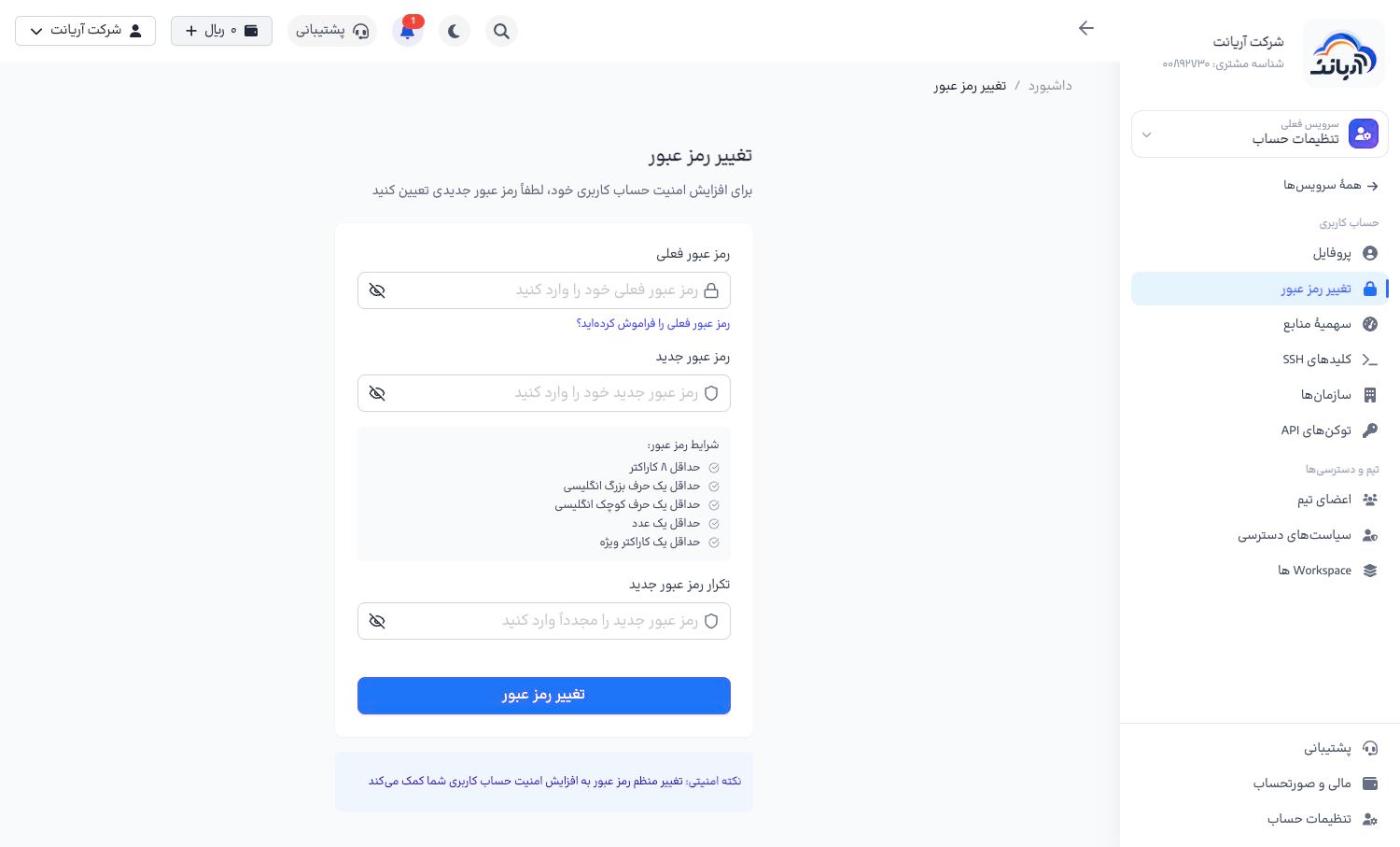
If you have forgotten your current password, click Forgot your current password? («رمز عبور فعلی را فراموش کردهاید؟»); you set a new password with an SMS code.
Sign-in security
Open Sign-in security («امنیت ورود») from the user menu. The Sign-in methods («روشهای ورود») page manages two ways to sign in without SMS. If SMS does not reach you for any reason (such as a disruption of international internet), you can still sign in to the panel with these methods. We recommend enabling at least one of them.
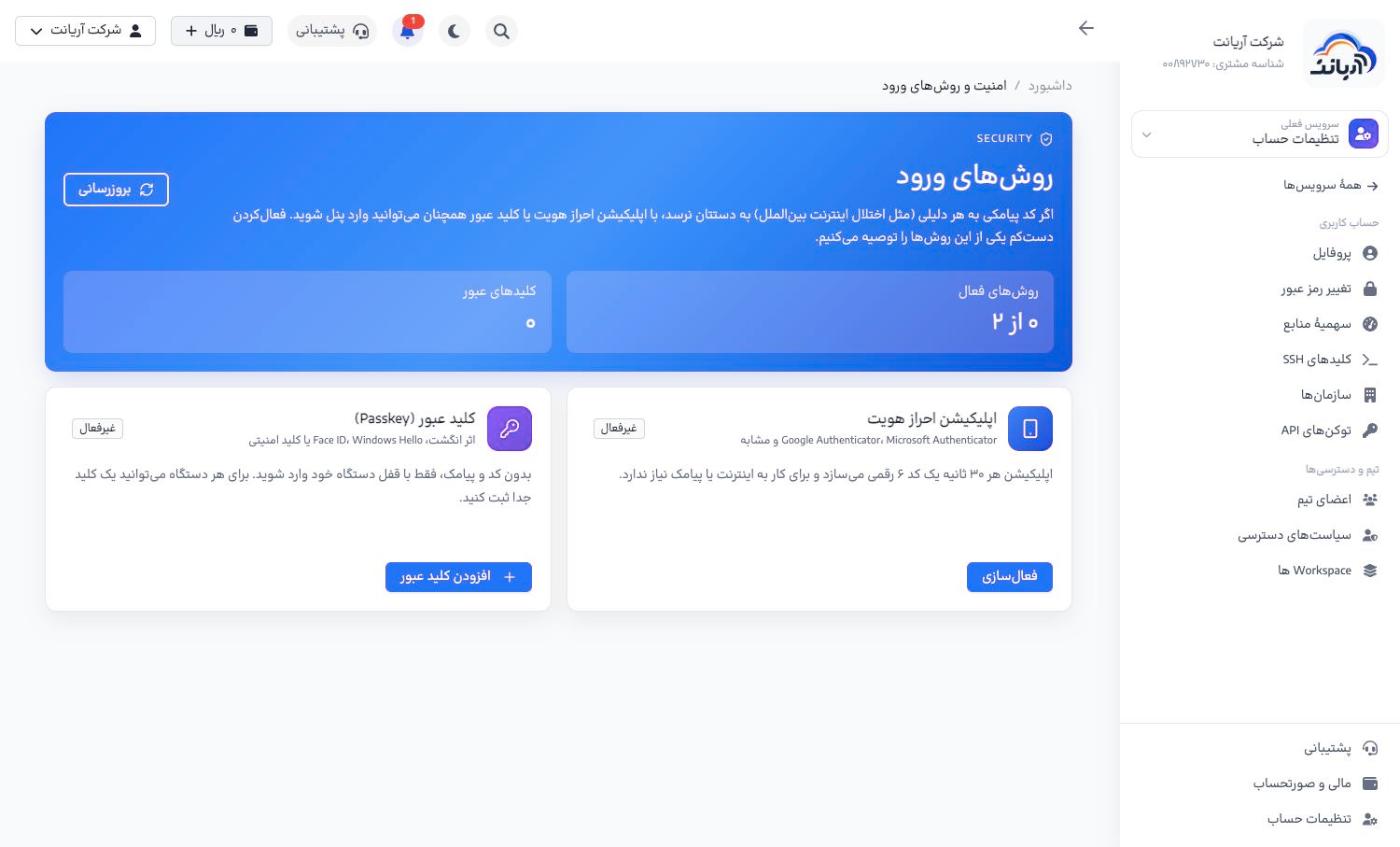
Authenticator app
An authenticator app (such as Google Authenticator or Microsoft Authenticator) generates a 6-digit code every 30 seconds and needs neither internet nor SMS to work.
- On the Authenticator app («اپلیکیشن احراز هویت») card, click Enable («فعالسازی»).
- Install the app on your phone and scan the QR code with it (or enter the displayed key manually).
- Enter the 6-digit code shown in the app and click Confirm and enable («تایید و فعالسازی»).
- Store the recovery codes that are shown in a safe place.
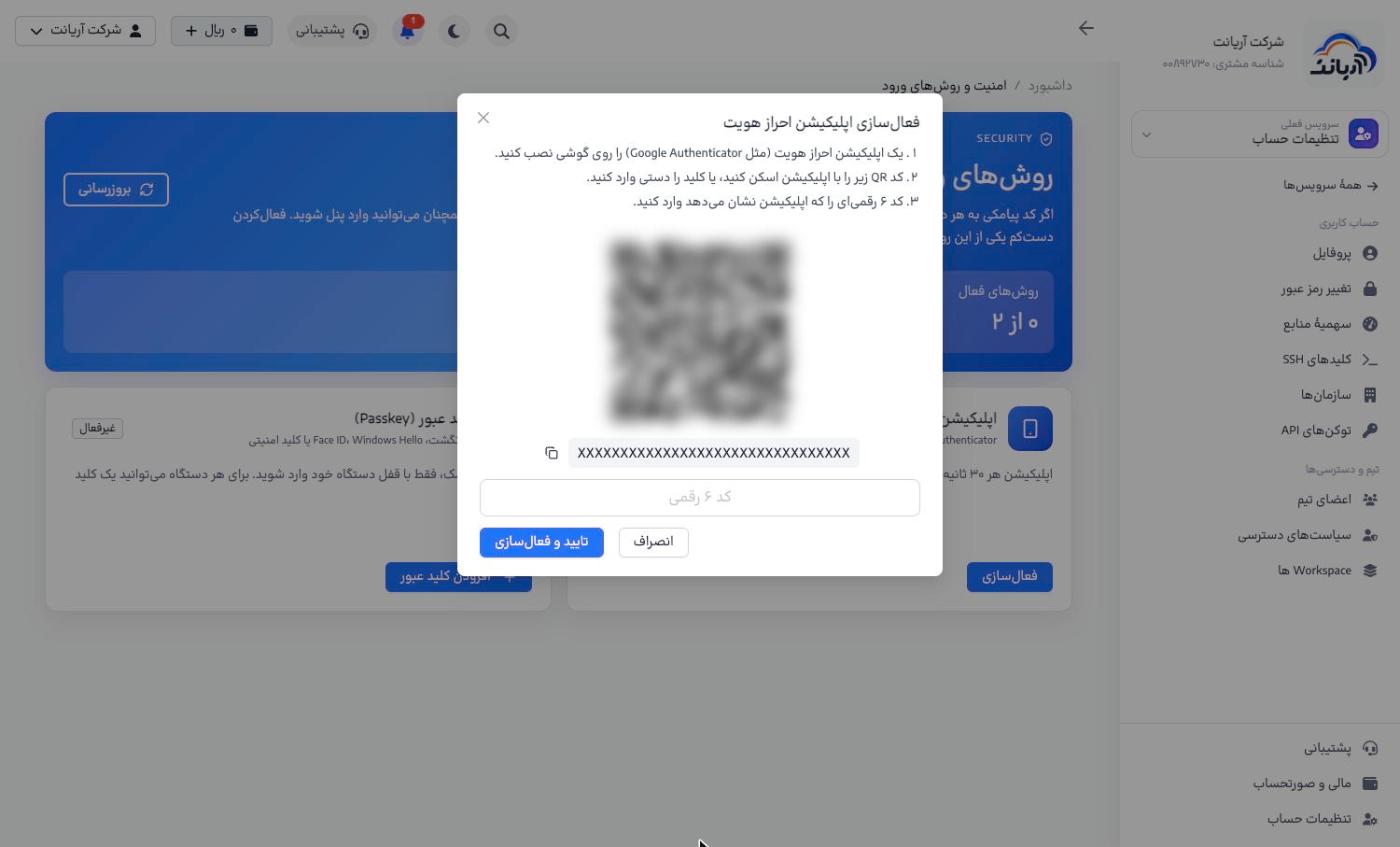
Never share the QR code or key with anyone. If you lose your phone, you can only sign in with the recovery codes; keep them separate from your phone.
Passkey
With a passkey you sign in without any code or SMS, using only your device lock (fingerprint, Face ID, Windows Hello or a security key).
- On the Passkey («کلید عبور (Passkey)») card, click Add passkey («افزودن کلید عبور»).
- Confirm the browser or operating system prompt with your fingerprint or device lock.
- Register a separate passkey for each device (laptop, phone). You can rename or delete each passkey.