SSH keys and API tokens
SSH keys
With an SSH key you sign in to servers without a password, more securely. A key you save here can be selected with one click whenever you create a VPS or cloud server.
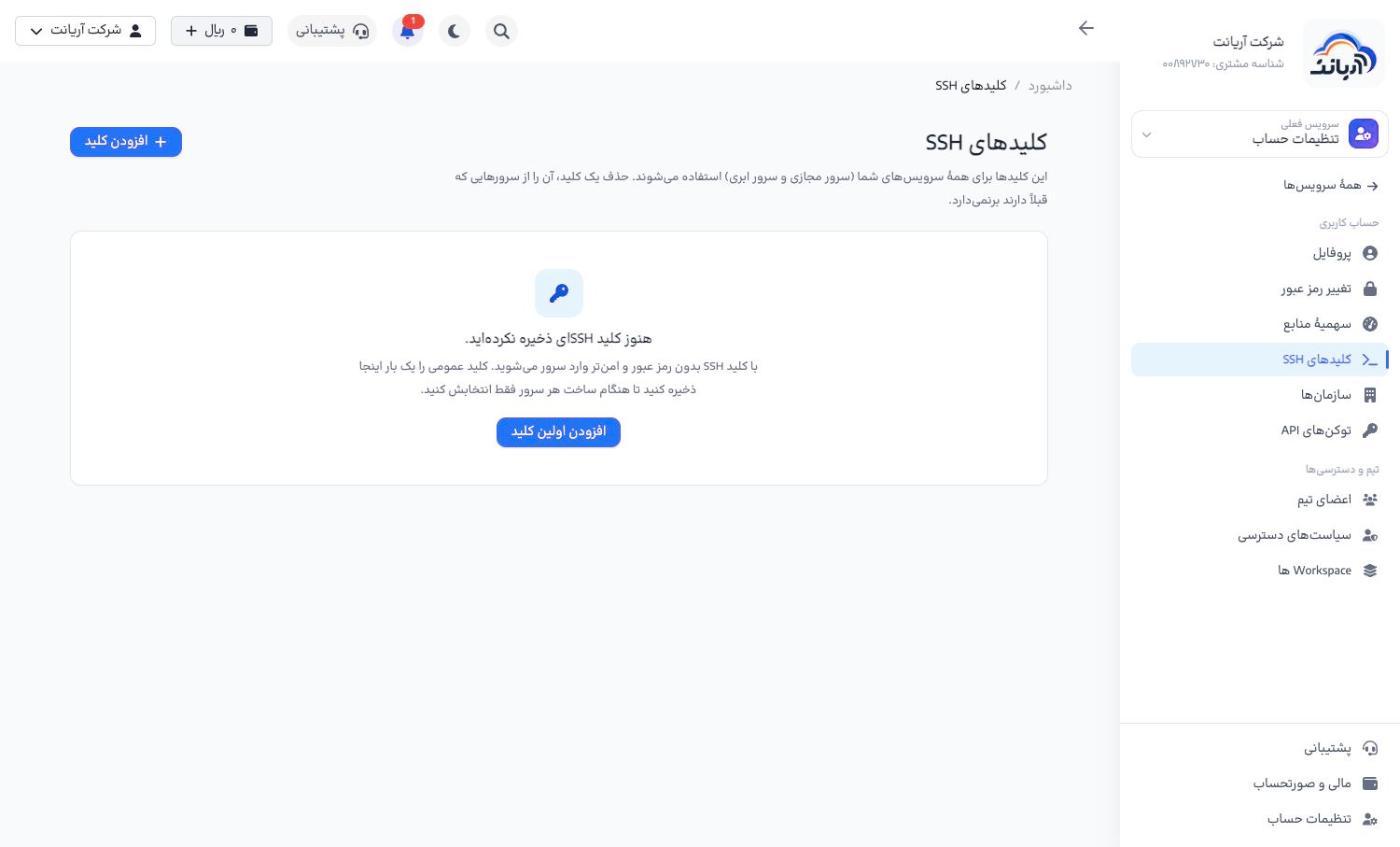
Creating a key on your computer
If you don't have a key, create one in a terminal (macOS, Linux or Windows PowerShell) and display the public key:
ssh-keygen -t ed25519
cat ~/.ssh/id_ed25519.pub
Adding the key to the panel
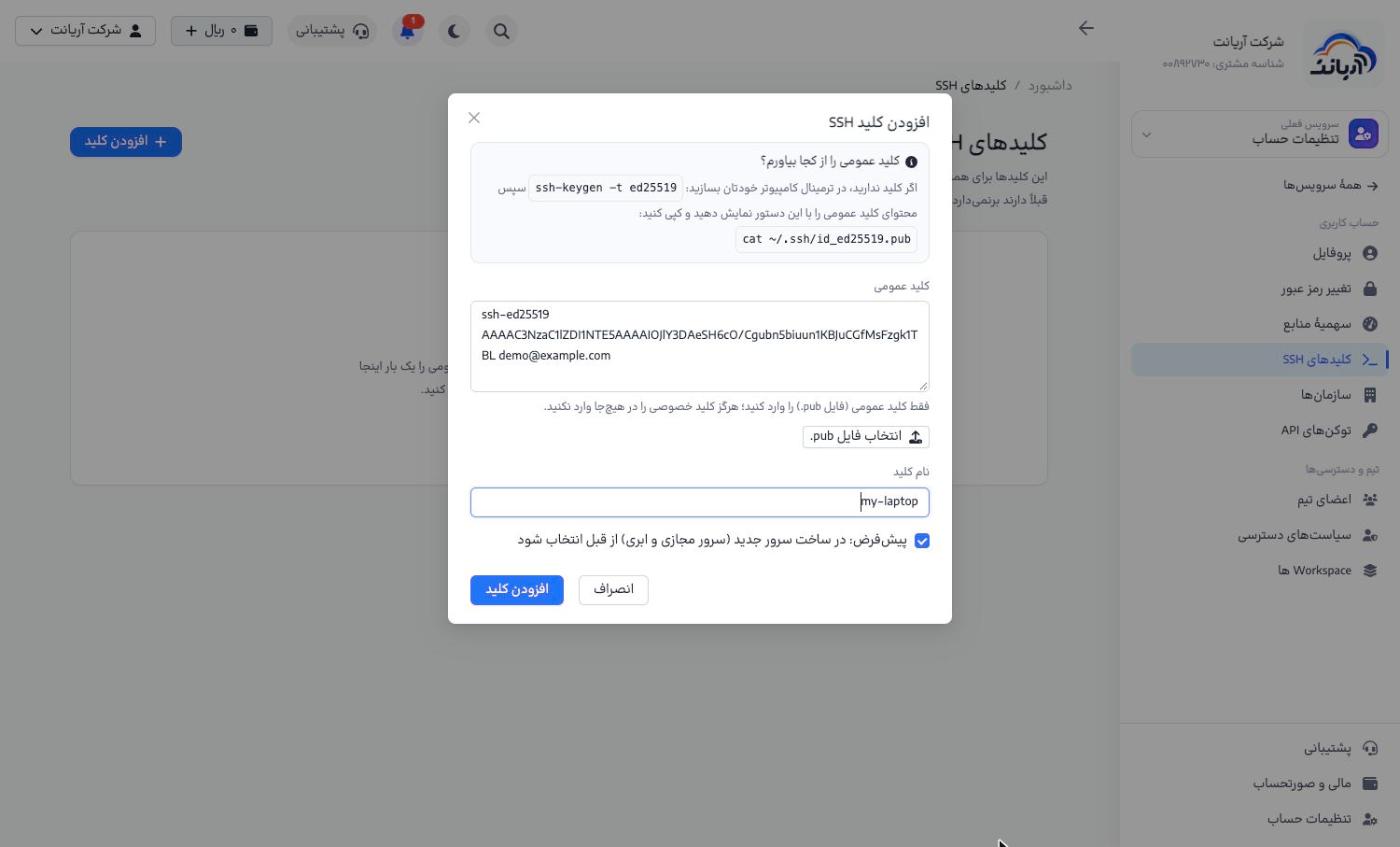
- Open Account settings → SSH keys («تنظیمات حساب ← کلیدهای SSH») and click Add key («افزودن کلید»).
- Paste the output of the
catcommand (the text starting withssh-ed25519) into Public key («کلید عمومی»), or upload the public key file with Choose .pub file («انتخاب فایل pub.»). - In Key name («نام کلید»), enter a recognizable name (for example
my-laptop). - If Default («پیشفرض») is ticked, this key is preselected when you create new servers.
- Click Add key («افزودن کلید»).
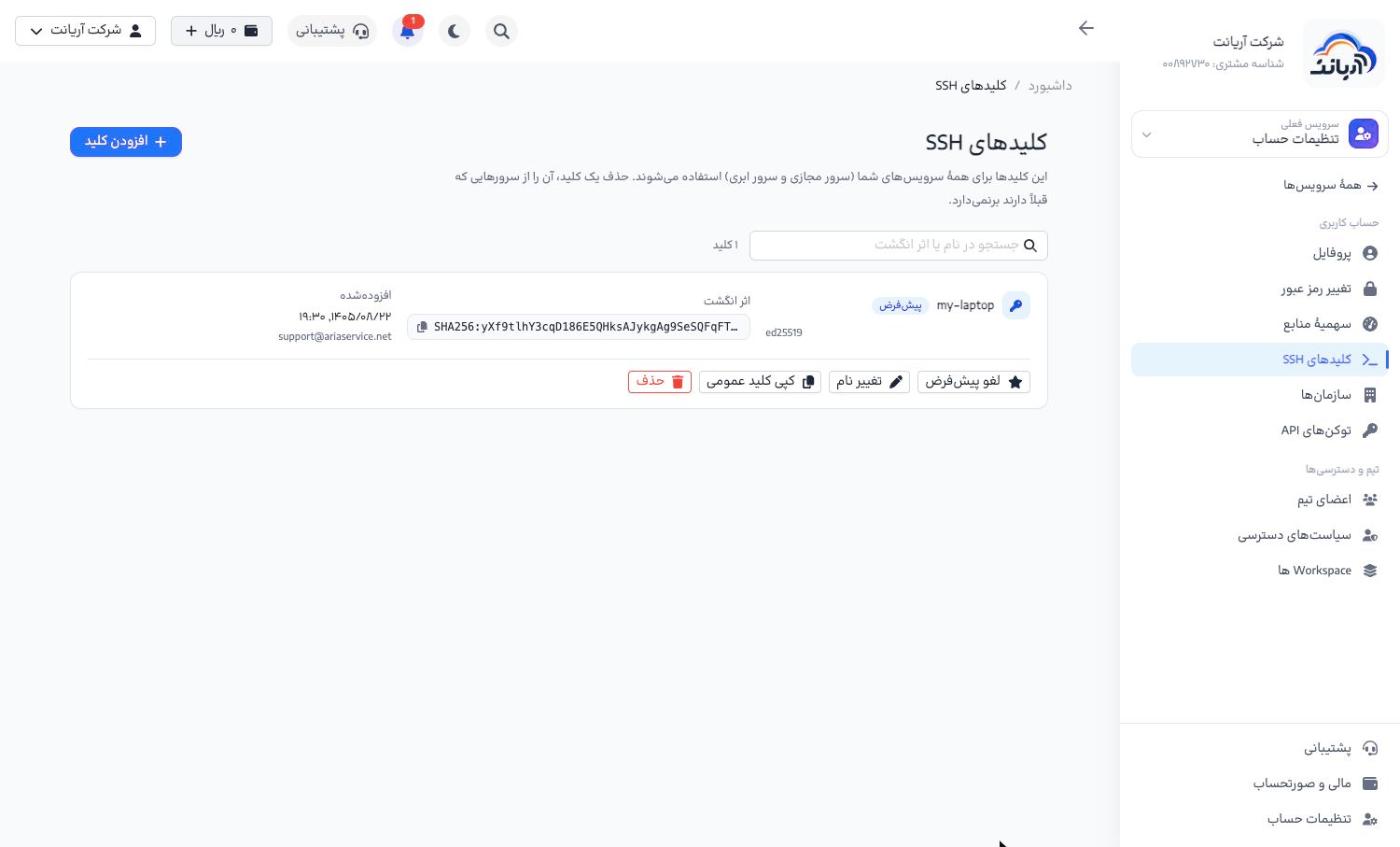
The key is listed with its name, type, fingerprint and the time it was added. Each key has these buttons: Remove default («لغو پیشفرض») or Make default («پیشفرض کردن»), Rename («تغییر نام»), Copy public key («کپی کلید عمومی») and Delete («حذف»).
Only enter the public key (the .pub file). Never enter your private key (the file without the .pub extension) on any site, and never give it to anyone.
Deleting a key from the panel does not remove it from servers that were already created with it. To revoke access, also remove the key from the ~/.ssh/authorized_keys file on the server itself.
API tokens
An API token is needed for the CLI, Terraform, scripts and the API. Open the page from Account settings → API tokens («تنظیمات حساب ← توکنهای API», or from the user menu). Total tokens («کل توکنها») and Active tokens («توکنهای فعال») are counted at the top of the page, and the CLI guide («راهنمای CLI») and API documentation («مستندات API») links are here too.
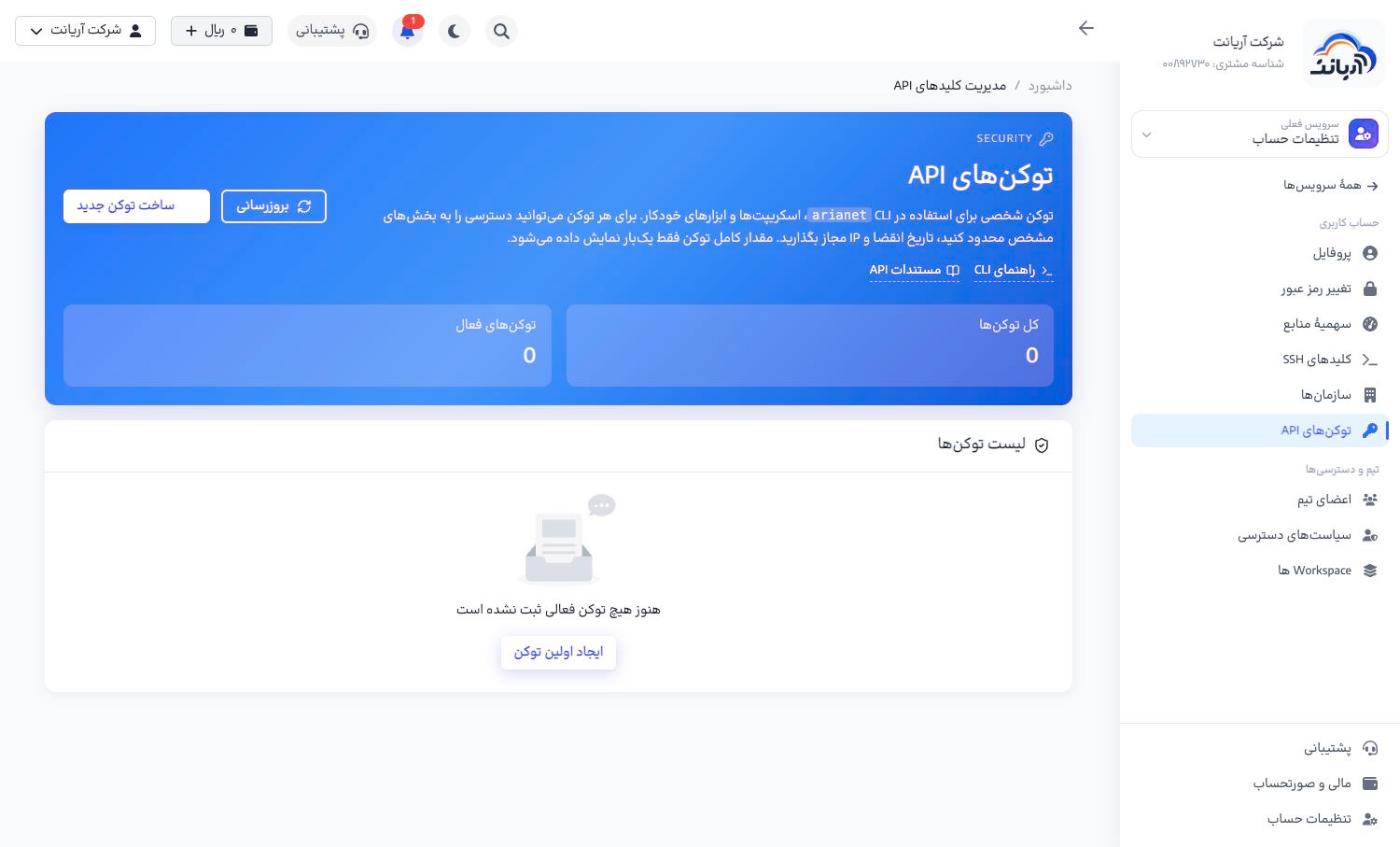
Creating a token
- Click Create new token («ساخت توکن جدید»).
- In Token name («نام توکن»), describe what it is for (for example "My laptop" or "Web server CI").
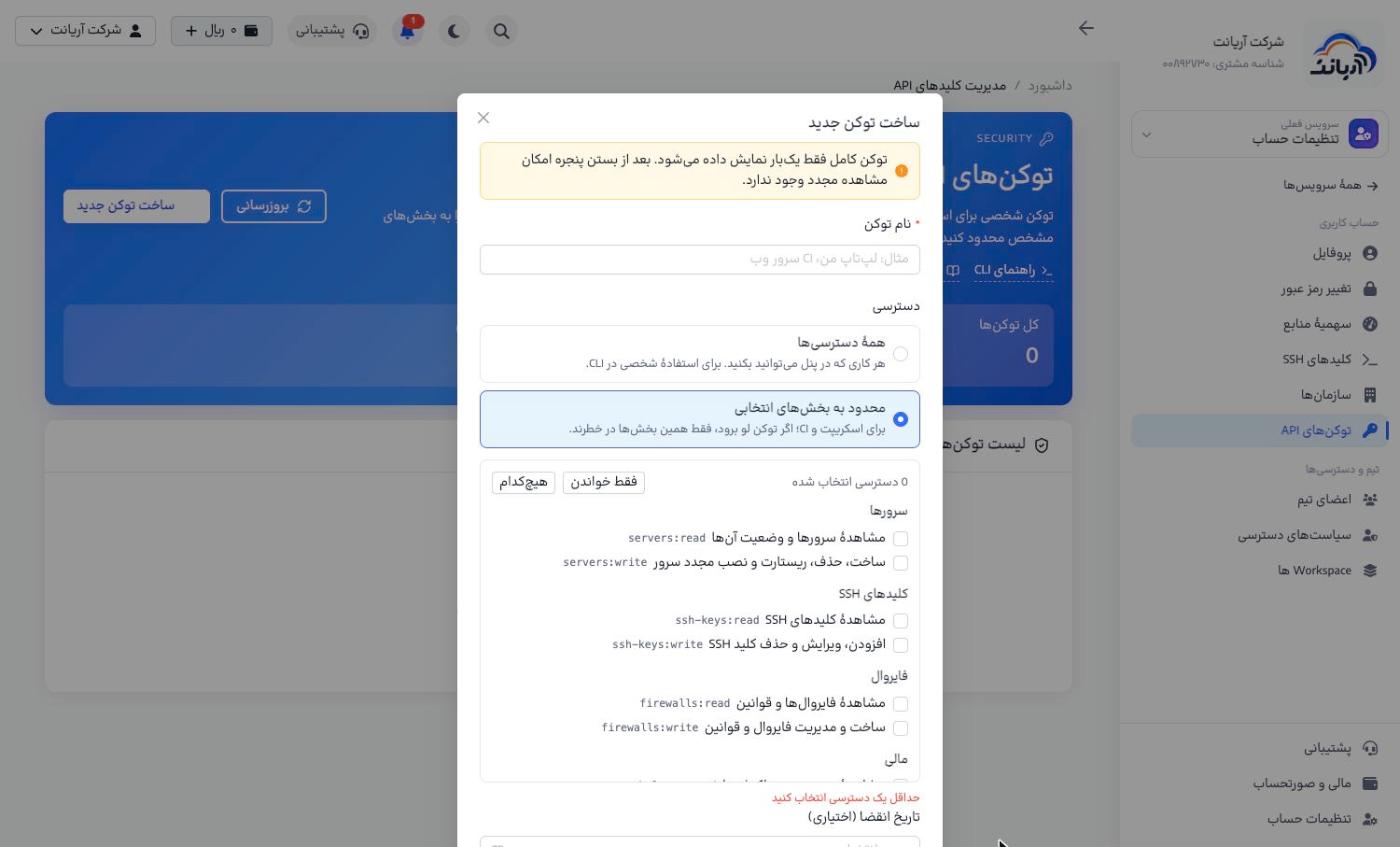
- Choose the Access («دسترسی»):
- All permissions («همهٔ دسترسیها»): anything you can do in the panel. Only for personal use in the CLI.
- Limited to selected sections («محدود به بخشهای انتخابی»): for scripts and CI. Tick only the permissions you need, for example
servers:read(view servers) orservers:write(create, delete, restart and reinstall servers). The Read only («فقط خواندن») button selects all view permissions at once.
- Set the Expiry date (optional) («تاریخ انقضا (اختیاری)»).
- In Allowed IPs (optional) («IP های مجاز (اختیاری)»), you can enter one IP (IPv4 or IPv6, not a range). Requests from any other IP are rejected with the
IP_NOT_ALLOWEDerror. - Click Create token («ساخت توکن»).
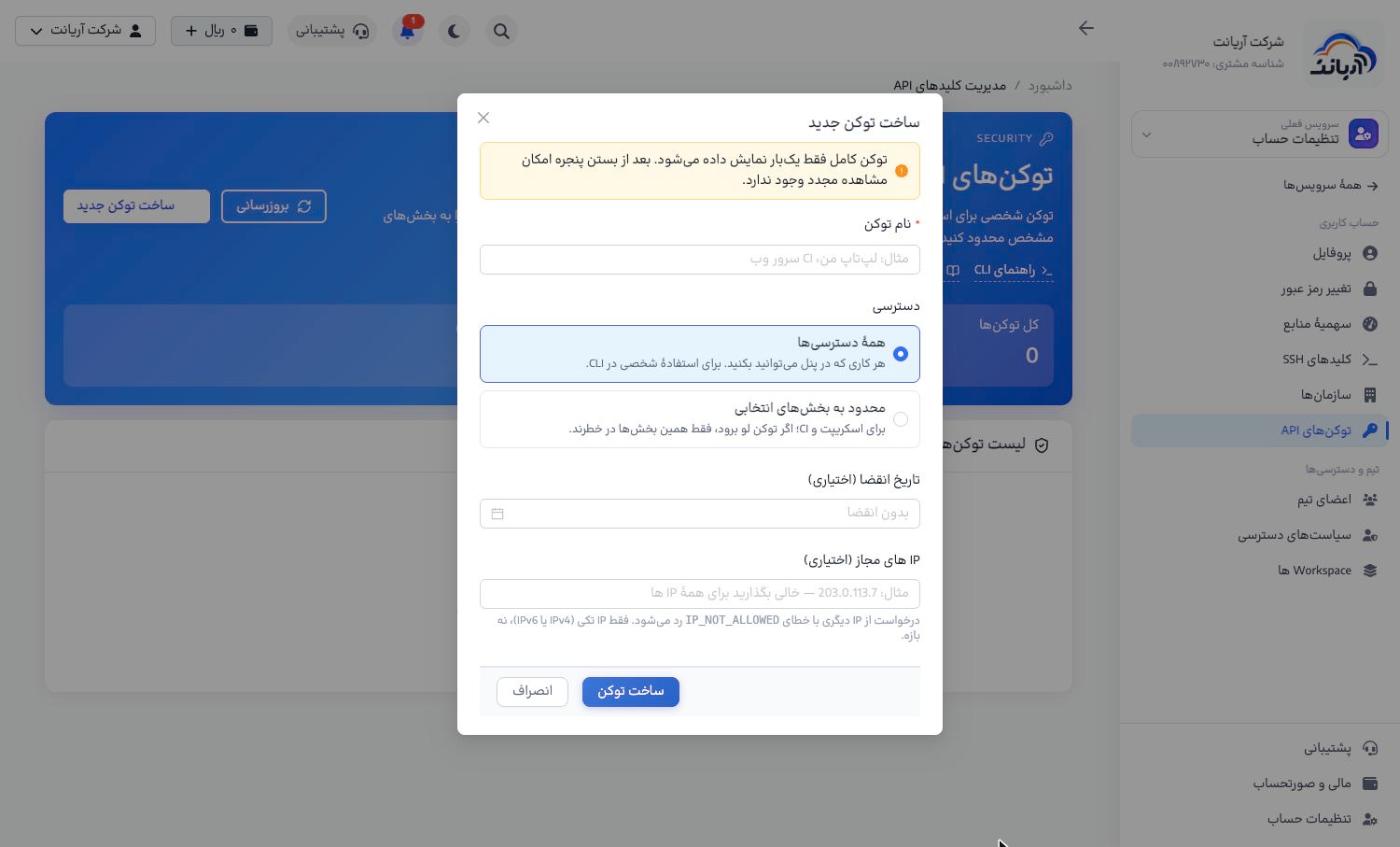
The full token is shown only once; after you close the window it cannot be viewed again. Copy it right away and store it somewhere safe (such as a password manager or a CI repository secret).
- Create a separate token for each use, so that if one leaks you only delete that one.
- Give script and CI tokens the minimum permissions needed, an expiry date and an allowed IP; if a limited token leaks, only those sections are at risk.
- Delete any token that has leaked or is no longer used immediately.