Virtual private server (VPS)
Arianet VPS is billed hourly: each hour's cost is deducted from your wallet balance, and whenever you delete the server, the charges stop too.
- To buy, your wallet balance must cover at least a few hours of server time. Top up your account
- If your balance runs out, the server is suspended. Keep balance notifications turned on in your profile.
- For more secure login, add an SSH key to the panel before you buy.
Buying a VPS
In the VPS («سرور مجازی / VPS») menu, click New service («سرویس جدید») (or New service on the dashboard). All steps are on one page, and the Order summary («خلاصه سفارش») box at the side of the page always shows your choices, the hourly cost and the approximate monthly cost.
1. Region and data center
In Choose region («انتخاب منطقه»), choose a country or continent (Iran, Europe, Turkey, America, Australia). Then pick a data center from the list in Available data centers («دیتاسنترهای موجود»). The data center's technical specifications («مشخصات فنی دیتاسنتر») are shown below the list.
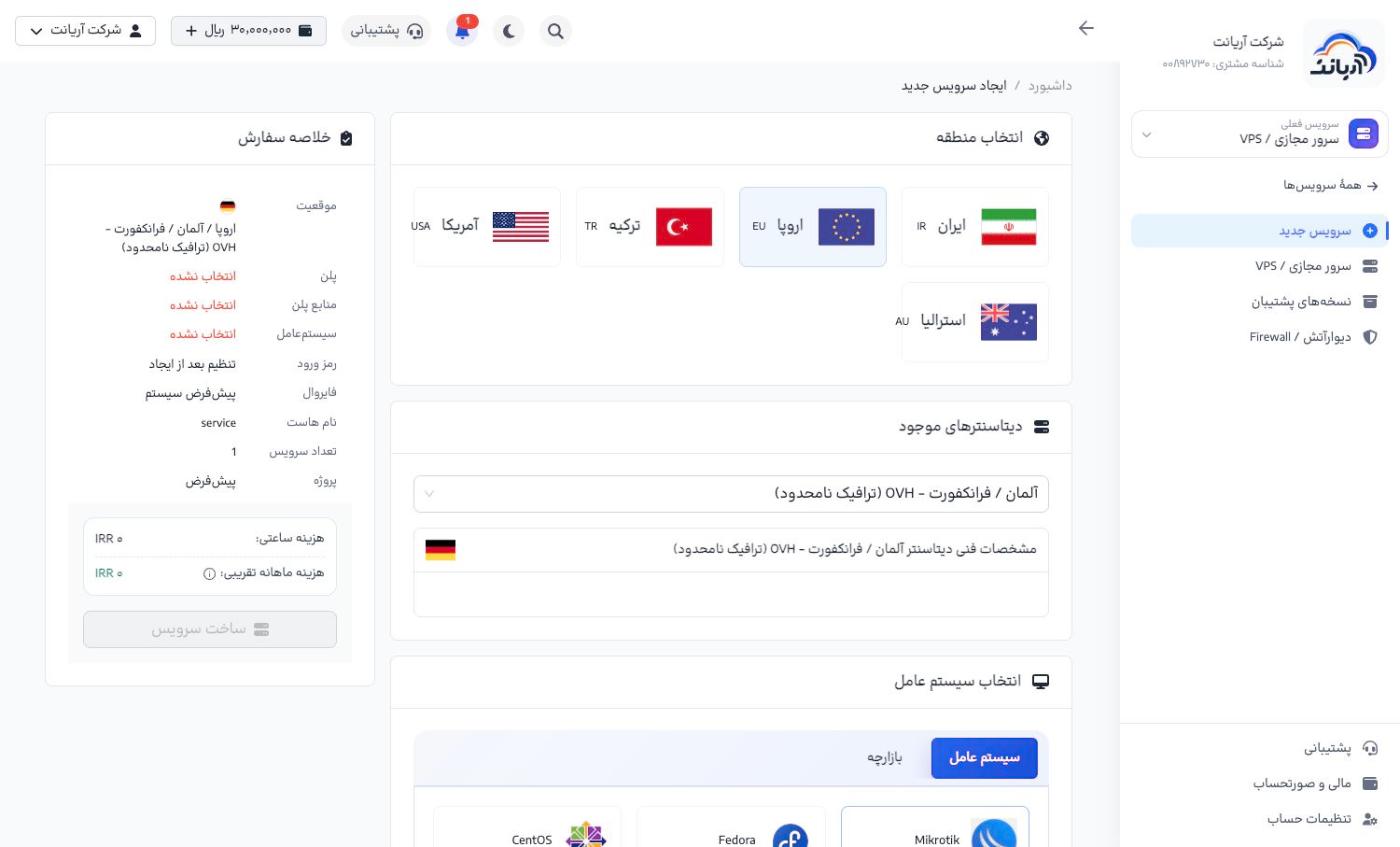
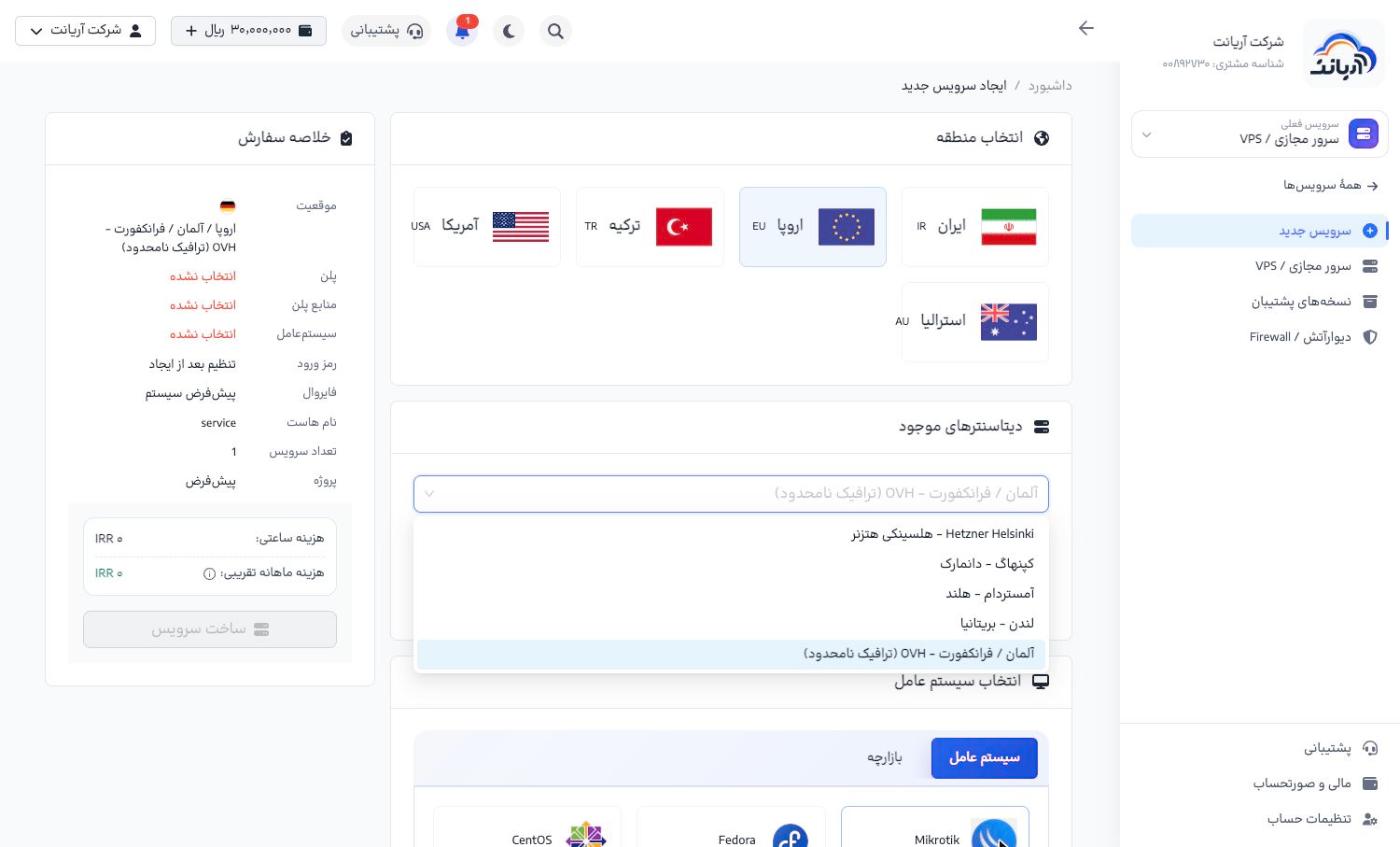
Data centers differ in their features; for example IP change, backups or unlimited traffic are available only in some data centers. If you need a particular feature, read the data center's specifications before you buy.
2. Operating system
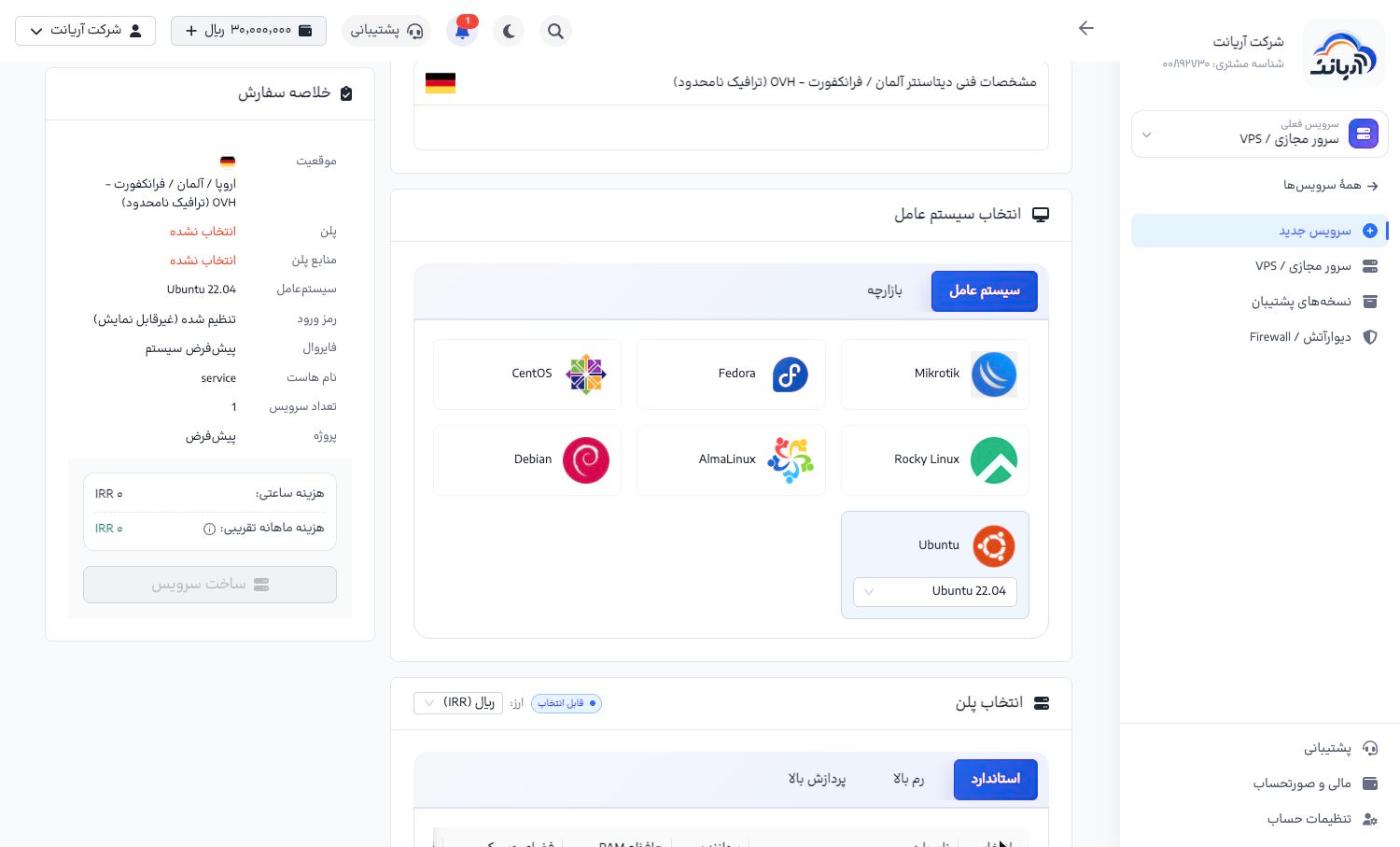
In Choose operating system («انتخاب سیستم عامل»), click an operating system (Ubuntu, Debian, AlmaLinux, Rocky Linux, CentOS, Fedora, Mikrotik and others) and choose the version from the list below it. The Marketplace («بازارچه») tab shows ready-made applications.
3. Plan
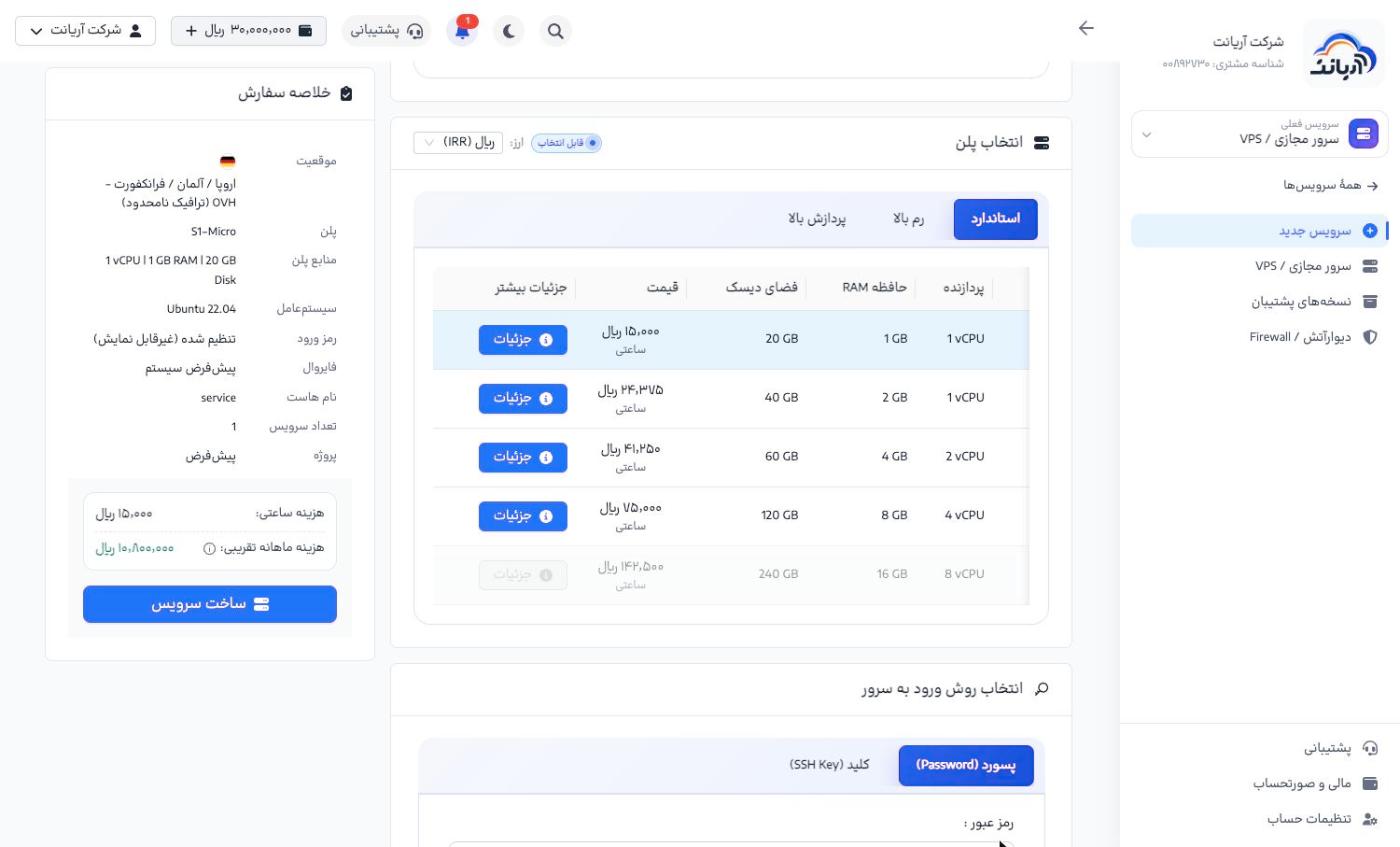
In Choose plan («انتخاب پلن»), open one of the groups Standard («استاندارد»), High memory («رم بالا») or High compute («پردازش بالا»). Each plan has its CPU, RAM, disk space and hourly price; click Details («جزئیات») to see its full specifications. The Recommended («پیشنهادی») label marks the most popular plan, and an Unavailable («ناموجود») plan cannot be bought right now. You can change the price currency with Currency («ارز») above the table.
4. Server login method
In Choose server login method («انتخاب روش ورود به سرور»), choose one:
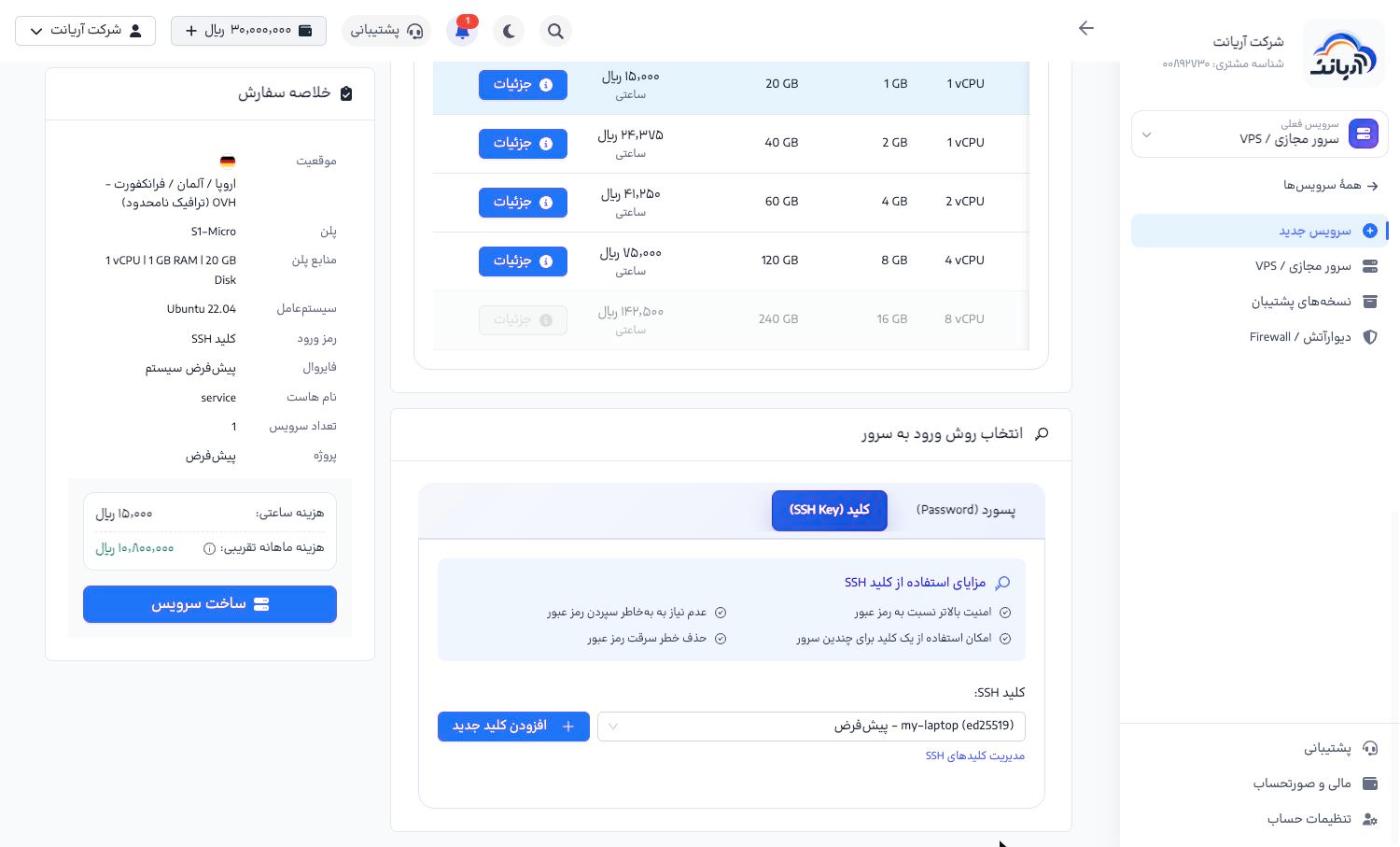
- SSH key («کلید (SSH Key)», recommended): choose one of your saved keys or add one right here with Add new key («افزودن کلید جدید»). It is more secure and needs no password.
- Password («پسورد (Password)»): enter a password yourself or generate a random one.
5. Create the service
Check the order summary and click Create service («ساخت سرویس»). The Data center terms and rules («شرایط و قوانین دیتاسنتر») window opens; read it, tick I have read and accept this data center's rules («قوانین این دیتاسنتر را خواندم و میپذیرم») and click Confirm and continue («تایید و ادامه»).
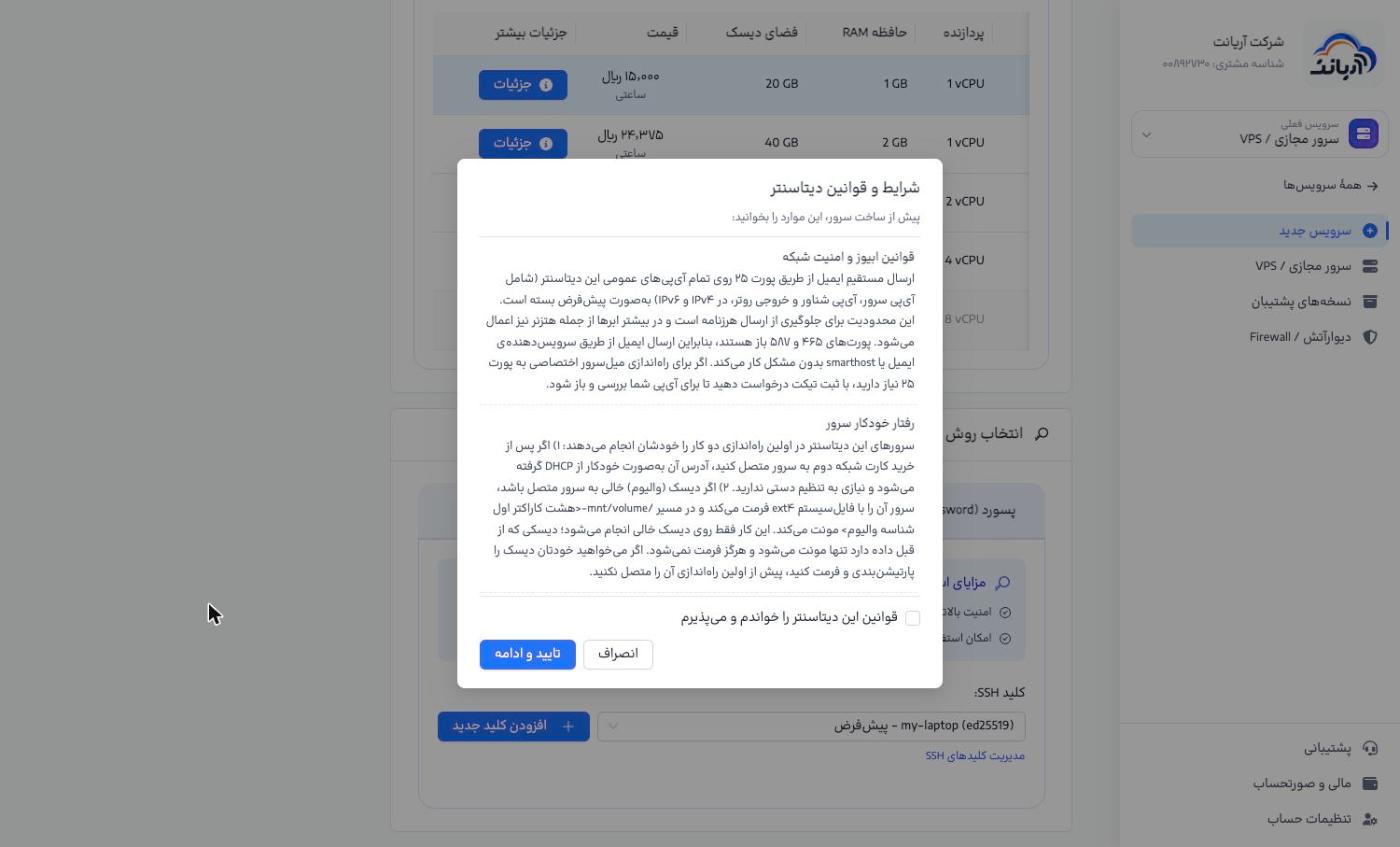
- Port 25 (sending email directly) is closed by default to prevent spam. Ports 465 and 587 are open. If you need port 25 for a mail server, open a ticket.
- If you attach a second network card to the server, its address is obtained automatically by DHCP.
- An empty disk (volume) attached to the server is automatically formatted with ext4 and mounted at
/mnt/volume-…. A disk that has data on it is never formatted. If you want to partition the disk yourself, do not attach it before the first boot.
6. The server is created
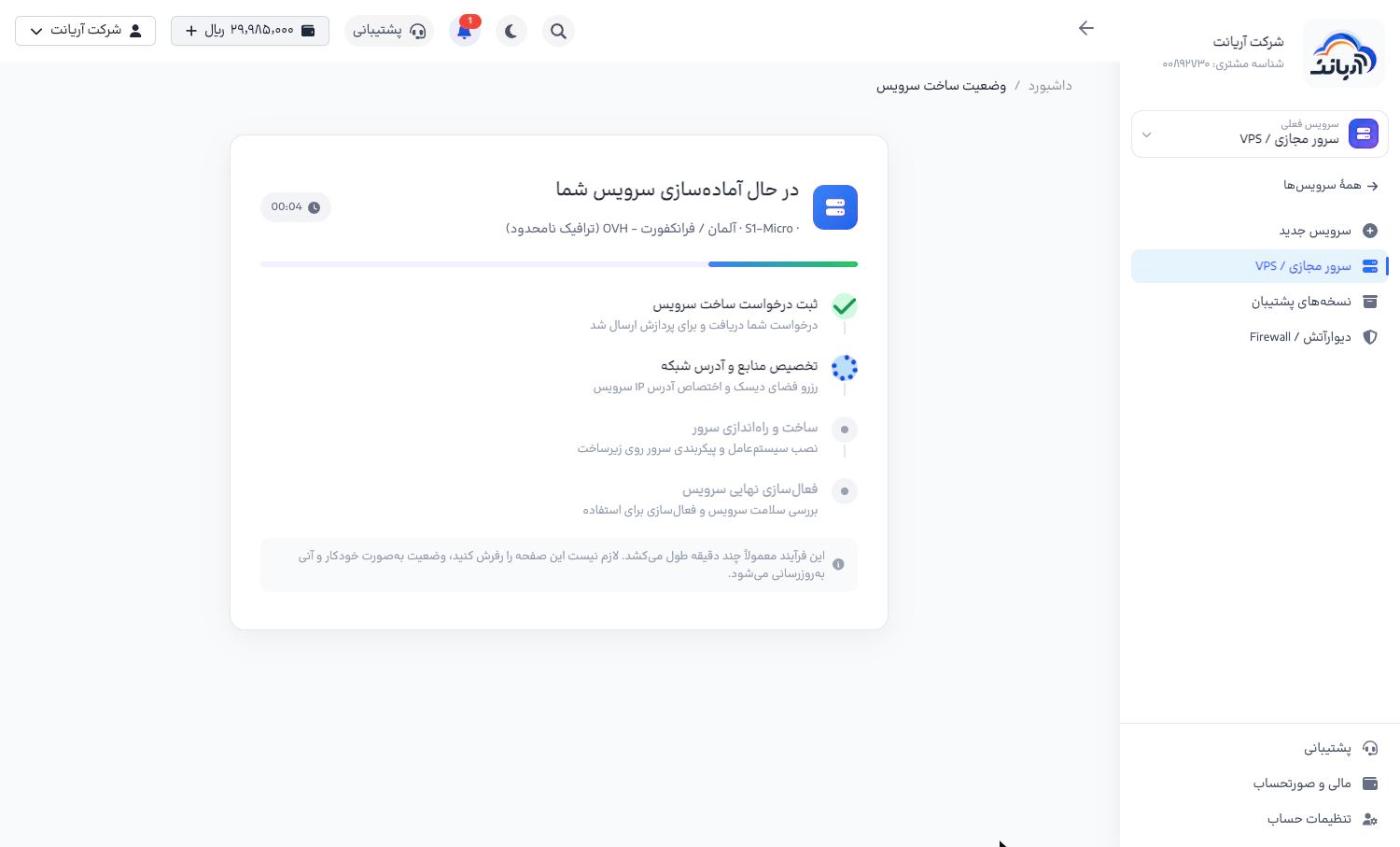
The Preparing your service («در حال آمادهسازی سرویس شما») page shows the steps live: request submitted, allocating resources and network address, creating and booting the server, and final activation. This usually takes a minute or two, and you do not need to refresh the page.
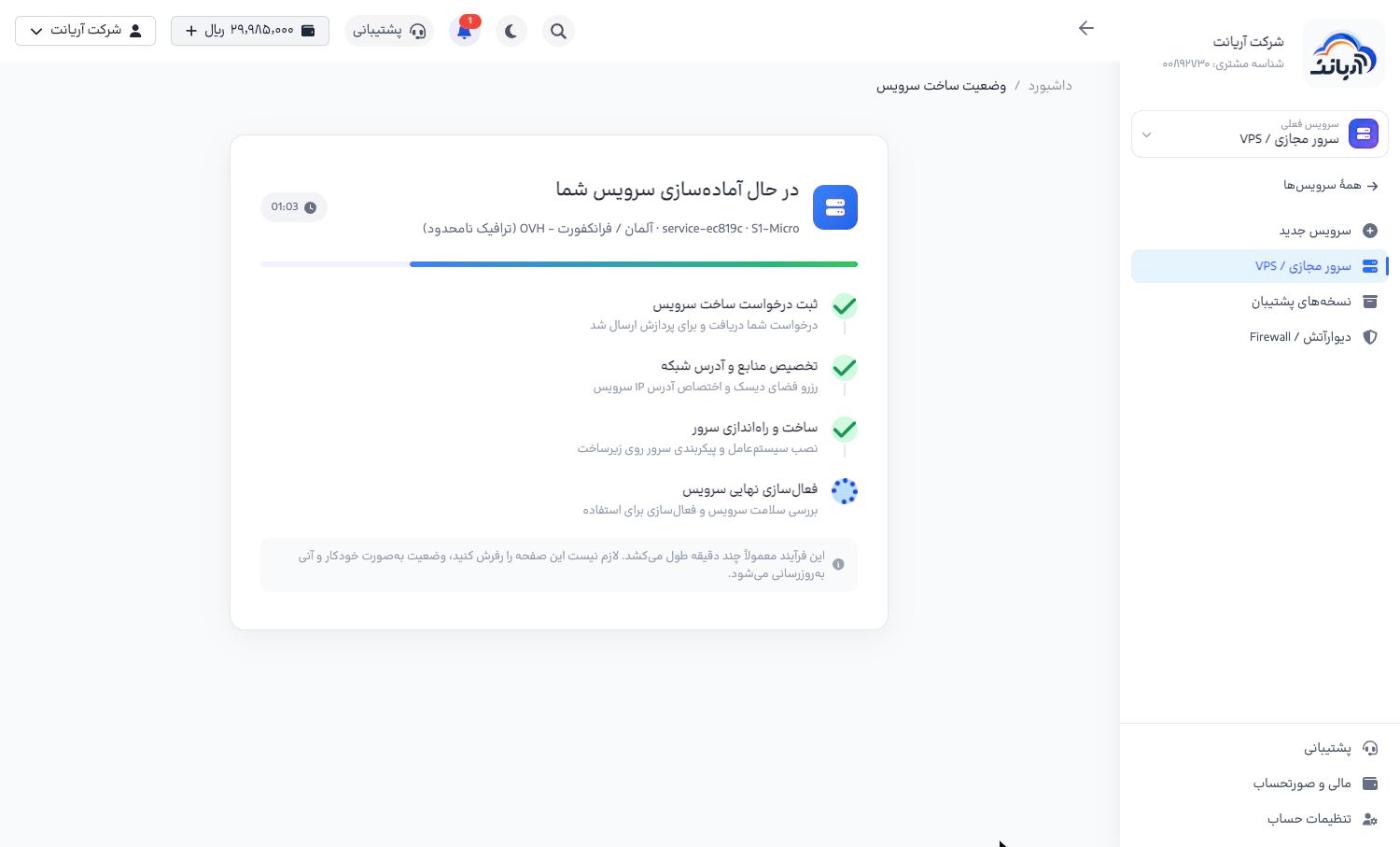
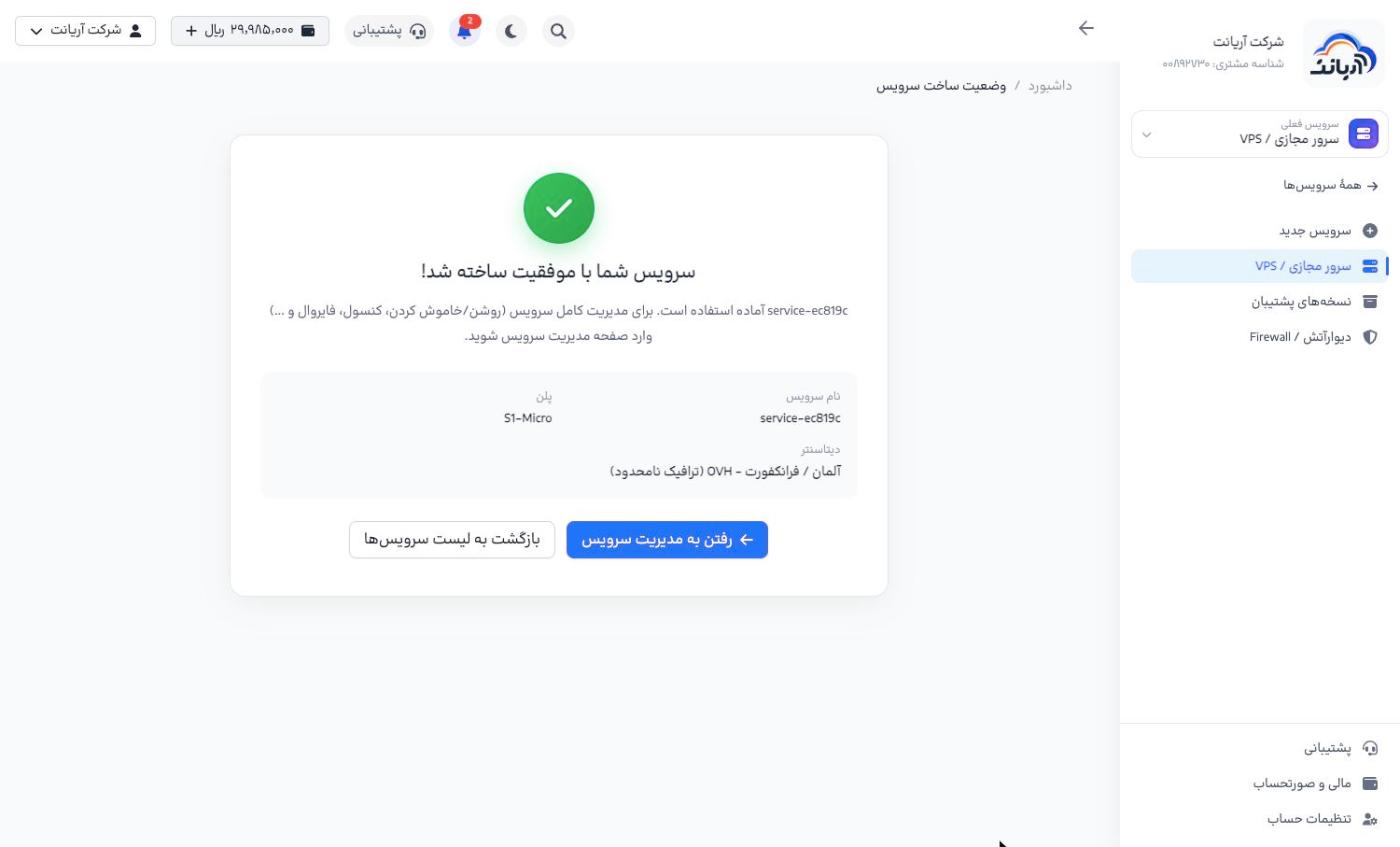
When the message Your service was created successfully! («سرویس شما با موفقیت ساخته شد!») appears, click Go to service management («رفتن به مدیریت سرویس»).
Managing the server
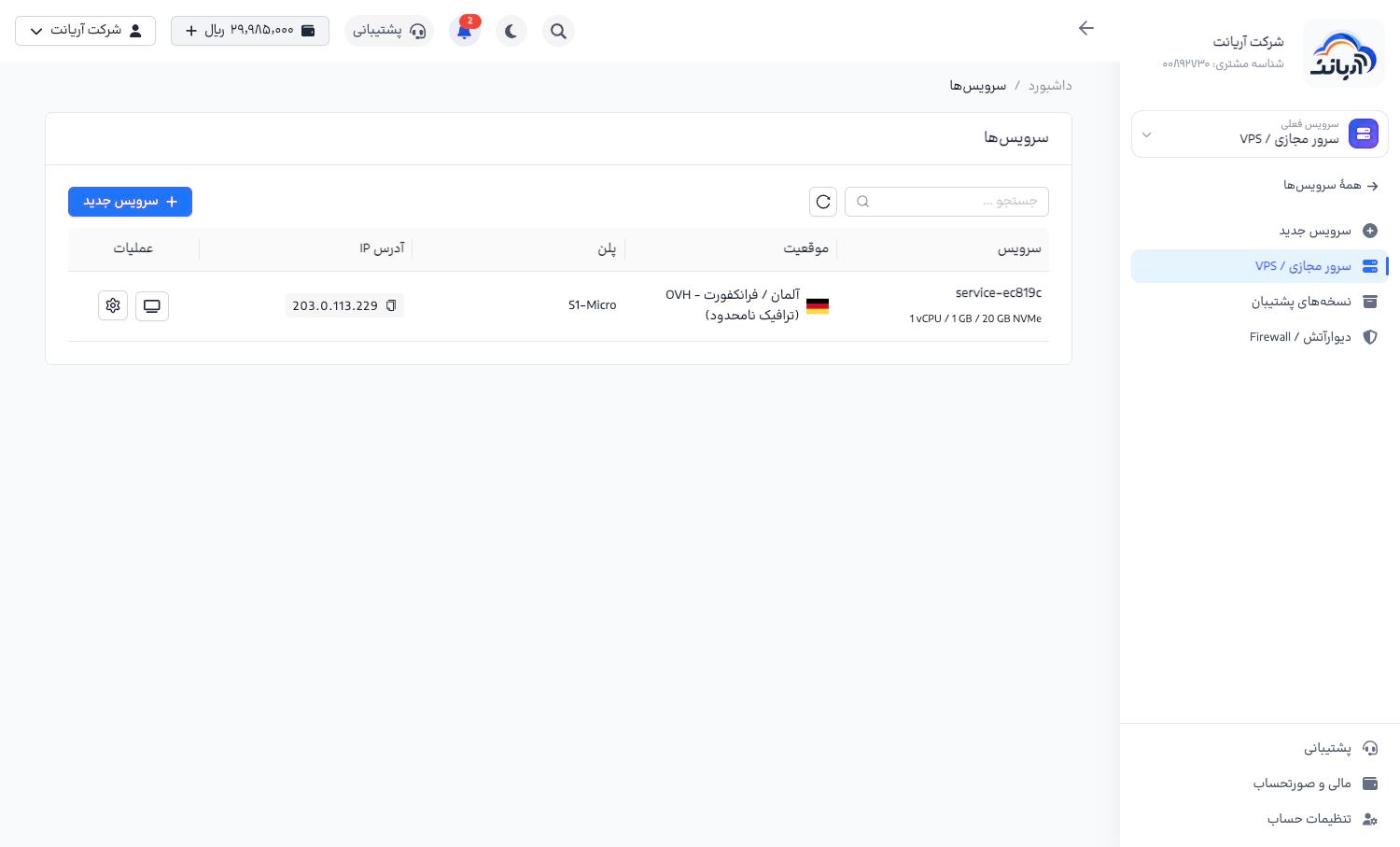
In VPS («سرور مجازی / VPS») the list of servers is shown with location, plan and IP. The monitor button opens the VNC console and the gear button opens the server management page.
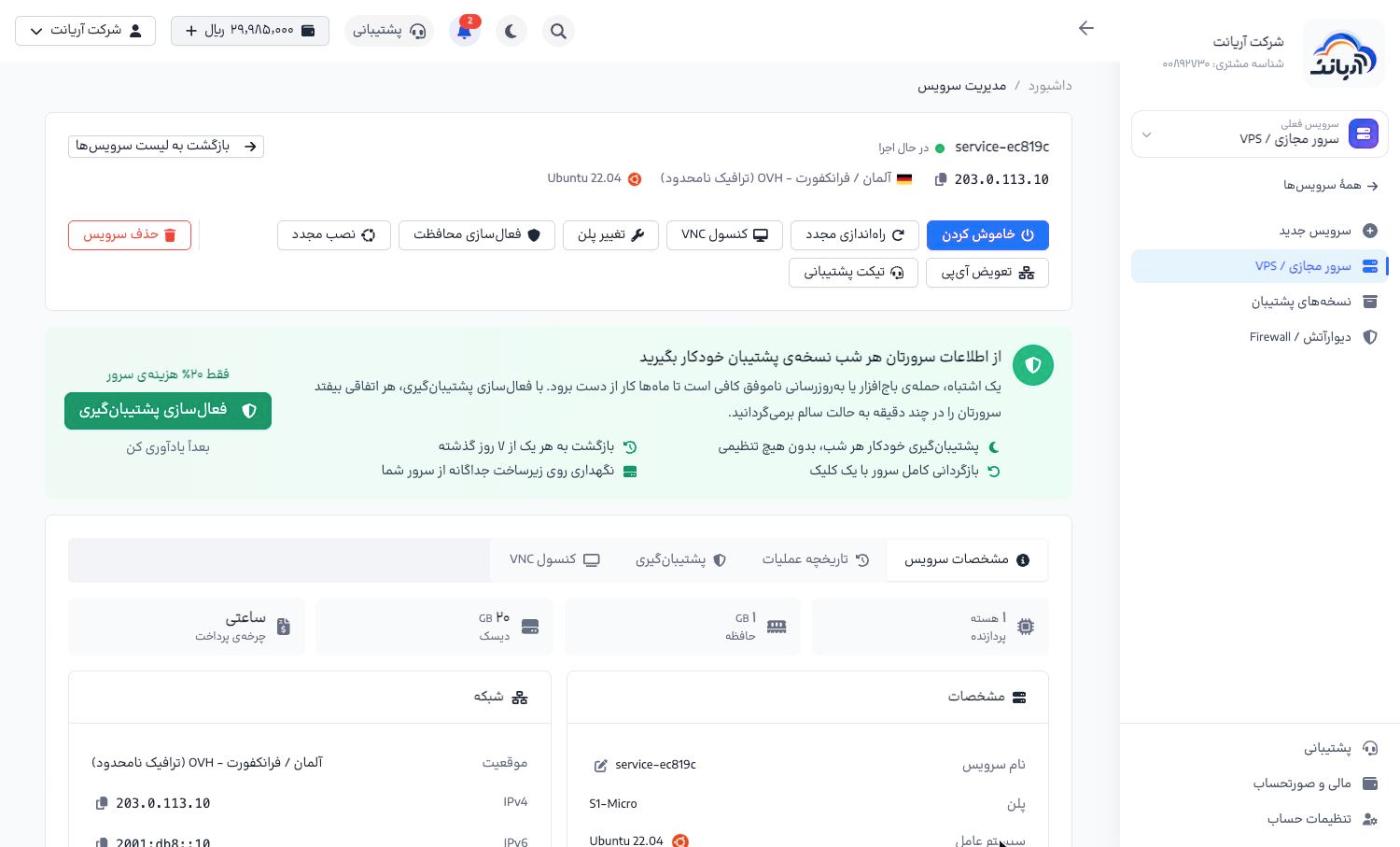
The top of the management page shows the server's name, status, IP, location and operating system, and the main buttons: Power off / Power on («خاموش کردن / روشن کردن»), Restart («راهاندازی مجدد»), VNC console («کنسول VNC»), Change plan («تغییر پلن»), Enable protection («فعالسازی محافظت»), Reinstall («نصب مجدد»), Change IP («تعویض آیپی»), Support ticket («تیکت پشتیبانی») and Delete service («حذف سرویس»).
Details, login information and network
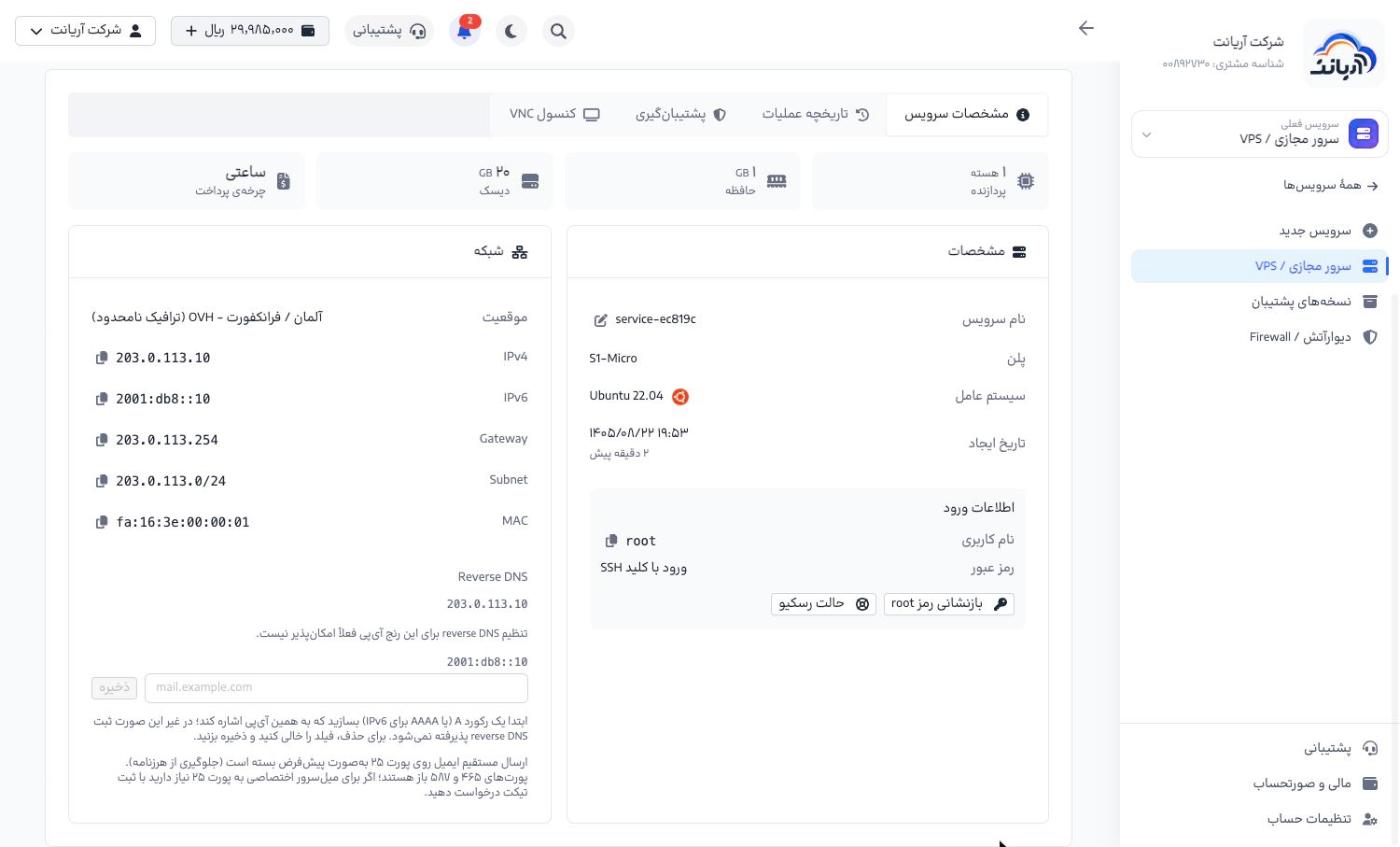
The Service details («مشخصات سرویس») tab shows:
- Resources: CPU, memory, disk and billing cycle (hourly)
- Details: service name (editable with the pencil icon), plan, operating system and creation date
- Login information: username
rootand password (or Login with SSH key, «ورود با کلید SSH»), plus the Reset root password («بازنشانی رمز root») and Rescue mode («حالت رسکیو») buttons - Network: IPv4, IPv6, Gateway, Subnet, MAC and Reverse DNS
Copy any value with the copy button next to it. To connect:
ssh root@IP-سرور
(replace IP-سرور with your server's IP).
Reverse DNS
In the network section, type a domain name (for example mail.example.com) in the Reverse DNS box and click Save («ذخیره»). To remove it, empty the field and save.
- First create an A record (or AAAA for IPv6) in the domain's DNS that points to this IP; otherwise the reverse DNS is not accepted.
- For some IP ranges, setting reverse DNS is not currently possible, and a message saying so is shown next to the IP.
- To send email from the server, the reverse DNS must match the mail server's name.
Power on, power off and restart
Control the server with Power off / Power on and Restart at the top of the page. To prevent mistakes, powering off asks for confirmation.
A powered-off server is still charged, because its resources (disk, IP and so on) stay reserved for you. To stop the charges, delete the service.
VNC console
The VNC console («کنسول VNC») tab (or the VNC console button at the top of the page) shows the server's own screen directly in your browser. Click "Connect". With the button in the top corner you can open the console in a new window.
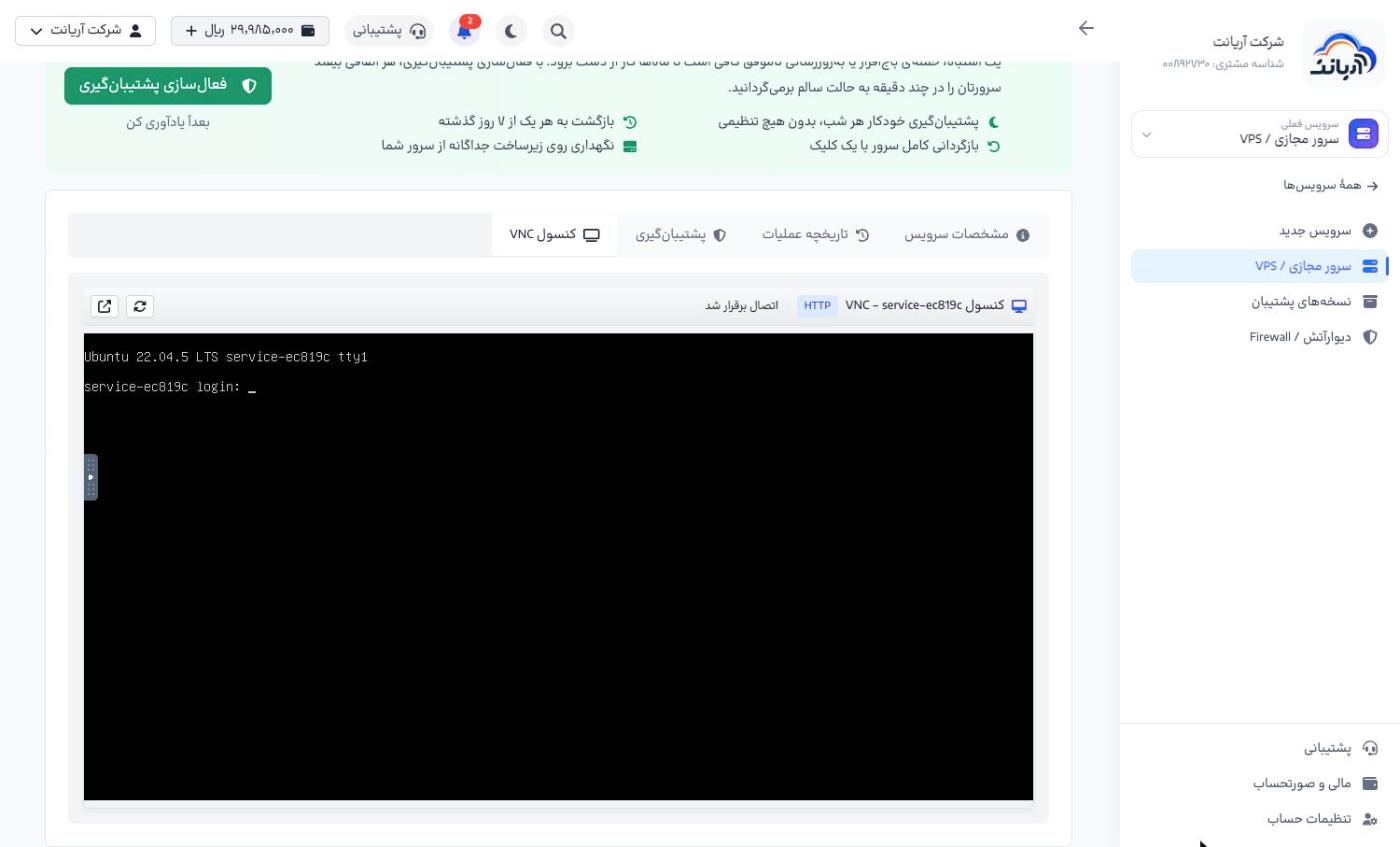
When SSH is not reachable (for example a firewall was closed by mistake or the server's network is broken), sign in through the VNC console and fix the problem.
Rescue mode
If the server does not boot or you have lost the password, click Rescue mode («حالت رسکیو»). The server boots into a temporary system, and you can mount and repair the main disk. When you are done, click Exit rescue («خروج از رسکیو») so the server boots from the main disk again.
Action history
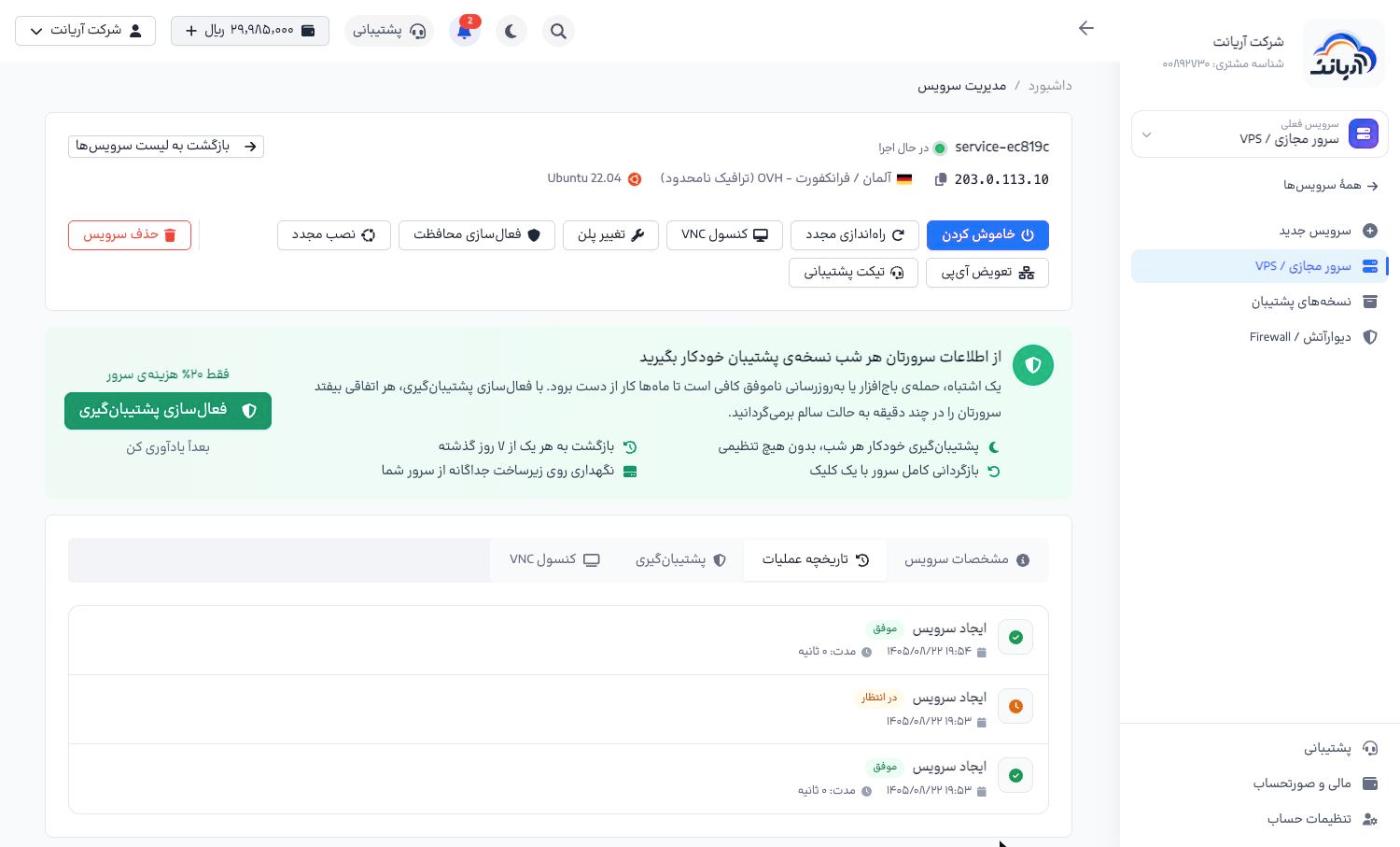
The Action history («تاریخچه عملیات») tab shows every action taken on the server (creation, power off and on, reinstall and so on) with time, duration and result (Successful «موفق», Pending «در انتظار» or Failed «ناموفق»).
Automatic backups
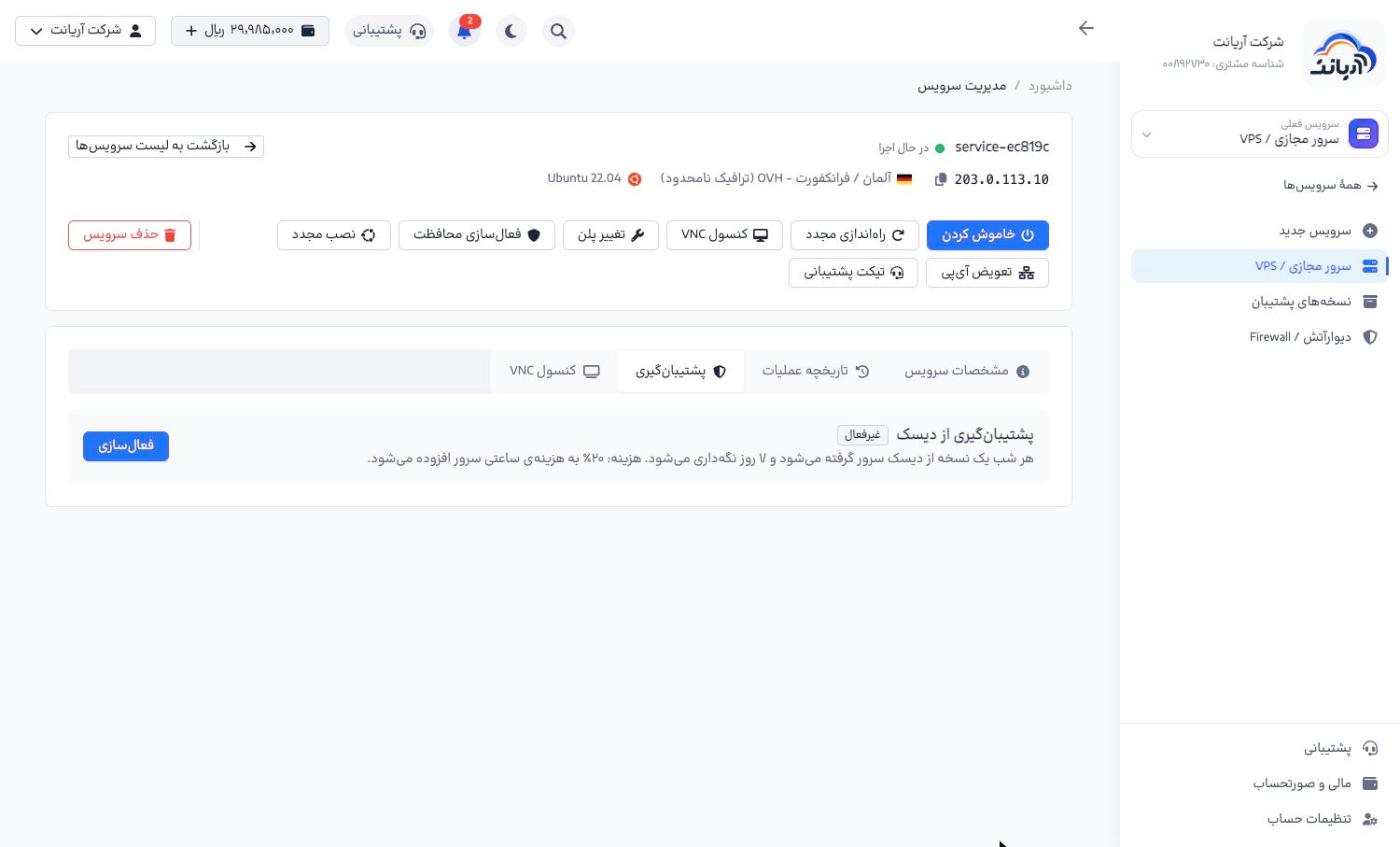
With automatic backups, a copy of the server's disk is taken every night and kept for 7 days. It costs 20% of the server's hourly cost.
- In the Backups («پشتیبانگیری») tab (or the green box at the top of the page), click Enable («فعالسازی»).
- From then on, copies are taken every night at 2 a.m.
- To roll the server back to one of the last 7 days, click Restore («بازگردانی») on the copy you want.
All of the account's backups are also shown in VPS → Backups («سرور مجازی / VPS ← نسخههای پشتیبان»). If you delete a server, its backups stay for up to 7 days and you can create a new server from them.
Reinstalling the operating system
Click Reinstall («نصب مجدد»), choose the new operating system and version, and confirm.
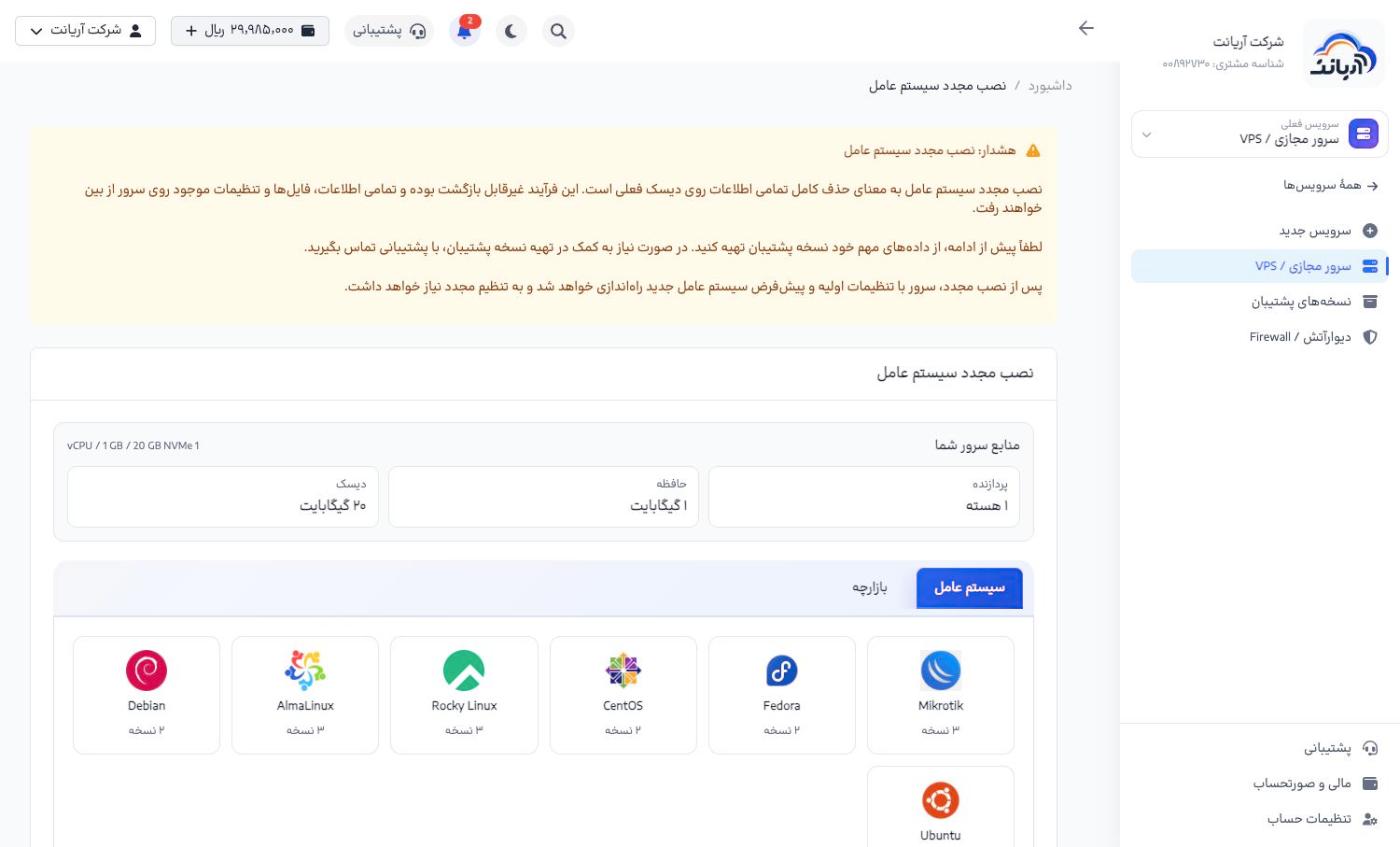
Reinstalling permanently deletes all data, files and settings on the disk. Back up important data first.
Upgrading the plan
Click Change plan («تغییر پلن») and Select («انتخاب») a bigger plan. Each plan's hourly and monthly price is shown in the table, and the new cost applies from the moment the plan is changed.
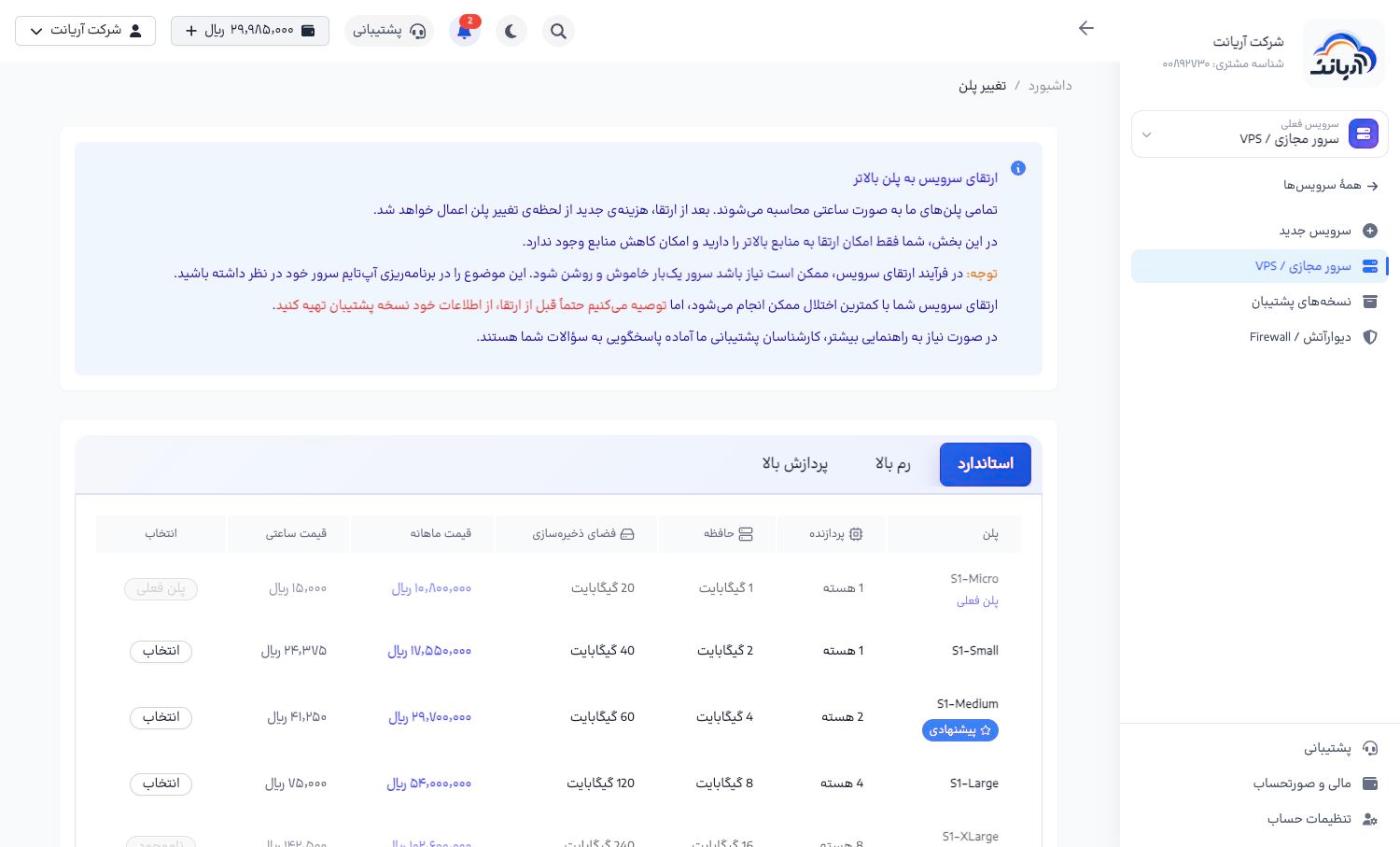
- Only upgrades are possible; resources cannot be reduced.
- An upgrade may power the server off and on once; plan for this, and back up your data before upgrading.
Changing the IP
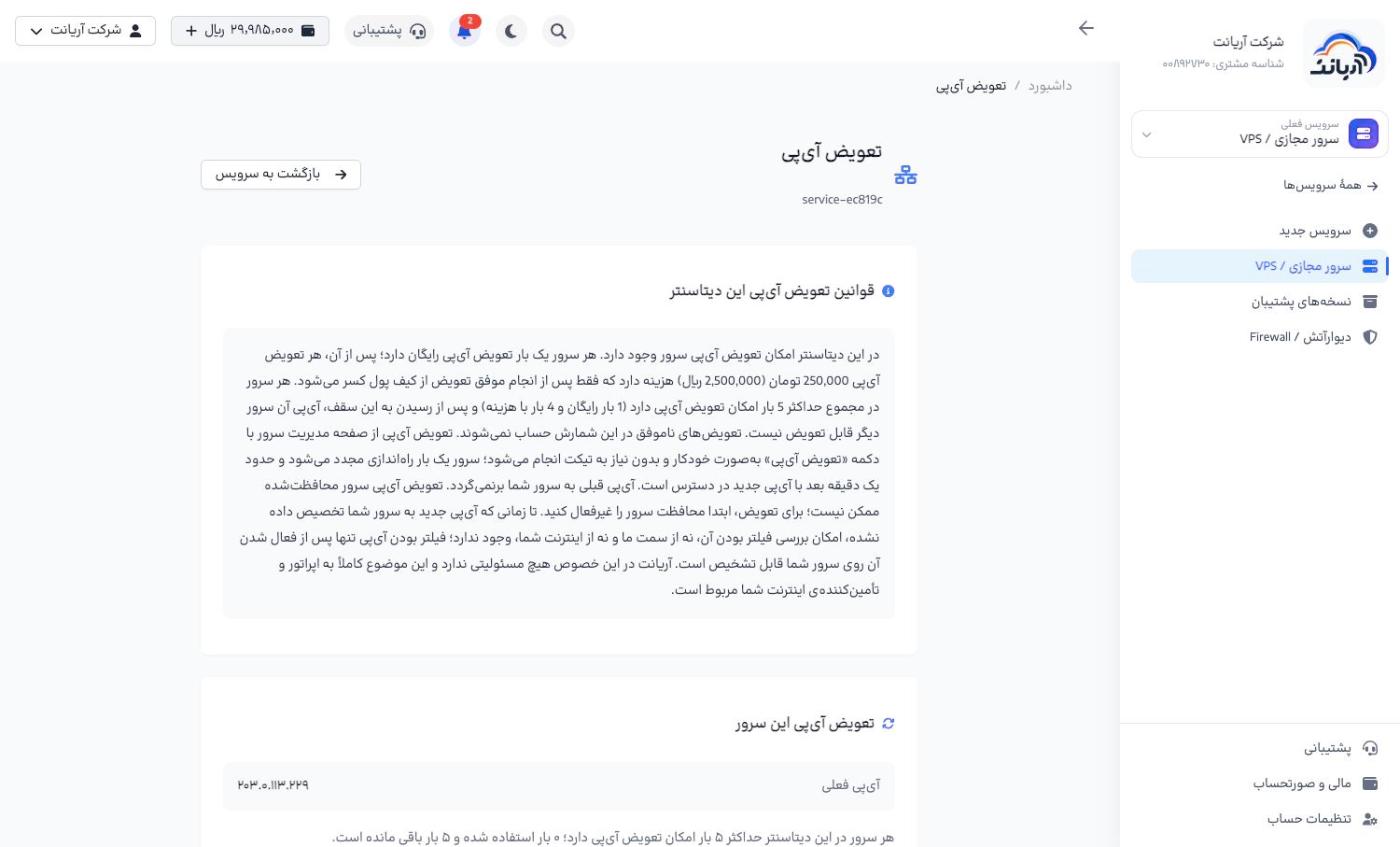
In data centers that support it, Change IP («تعویض آیپی») gives the server a new IP. That data center's rules are shown at the top of the page. Example rules for one data center:
- Each server has one free change; later changes have a cost, which is deducted from your wallet only after a successful change.
- Each server has a maximum number of changes (for example 5); failed changes are not counted.
- The change is automatic, with no ticket; the server restarts once and the new IP is available about a minute later.
- The previous IP does not come back to your server.
- A Protected server cannot change its IP; disable protection first.
- Whether the new IP is filtered cannot be checked before it is assigned.
Protection
Enable protection («فعالسازی محافظت») prevents accidental deletion or reinstallation of the server. While protection is on, deletion, reinstall and IP change are not possible.
Firewall
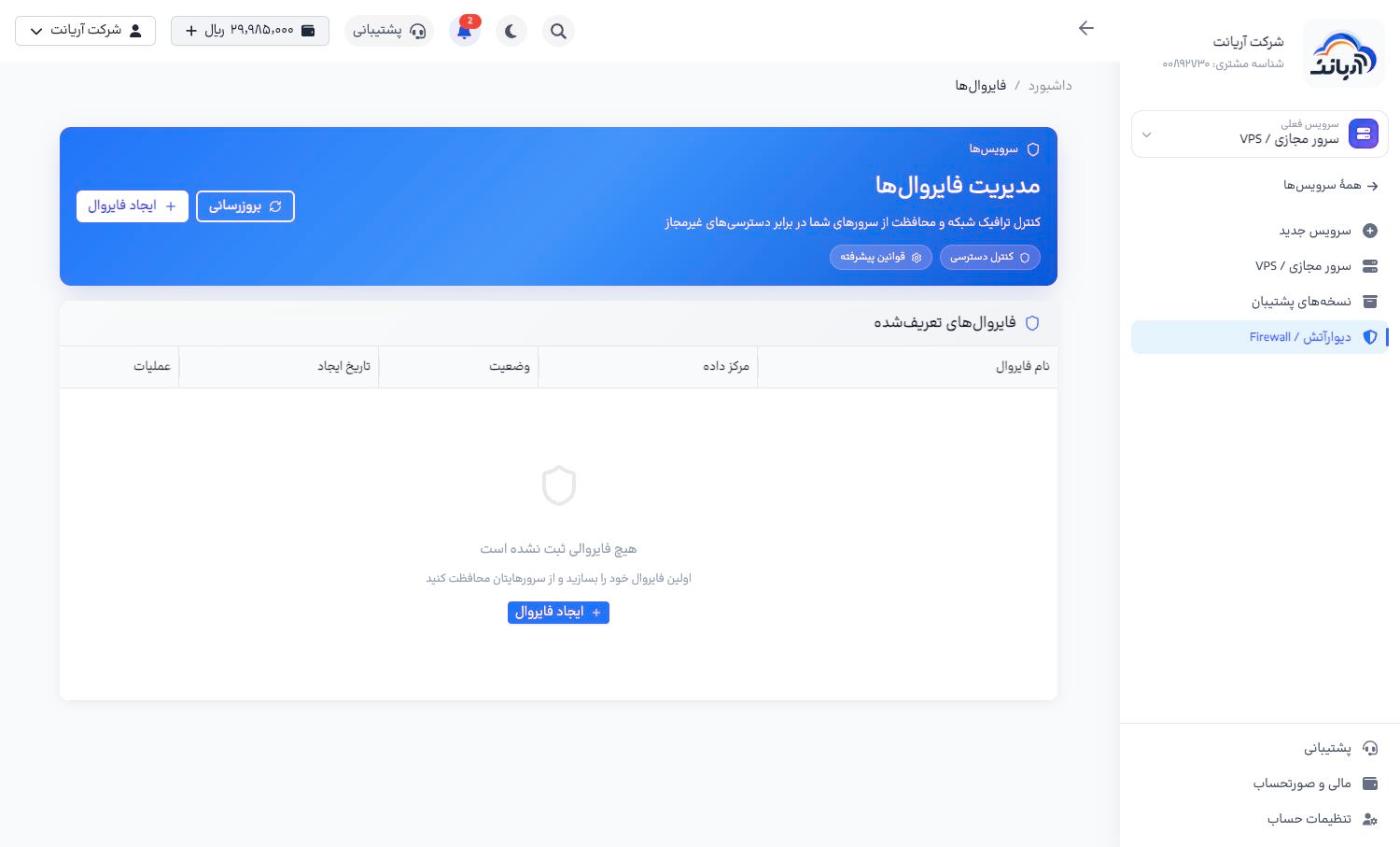
In VPS → Firewall («سرور مجازی / VPS ← دیوارآتش / Firewall»), create firewalls and control your servers' incoming and outgoing traffic:
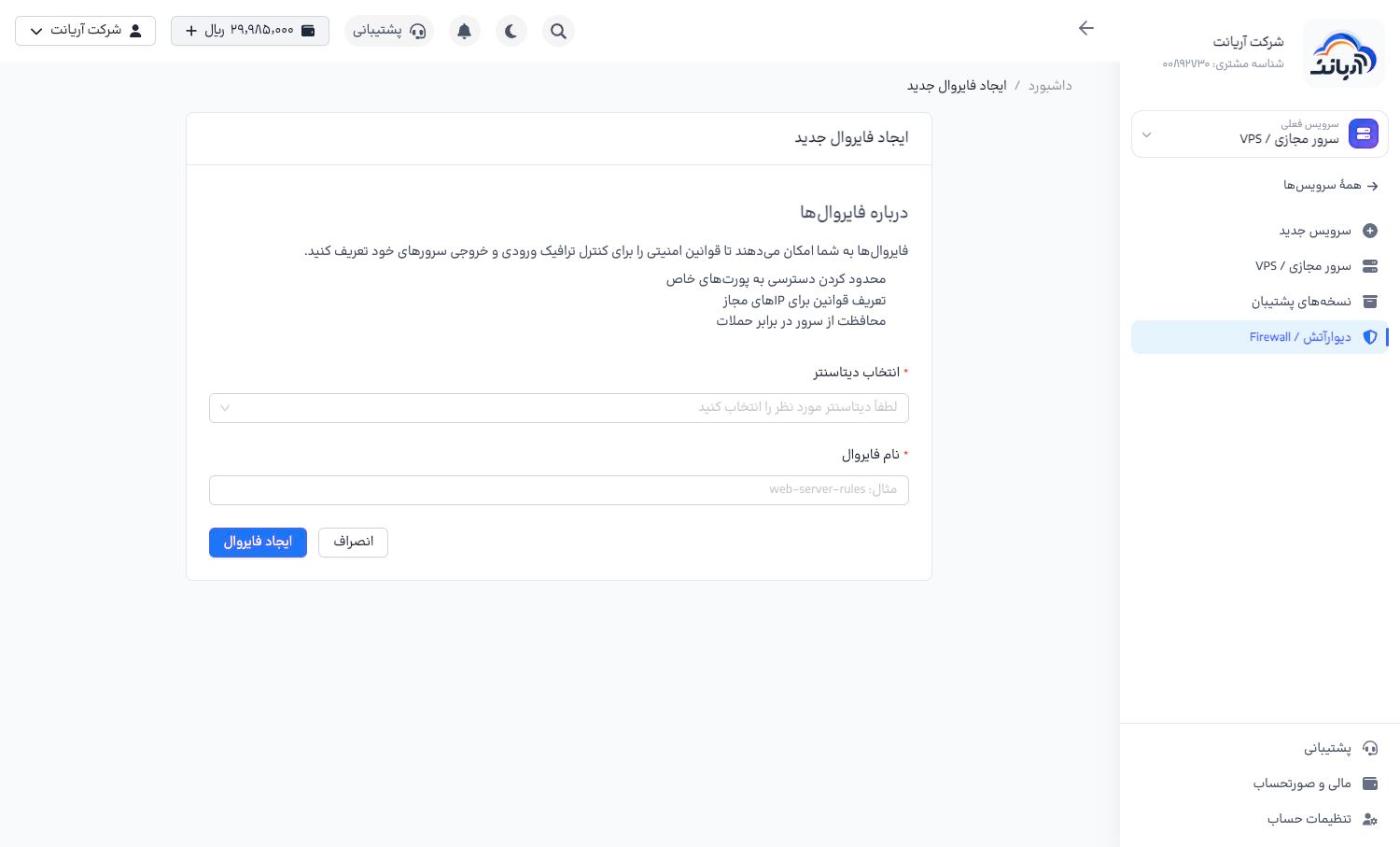
- Click Create firewall («ایجاد فایروال»), choose the data center and give it a name (for example
web-server-rules). - Define the firewall rules (port, protocol and allowed IPs).
- Attach the firewall to servers in the same data center.
Before closing ports, make sure the SSH port (usually 22) is open for your own IP; otherwise you will only be able to reach the server through the VNC console.
Deleting a server
- Click Delete service («حذف سرویس»).
- In Why do you want to delete this service? («چرا میخواهید این سرویس را حذف کنید؟»), choose a reason and, if you like, add a note.
- Read the warnings, enter the exact service name (using the Copy «کپی» button) in the confirmation box and click Confirm final deletion («تایید حذف نهایی»).
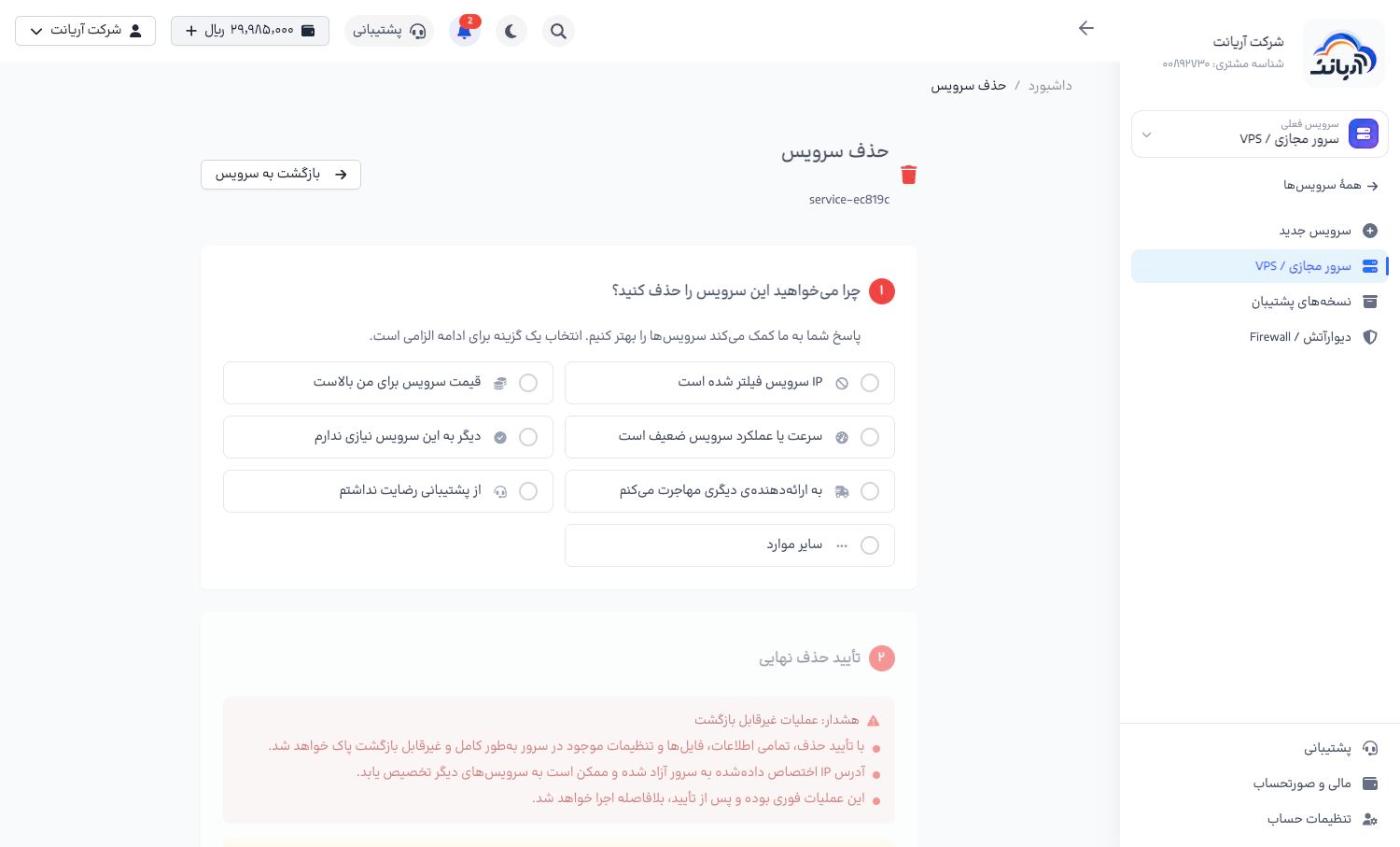
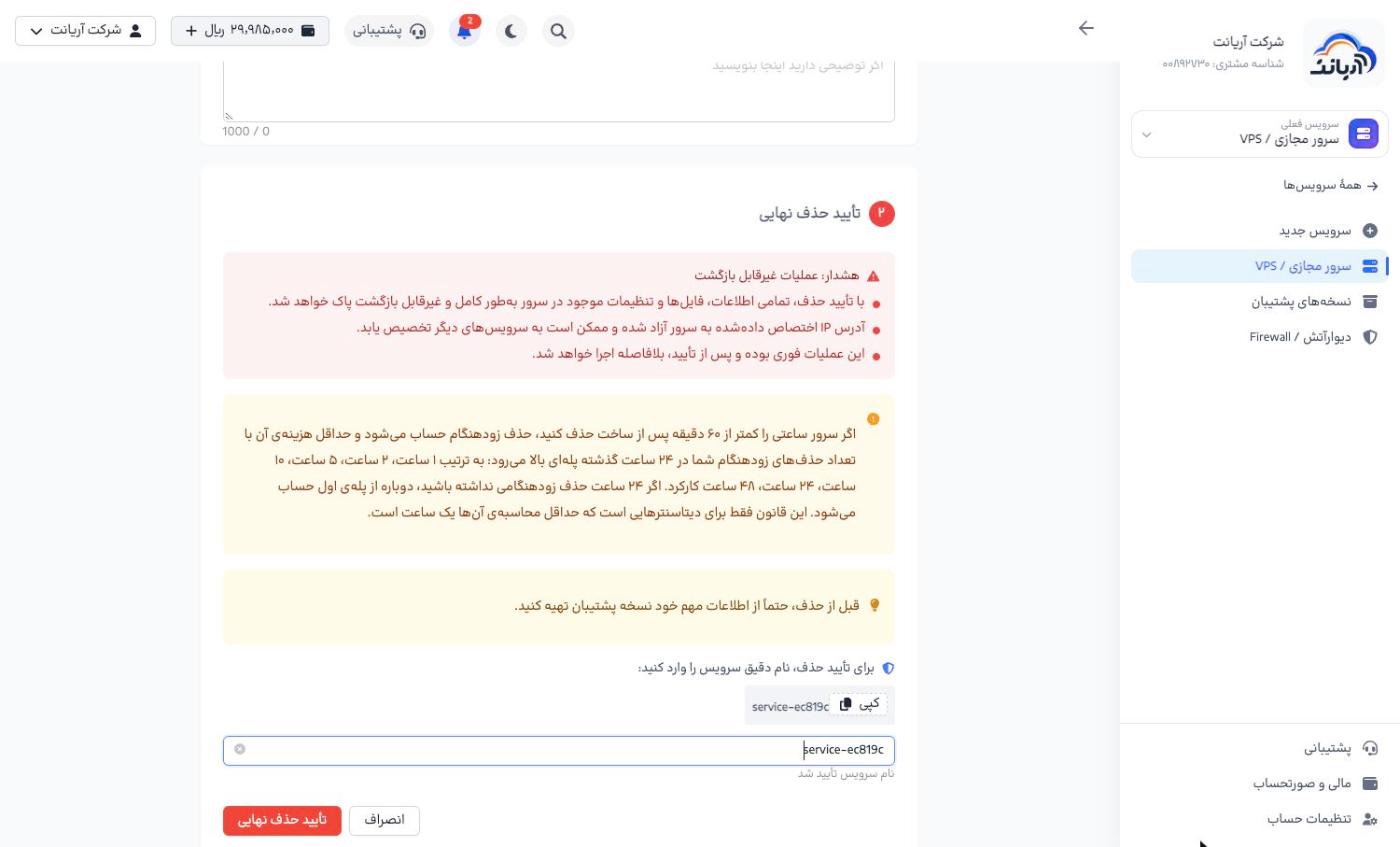
- Deletion is irreversible and all the server's data is deleted.
- The server's IP is released and may be given to another service.
- Deletion is immediate and charges stop at that moment.
If you delete an hourly server less than 60 minutes after creating it, it counts as an early deletion, and its minimum charge steps up with the number of early deletions you made in the past 24 hours: 1, 2, 5, 10, 24 and 48 hours of usage, in that order. If you go 24 hours without an early deletion, counting starts again from the first step.