Hosting
Arianet shared hosting runs on servers in a Tehran data center, with a free SSL certificate and a ready-to-use control panel. Hosting is prepaid: the cost of the chosen period (weekly to yearly) is deducted from your wallet.
Buying hosting
In the Hosting («هاستینگ») menu, click Buy hosting («خرید هاستینگ»). Buying has three steps: Data center and plan, Domain and Final confirmation. The Order summary («خلاصه سفارش») box at the side of the page shows your choices, the order amount and your wallet balance.
1. Data center, hosting type and plan
- Data center («دیتاسنتر»): where the hosting server is (for example Tehran).
- Hosting type («نوع هاست»):
- Shared hosting («هاست اشتراکی»): ready-made hosting for your own site; suitable for personal, company and online-shop sites, with a ready management panel, email and databases.
- Reseller hosting («نمایندگی هاست»): for selling hosting under your own brand; create accounts for your customers and manage them in WHM or DirectAdmin.
- Plan and billing period («پلن و دوره پرداخت»): first choose the period (weekly, monthly, quarterly, six-monthly or yearly) so that every plan's price is shown for that period. Then click Select («انتخاب») on a plan. Each plan's card lists its space, bandwidth, number of subdomains, RAM and CPU.
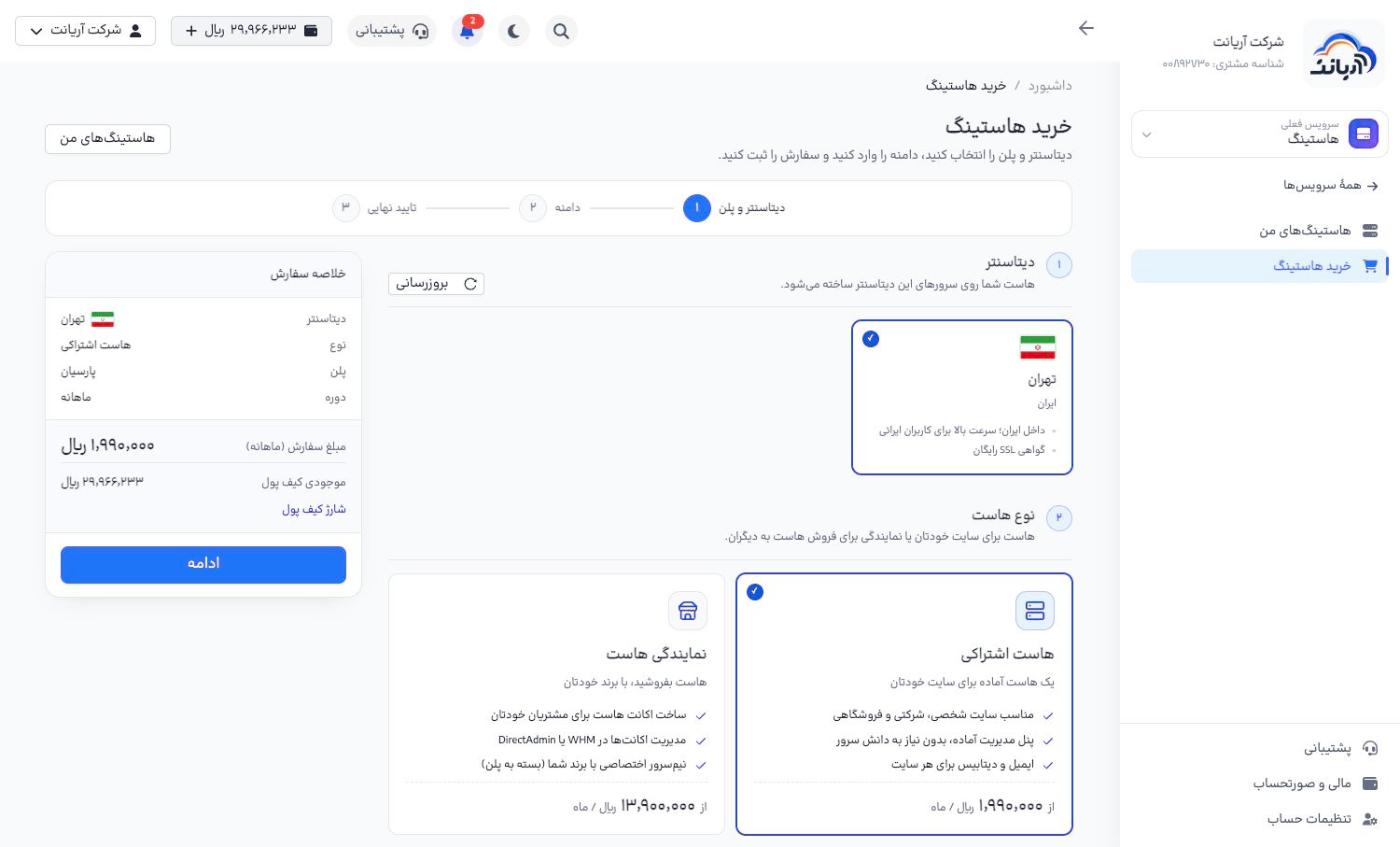
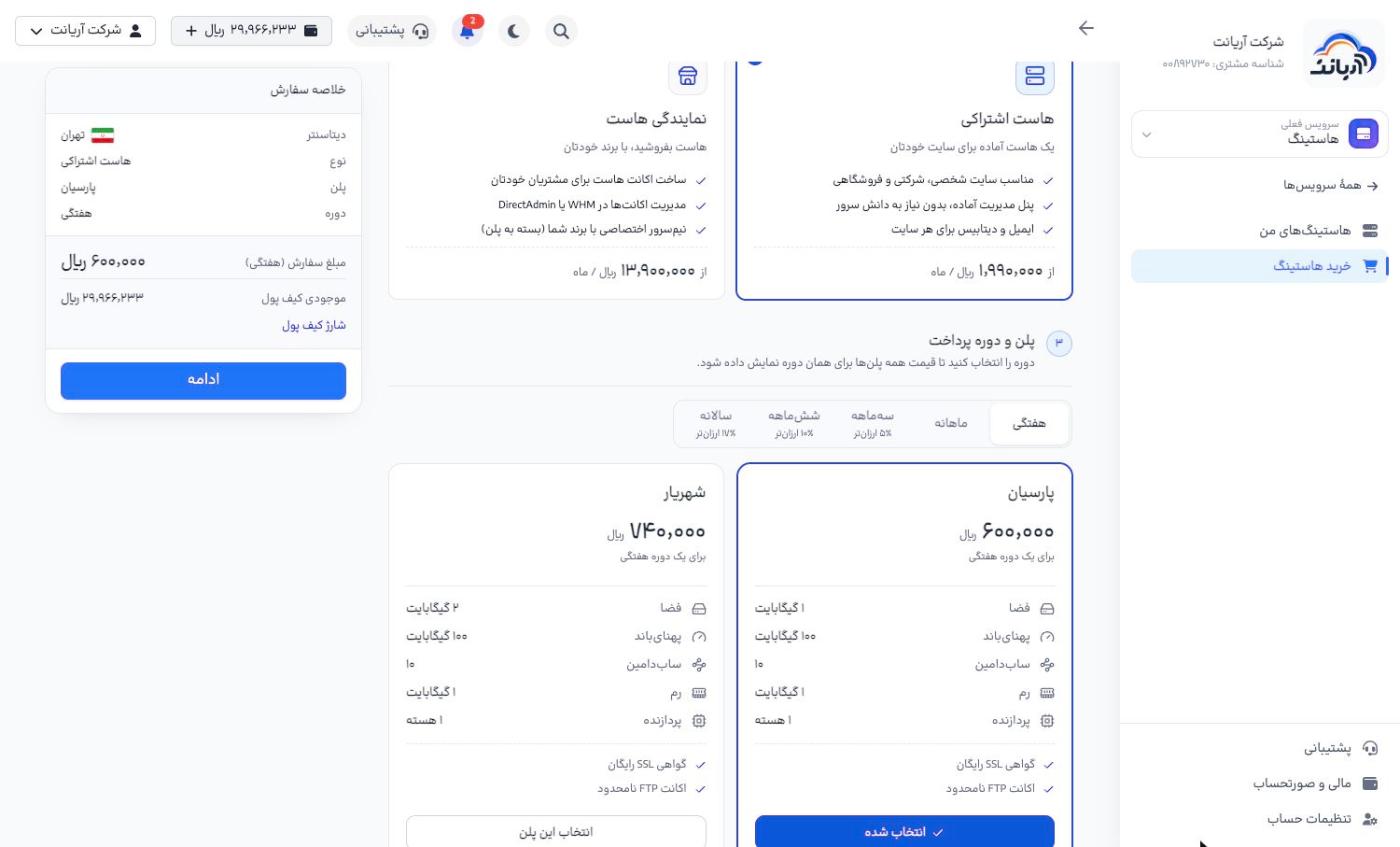
Longer periods are cheaper: quarterly has a 5% discount, six-monthly 10% and yearly 17%. To try it out, choose the weekly period.
Click Continue («ادامه»).
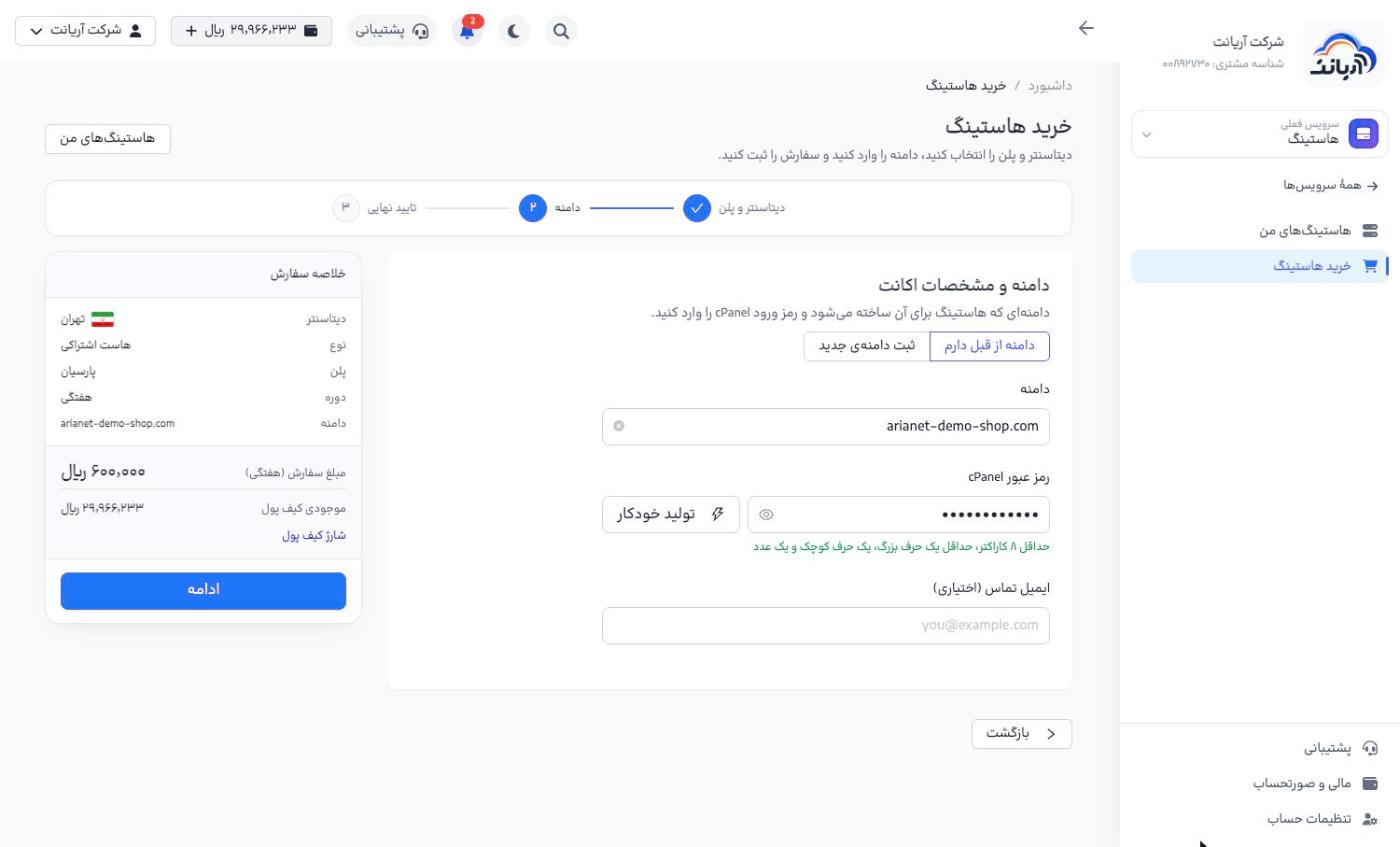
2. Domain and account details
- Domain («دامنه»): if you already have a domain, choose I already have a domain («دامنه از قبل دارم») and enter its name; otherwise choose Register a new domain («ثبت دامنهی جدید»).
- cPanel password («رمز عبور cPanel»): the password for signing in to the control panel; at least 8 characters with one uppercase letter, one lowercase letter and one digit. Use Generate («تولید خودکار») to create a strong password.
- Contact email (optional) («ایمیل تماس (اختیاری)»)
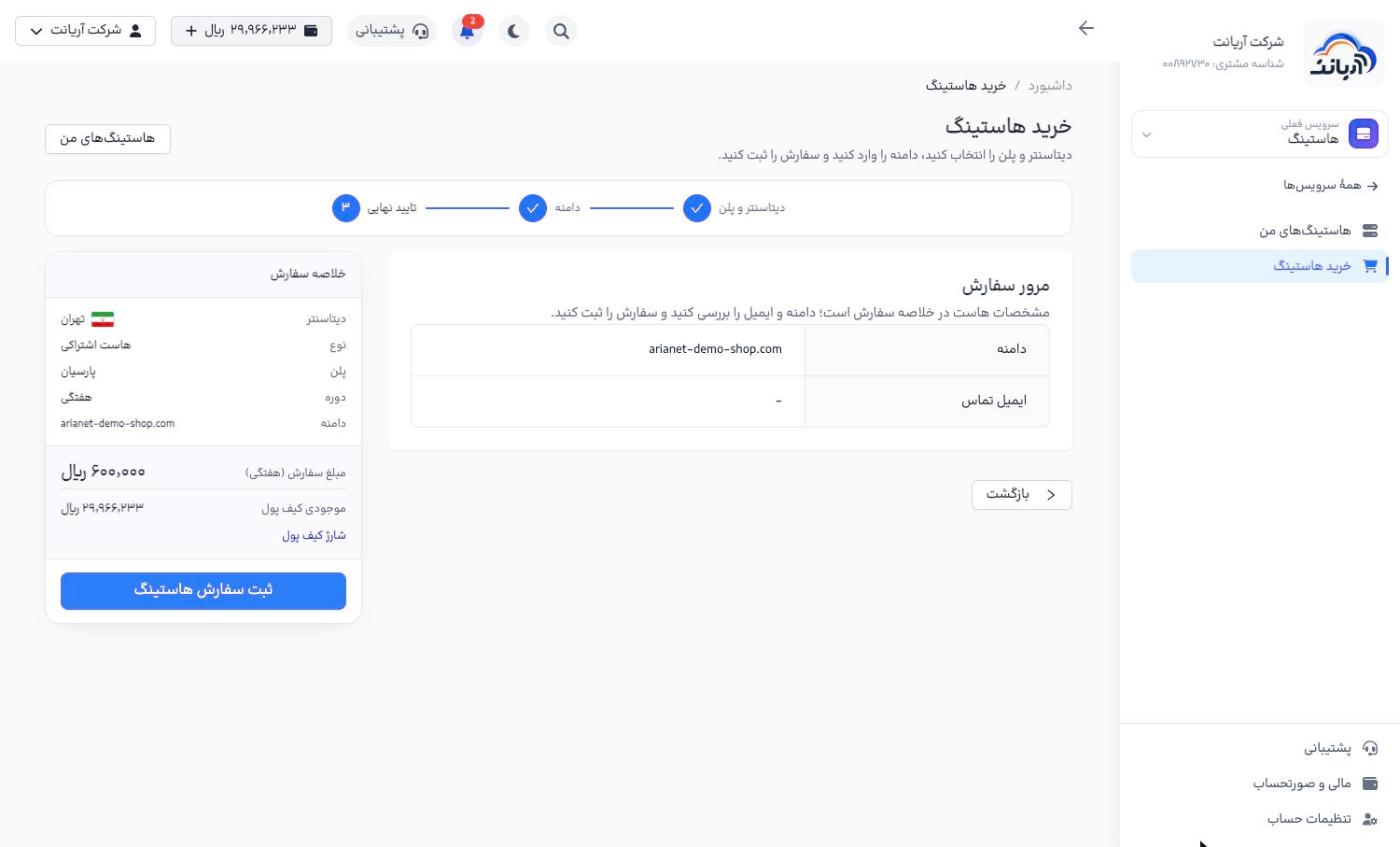
3. Final confirmation
Check the domain and email in Order review («مرور سفارش») and click Place hosting order («ثبت سفارش هاستینگ»). The cost of the period is deducted from your wallet.
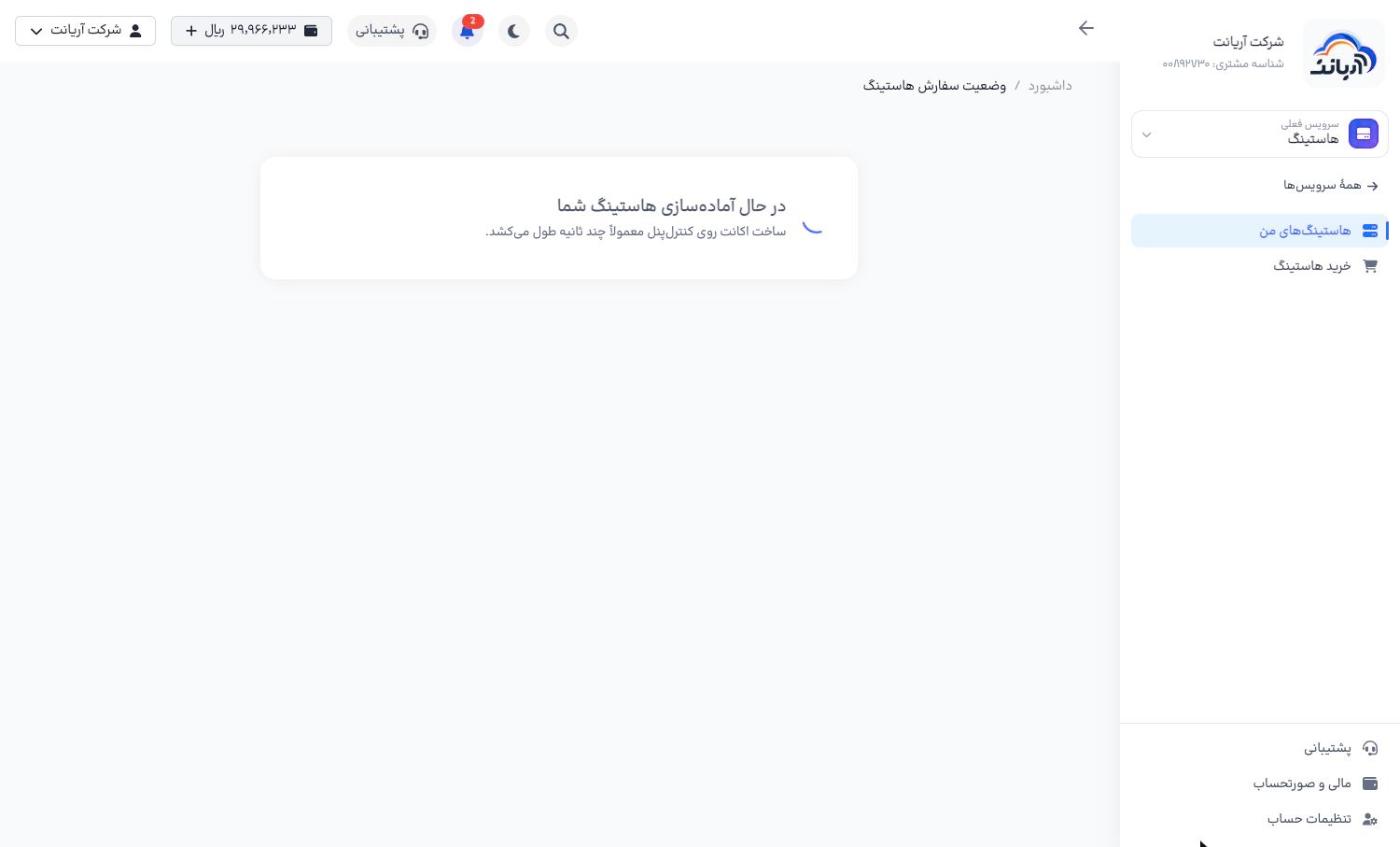
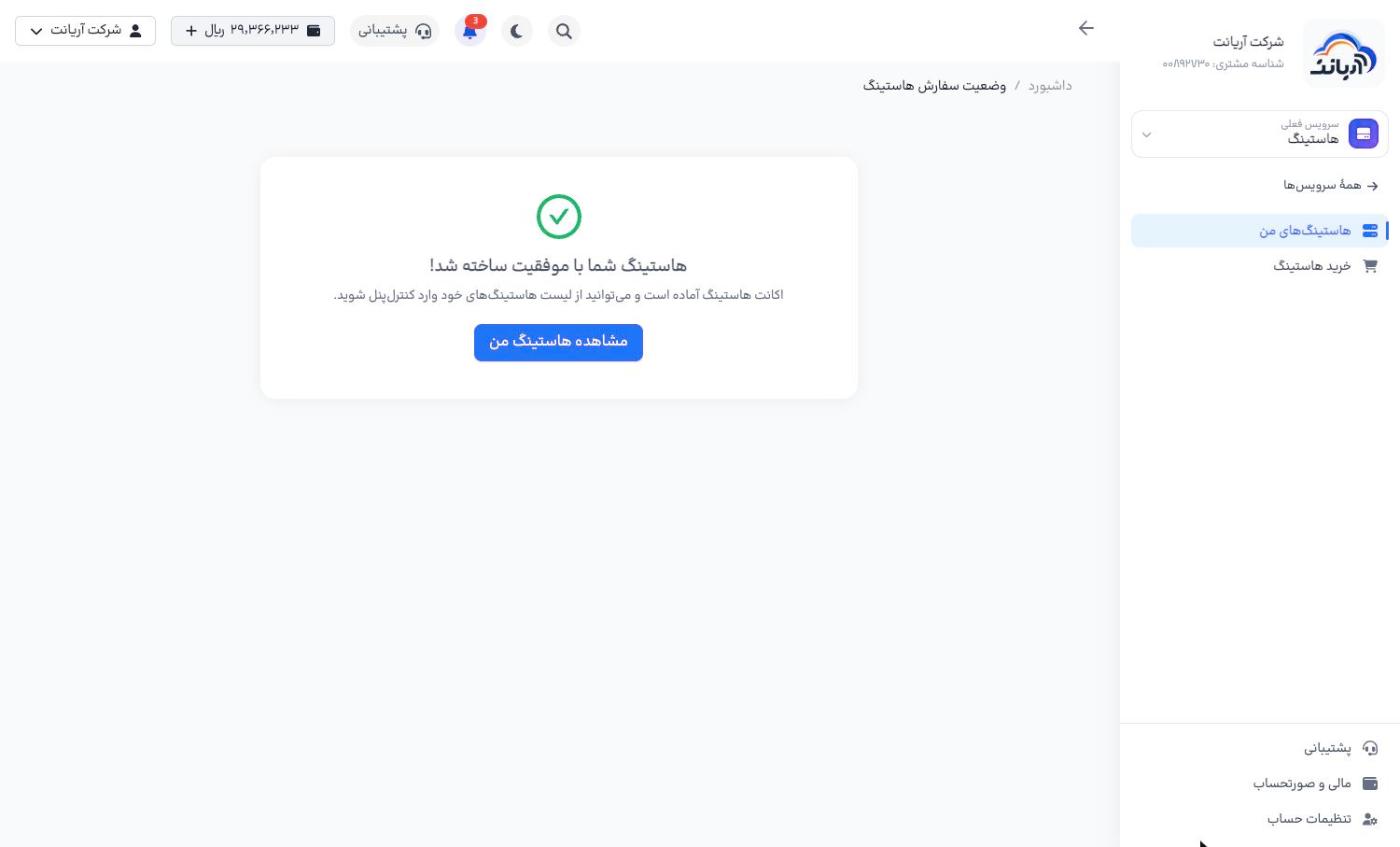
The Preparing your hosting («در حال آمادهسازی هاستینگ شما») page opens. Creating the account usually takes less than a minute. After the message Your hosting was created successfully! («هاستینگ شما با موفقیت ساخته شد!»), click View my hosting («مشاهده هاستینگ من»).
Managing hosting
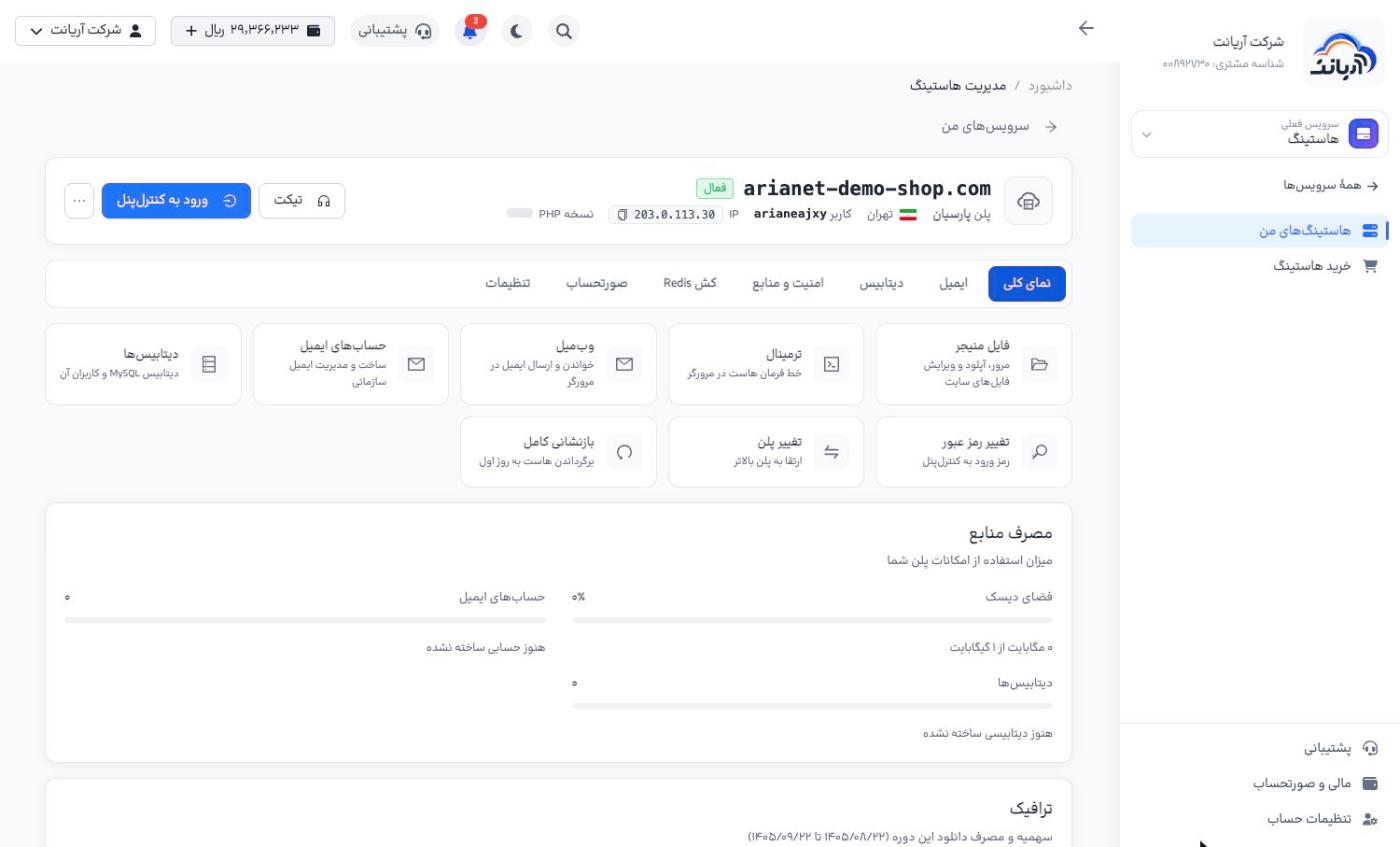
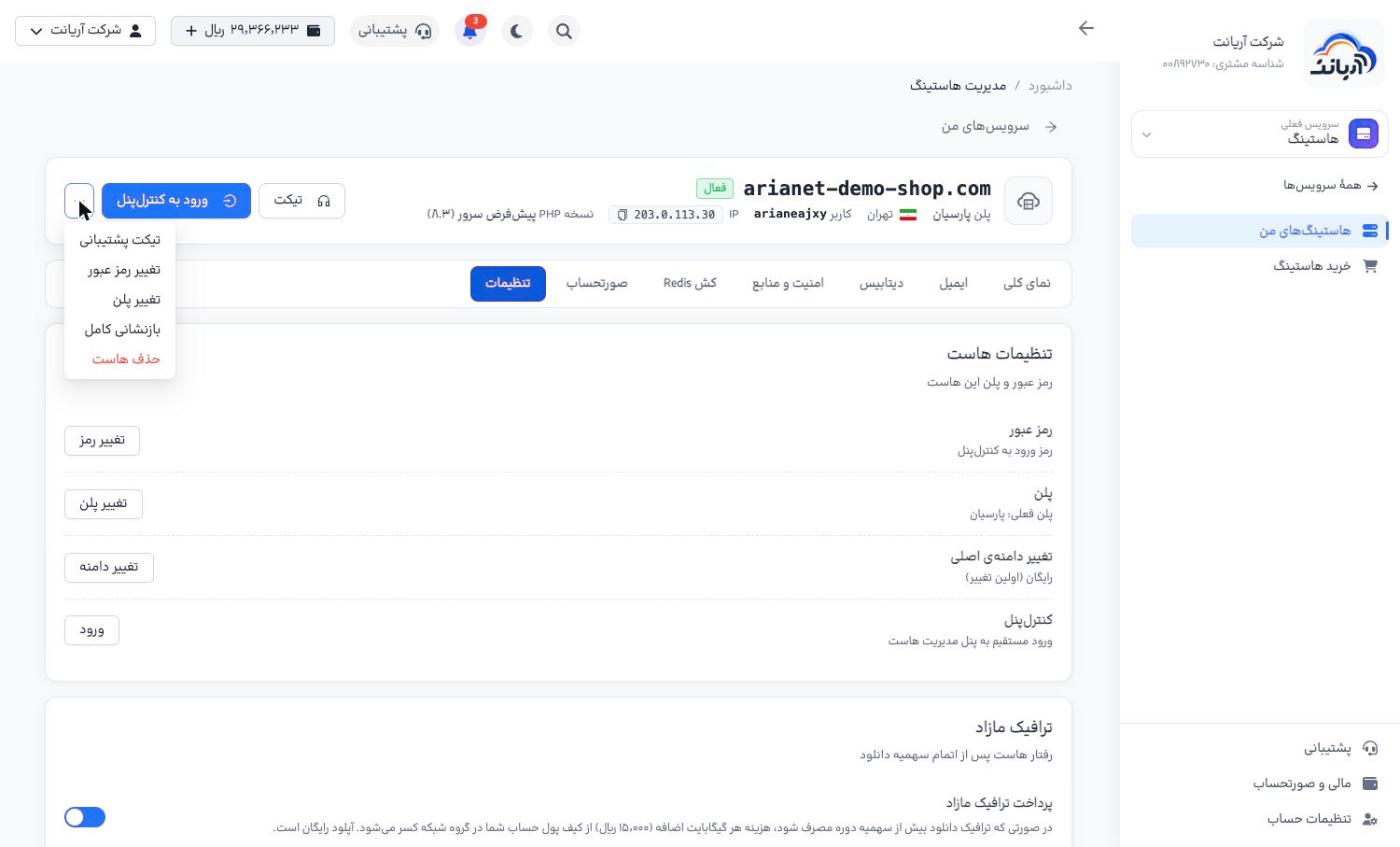
Open the hosting in My hosting («هاستینگهای من»). The top of the page shows the domain, status, plan, location, username, IP and PHP version, the Sign in to control panel («ورود به کنترلپنل») and Ticket («تیکت») buttons, and the "…" menu (support ticket, change password, change plan, full reset, delete hosting).
Overview
- Shortcuts: file manager, terminal (command line in the browser), webmail, email accounts, databases, change password, change plan and full reset
- Resource usage: disk space, number of email accounts and databases
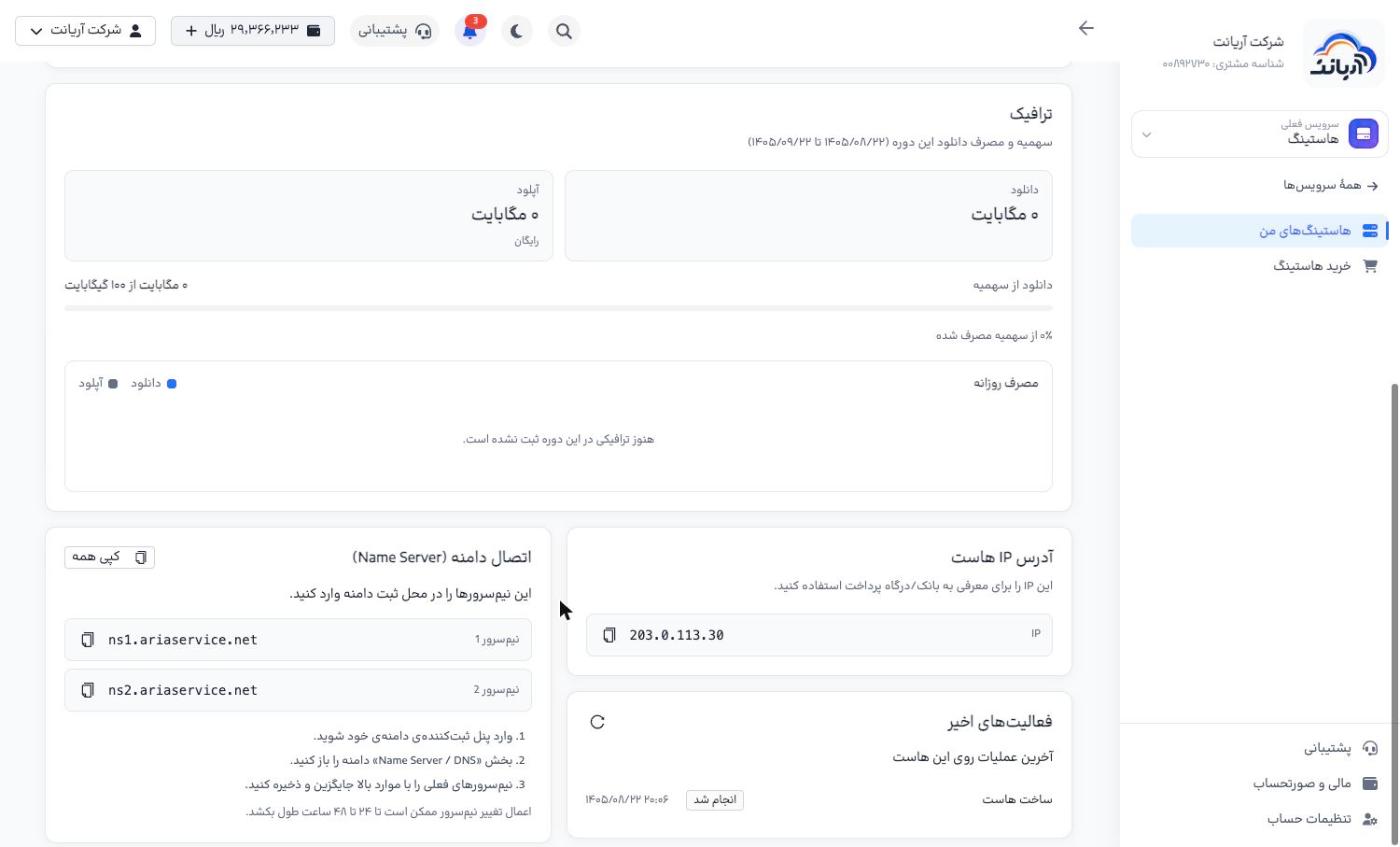
- Traffic: download and upload for this period, the download quota and a daily usage chart (upload is free)
- Hosting IP address
- Domain connection (Name Server) and Recent activity
Connecting a domain to the hosting
- In the Domain connection (Name Server) («اتصال دامنه (Name Server)») section, click Copy all («کپی همه»).
- Sign in to your domain registrar's panel and open its "Name Server / DNS" section.
- Replace the current name servers with Arianet's name servers (for example
ns1.ariaservice.netandns2.ariaservice.net) and save.
A name server change can take 24 to 48 hours to take effect. If you got the domain from Arianet, change the name servers on the domain page.
Use the hosting IP when registering your site with a bank or payment gateway.
Email
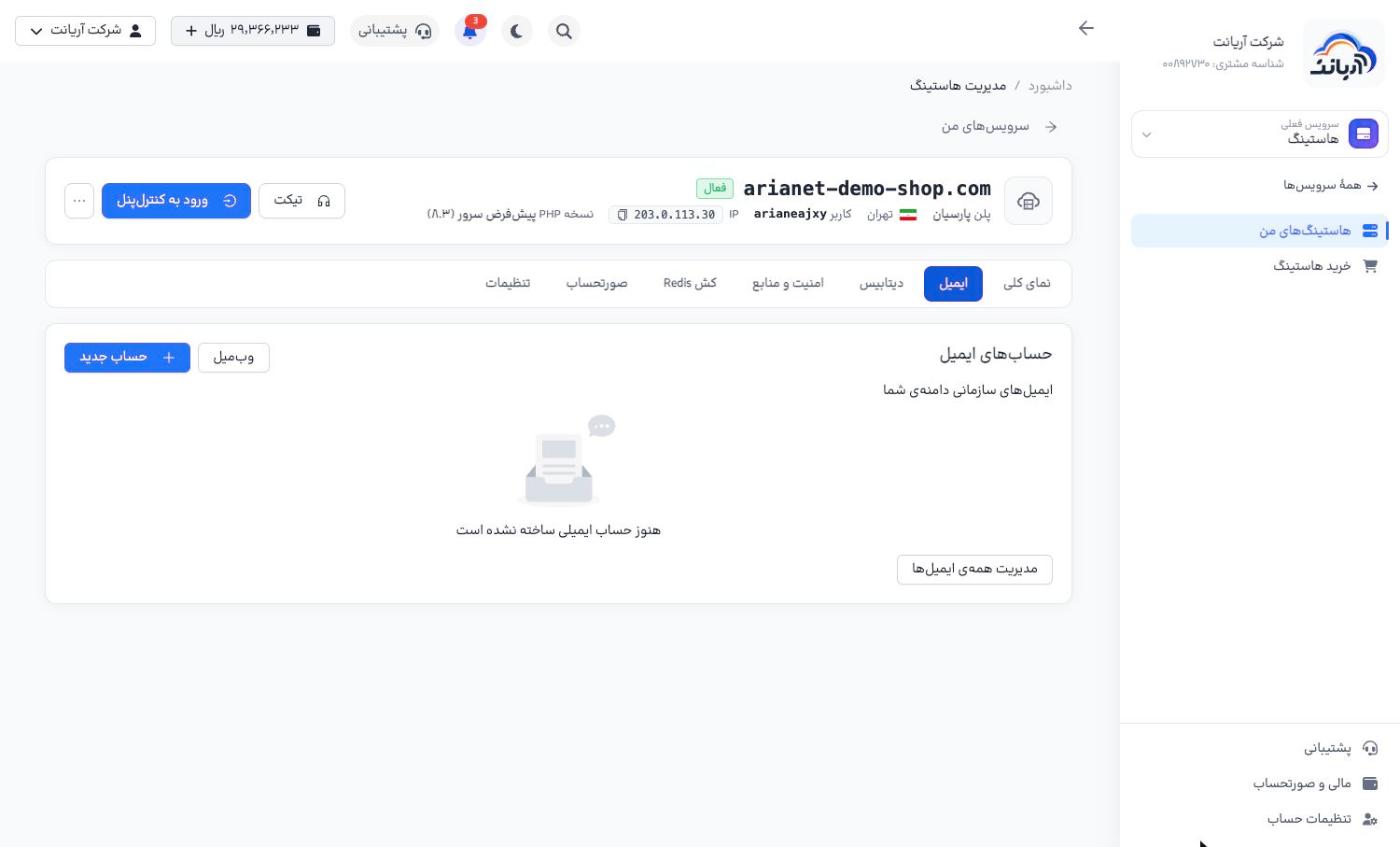
The Email («ایمیل») tab shows the domain's business email accounts (such as info@example.com). Create an email account with New account («حساب جدید») and read and send email in your browser with Webmail («وبمیل»).
Database
In the Database («دیتابیس») tab, create a MySQL database and its user; enter the database name, username and password in your site's settings (for example WordPress's wp-config.php).
Security and resources
- Account isolation (CageFS) («ایزولهسازی حساب»): your site's files and processes are not visible to other users on the server.
- Link protection (LinkSafe) («محافظت از لینکها»): blocks symlink and hardlink attacks on other users' files.
- Alerts («هشدارها»): events such as blocked attacks, the disk filling up and reaching the resource limit.
- Dedicated resources and usage («منابع اختصاصی و مصرف»): the plan's resource limits and peak usage over the chosen range (one hour to 30 days).
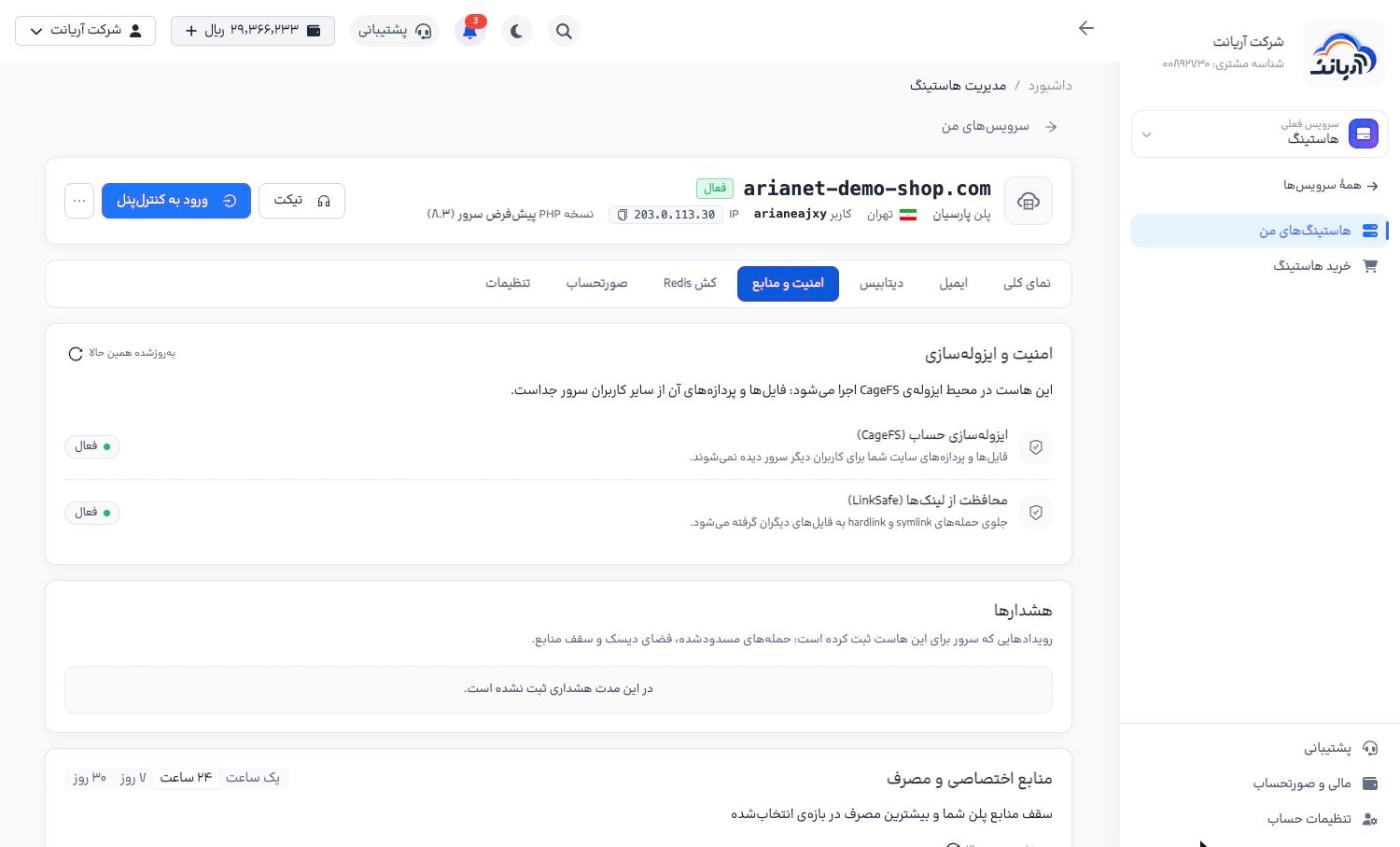
If your site is slow or returns a 508 error, check in Dedicated resources and usage whether you have hit the CPU or RAM limit. If so, upgrade your plan.
Redis cache
In the Redis cache («کش Redis») tab you can turn on Redis to speed up your site (for example with a WordPress caching plugin).
Billing and renewal
The Billing («صورتحساب») tab shows the billing period, the next renewal date, the cost per period and the auto-renewal switch. View this service's costs («مشاهده هزینههای این سرویس») shows every payment for this hosting.
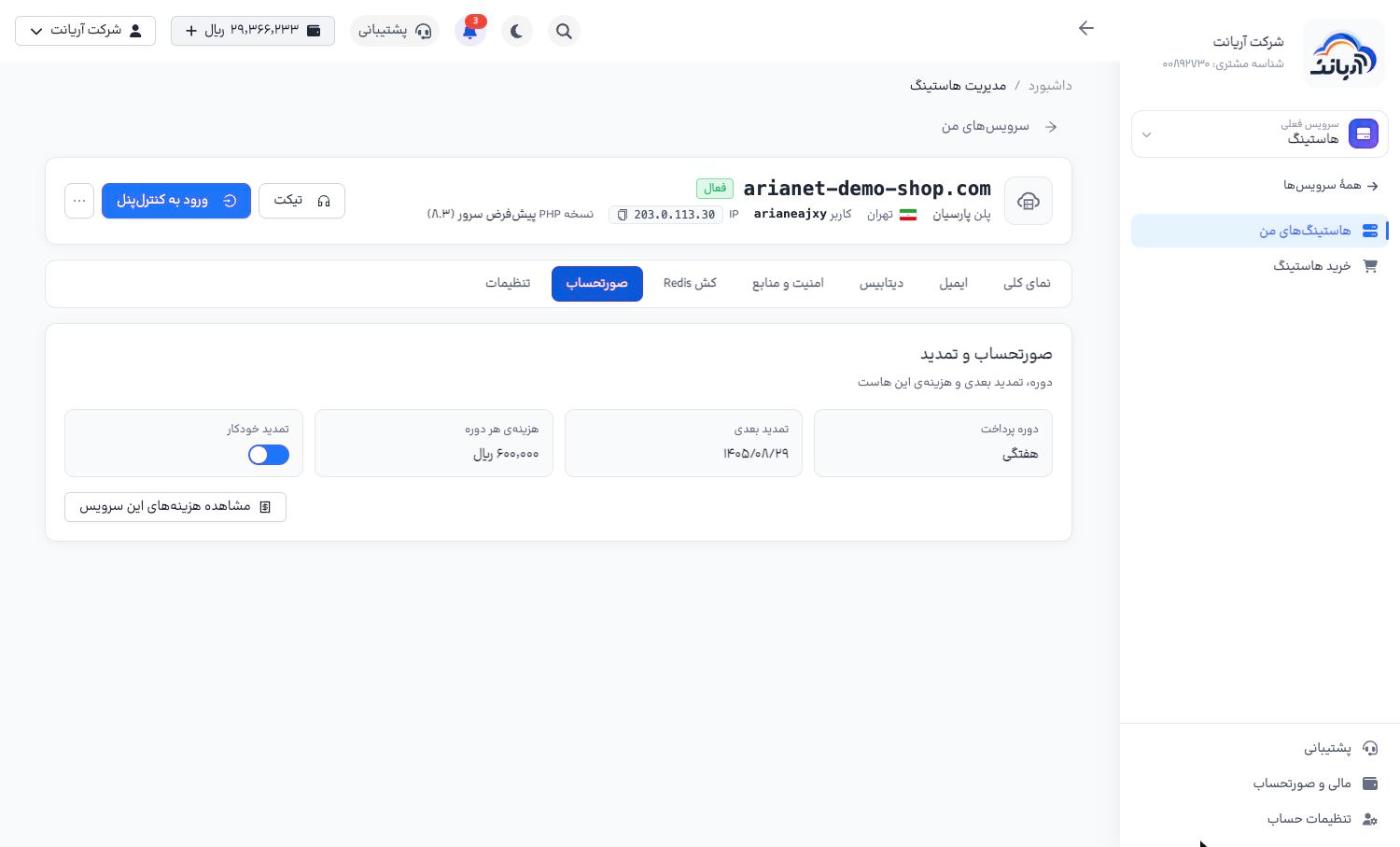
Turn on auto-renewal and keep enough wallet balance before the renewal date so that the hosting is not suspended.
Settings
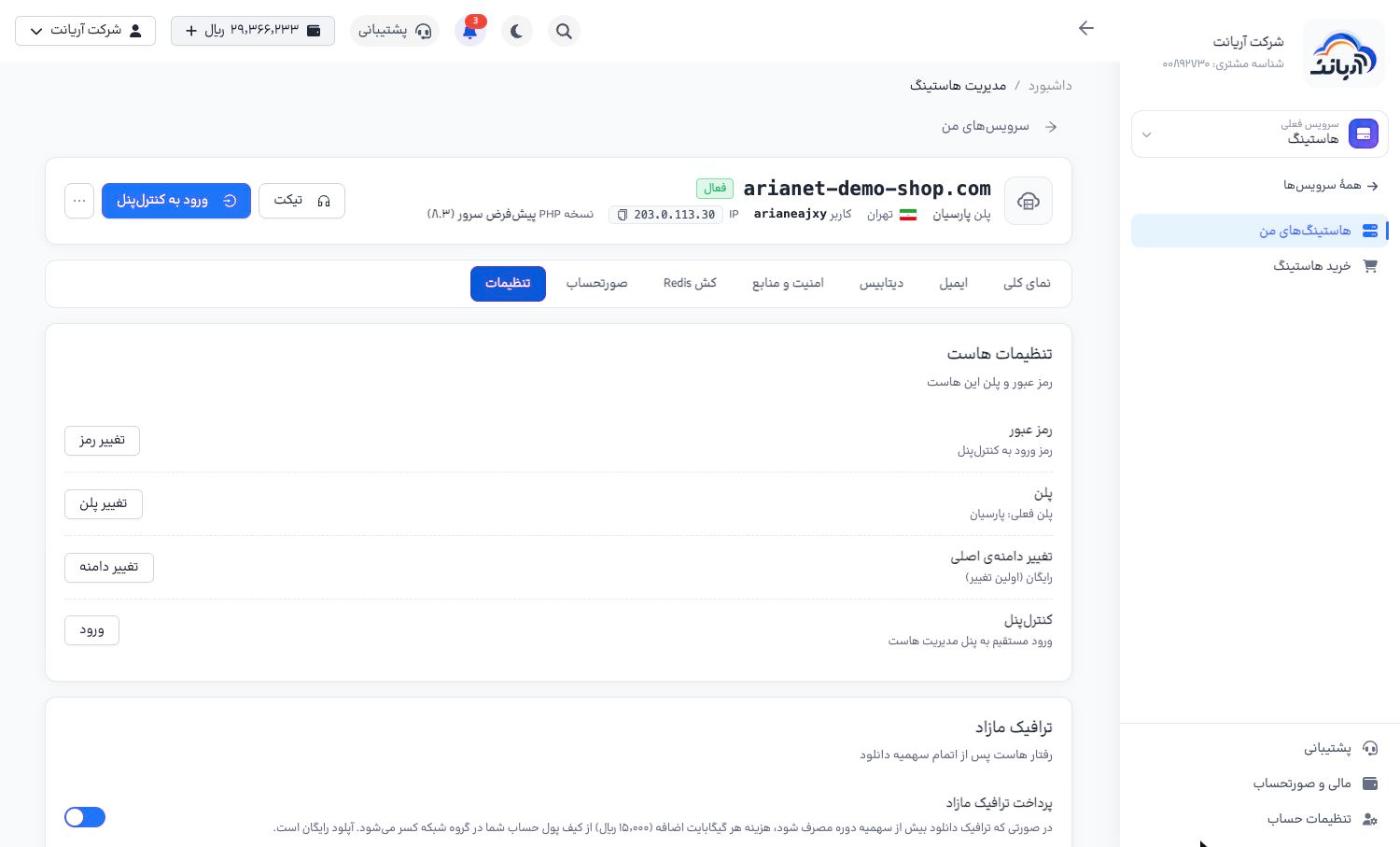
- Password («رمز عبور»): change the control panel password
- Plan («پلن»): upgrade to a higher plan
- Change primary domain («تغییر دامنهی اصلی»): the first change is free
- Control panel («کنترلپنل»): sign in directly to the hosting management panel
- Extra traffic («ترافیک مازاد»): if Pay for extra traffic («پرداخت ترافیک مازاد») is on, once the period's download quota runs out, the cost of each extra gigabyte is deducted from your wallet and the site stays online.
Full reset
Full reset («بازنشانی کامل») returns the hosting to its day-one state.
A full reset deletes all the hosting's files, emails and databases. Take a backup first.
Deleting hosting
- From the "…" menu at the top of the page, click Delete hosting («حذف هاست»).
- Type the domain name to confirm.
- Tick I understand that all data will be permanently deleted and cannot be recovered («میدانم که همهی دادهها برای همیشه حذف میشود و قابل بازگشت نیست») and click Delete hosting permanently («حذف همیشگی هاست»).
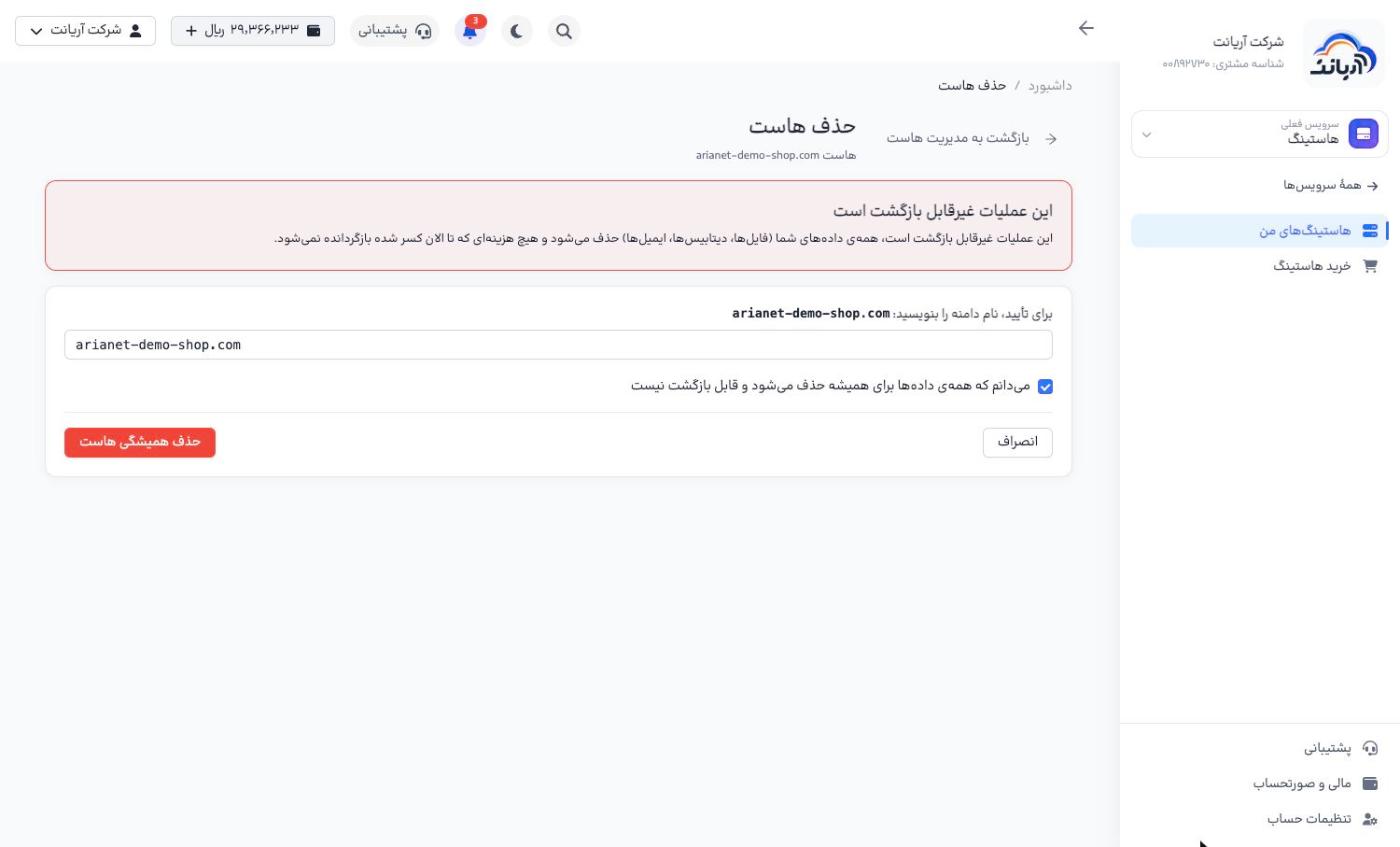
Deleting hosting is irreversible: all files, databases and emails are deleted, and the cost of the paid period is not refunded.