Dedicated servers
A dedicated server is a complete physical server in OVHcloud data centers (Canada, Europe, Asia and Australia) that is yours alone. It is rented monthly and prepaid.
- The server is bought from the data center after you pay, and delivery takes up to 72 hours (longer for some configurations). Instant delivery is not guaranteed.
- The server is delivered without an operating system; you install the operating system yourself from the panel after delivery.
- First payment = first month's rent + a one-time setup fee. This amount is deducted from your wallet when you place the order, so top up your account before ordering.
- Renewal is not automatic; you must renew manually every month.
Ordering a dedicated server
In the Dedicated server («سرور اختصاصی») menu, click Order a dedicated server («سفارش سرور اختصاصی»). The order has ten steps; in each step Continue («ادامه») takes you to the next step and Previous step («مرحله قبل») to the previous one. You can also go back to any completed step by clicking its number in the top bar. The Order summary («خلاصهٔ سفارش») box at the side of the page always shows your choices and the price.
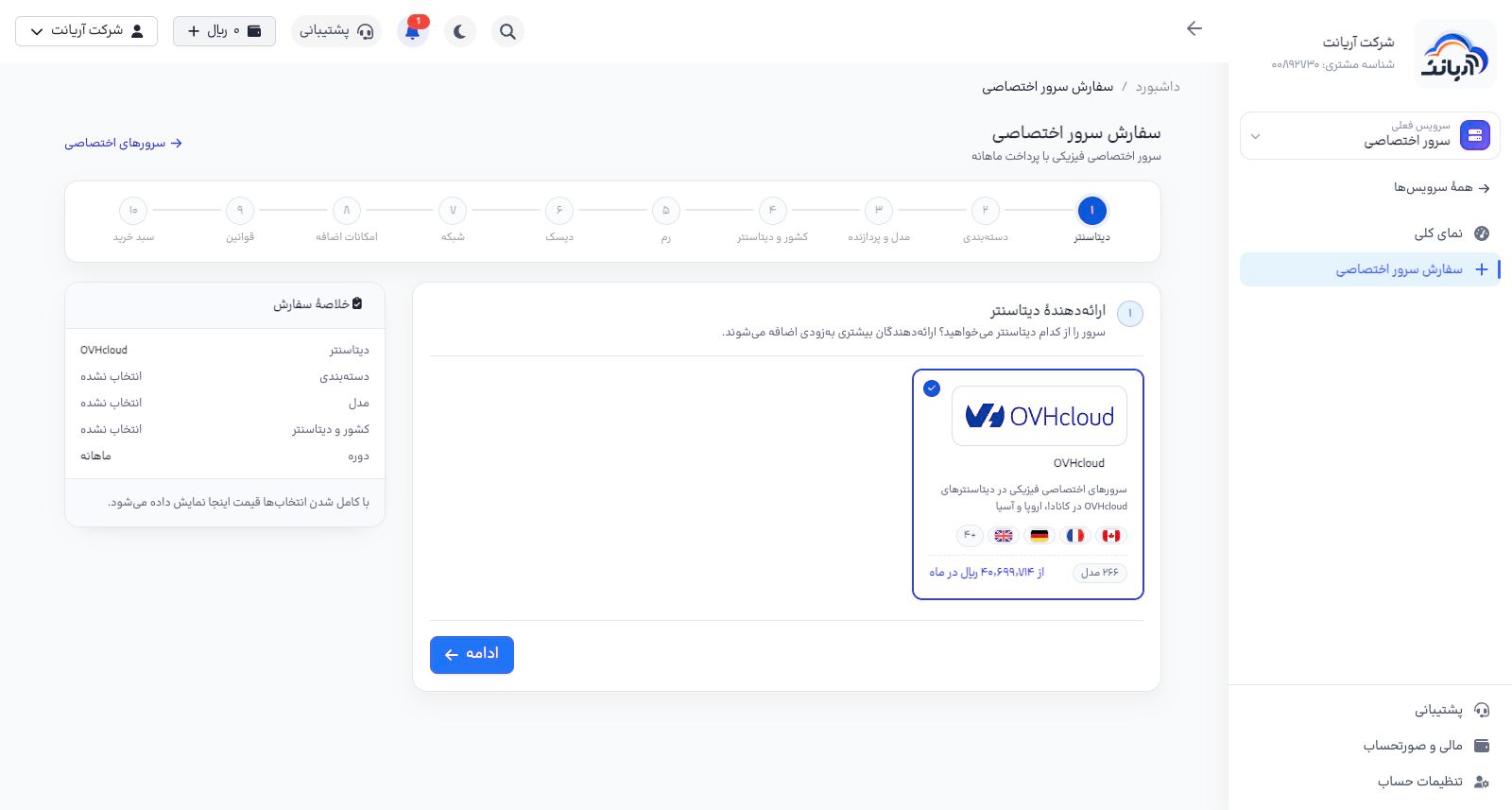
1. Data center provider
Choose the provider (currently OVHcloud). Its card lists the available countries, the number of models and the lowest price.
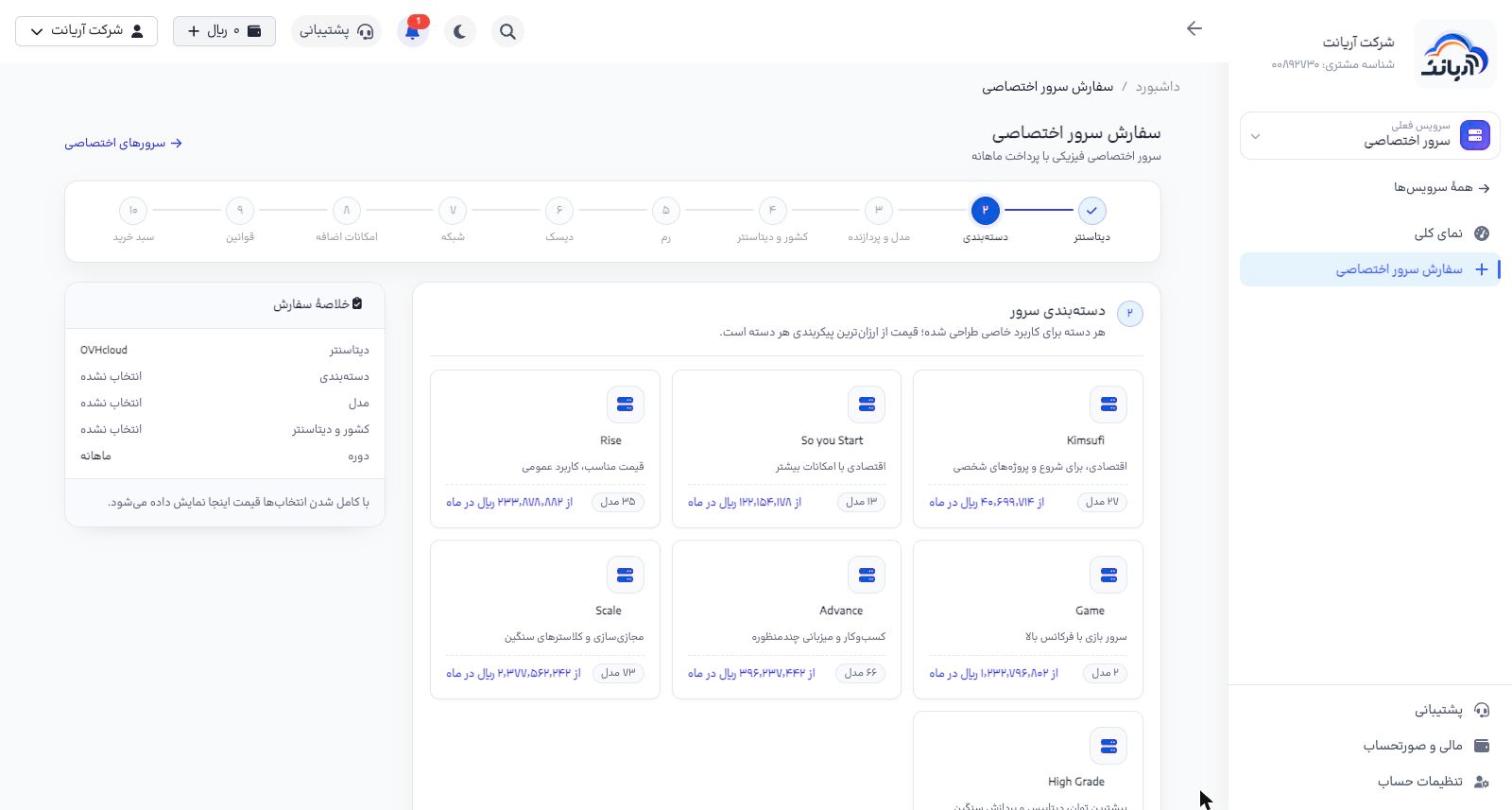
2. Category
Each category is designed for a use case; for example Kimsufi and So you Start are budget lines, Game is for high-frequency game servers, Advance is for businesses, and Scale and High Grade are for virtualization and heavy computing. The price on each card is the price of the cheapest model in that category.
3. Model and processor
Use the filters (CPU manufacturer, country, minimum cores, minimum RAM, disk type, server type and maximum monthly price) to find a suitable model, then click it. You can sort the list by Cheapest («ارزانترین»), Most cores («بیشترین هسته») or Highest frequency («بیشترین فرکانس»).
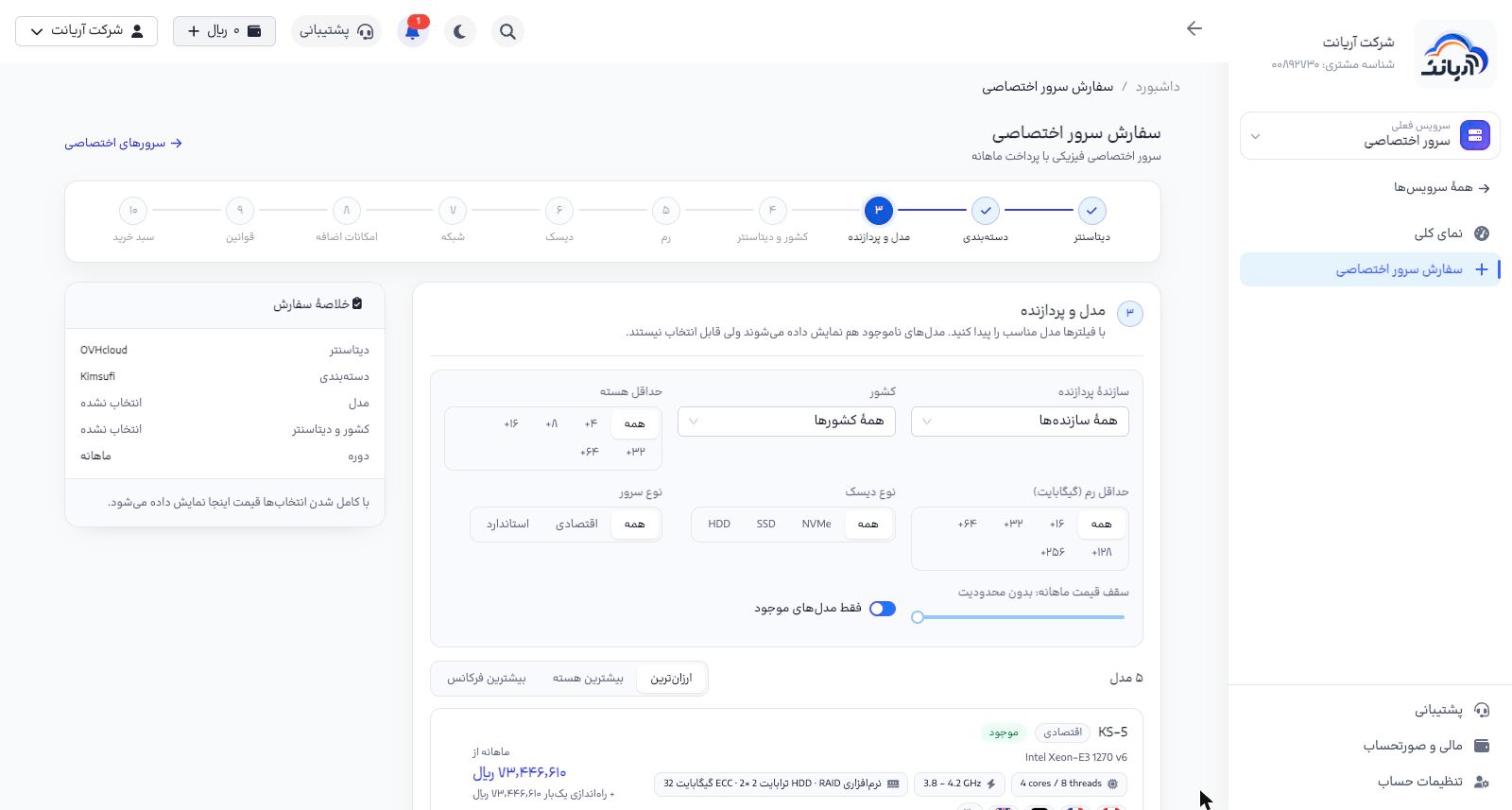
Turn on the Available models only («فقط مدلهای موجود») switch. Unavailable models are shown too, but cannot be ordered. Even a model marked Available («موجود») may be unavailable in some data centers or with some disks; if an option is disabled in a later step, choose another data center or model.
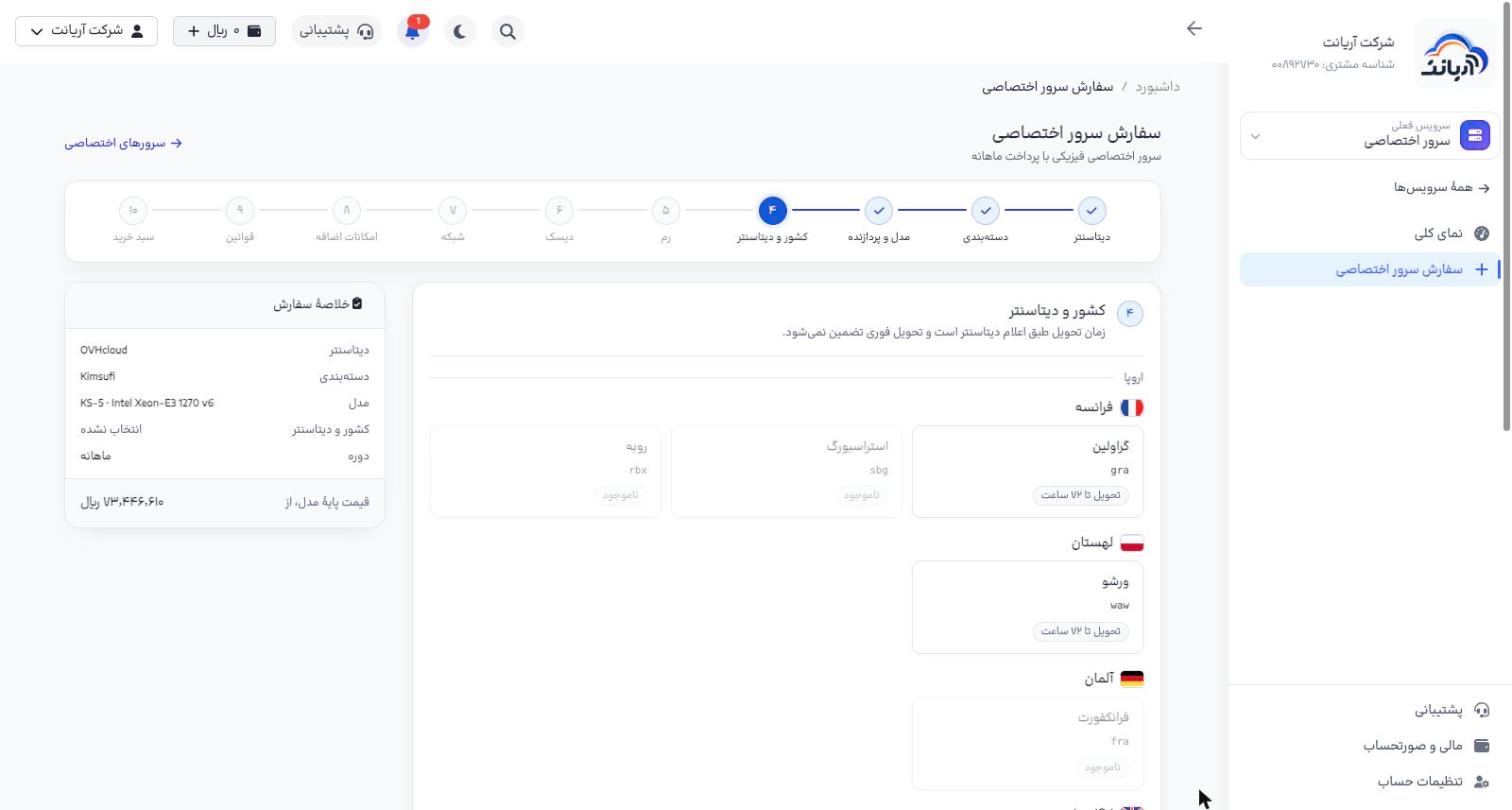
4. Country and data center
Data centers are grouped by continent and country. Under each data center the delivery time (Delivery within 72 hours, «تحویل تا ۷۲ ساعت») or Unavailable («ناموجود») is shown.
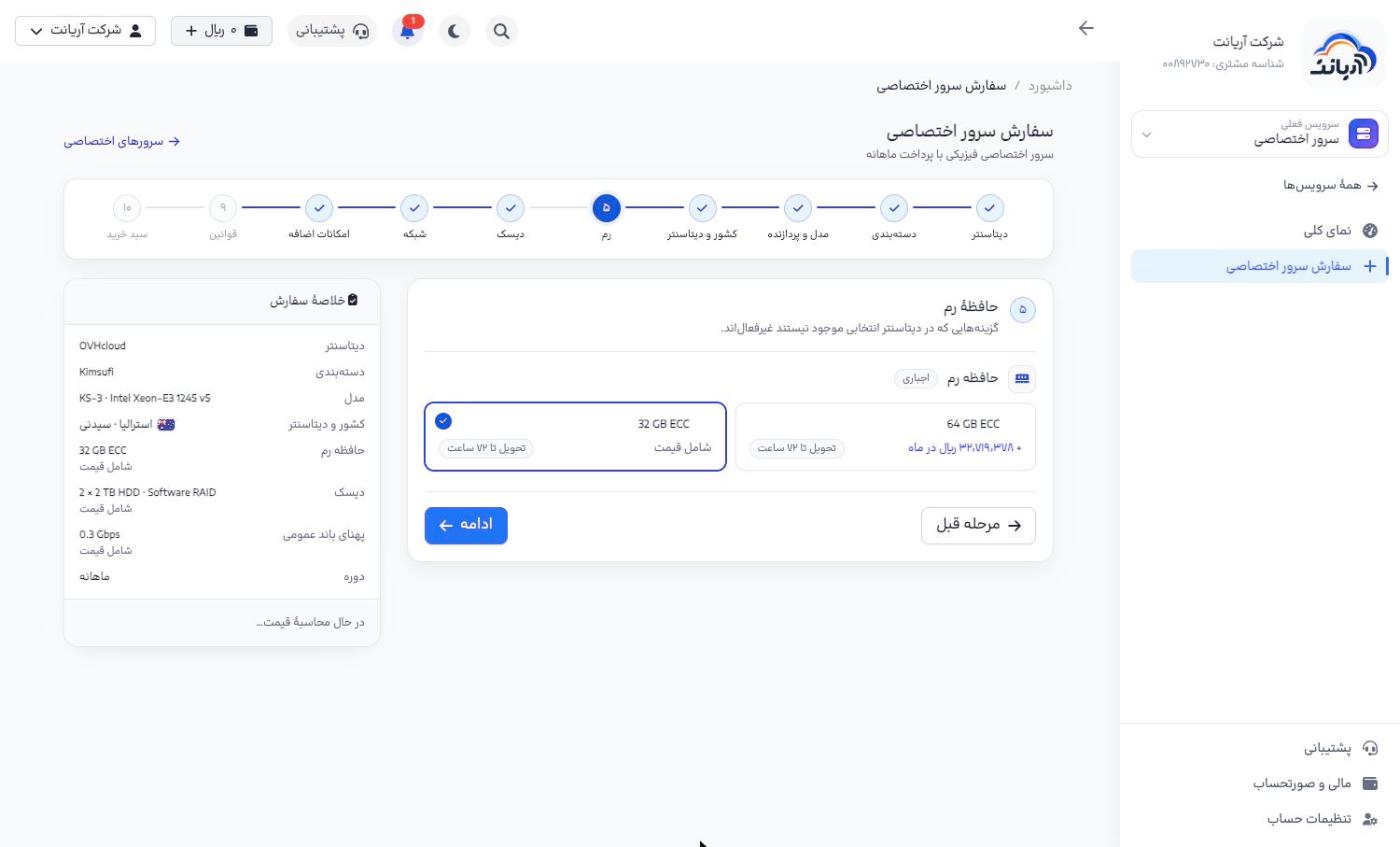
5. RAM
The model's base RAM is Included in the price («شامل قیمت»). More RAM has an extra monthly cost, shown next to the option.
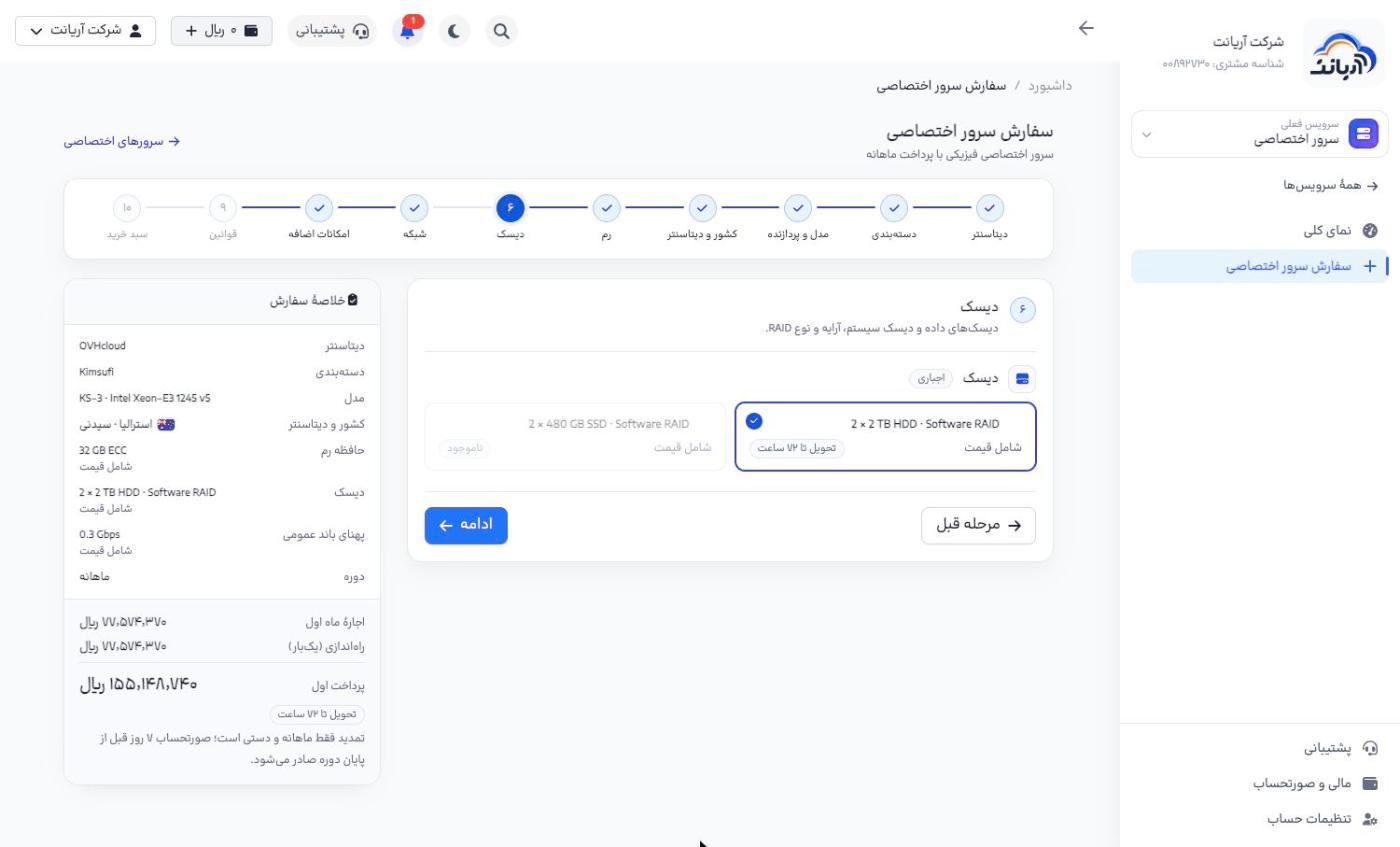
6. Disks
Choose the number and type of disks (HDD, SSD or NVMe) and the RAID type. From this step on, the summary box shows the First month's rent («اجارهٔ ماه اول»), Setup (one-time) («راهاندازی (یکبار)») and First payment («پرداخت اول») amounts.
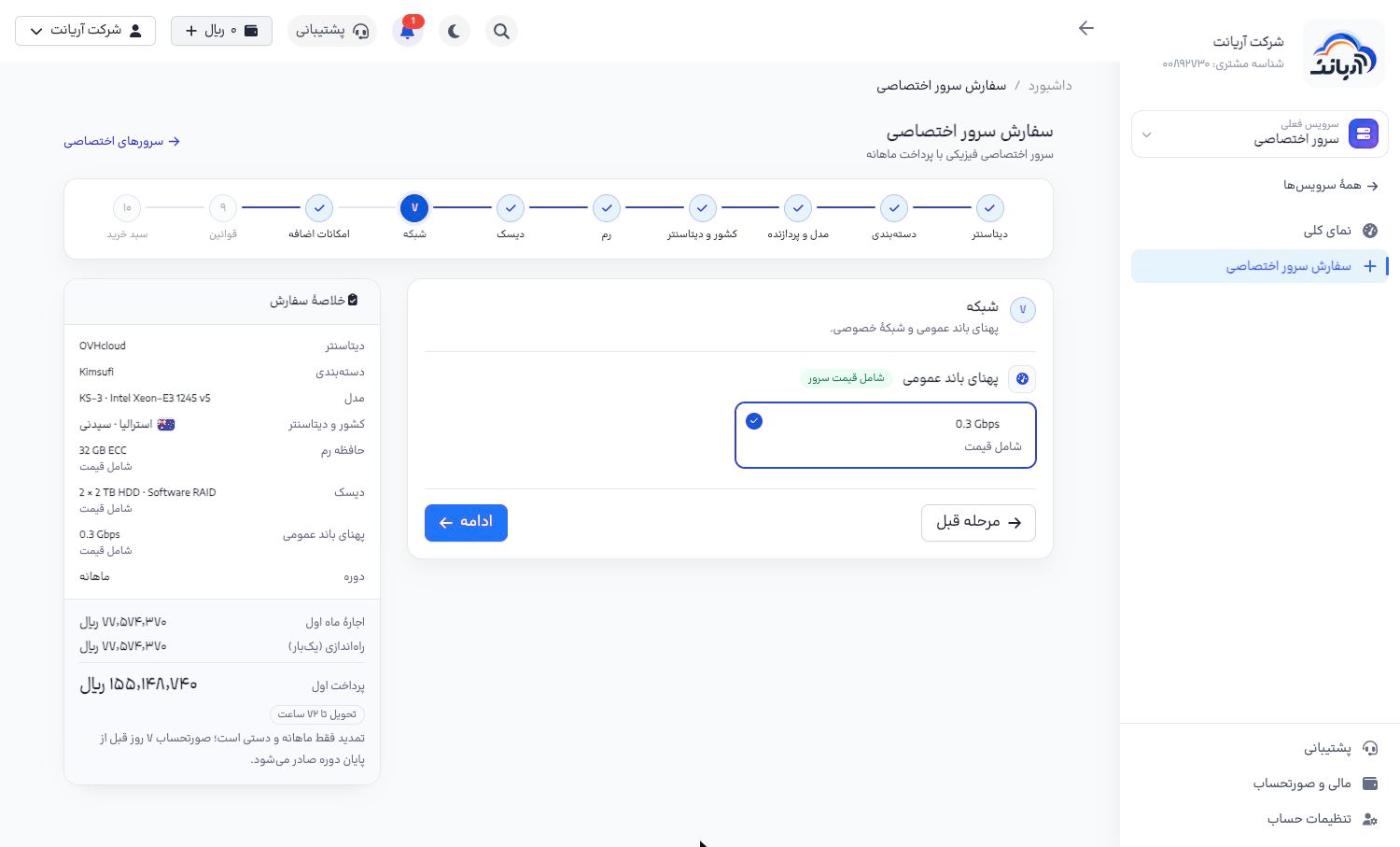
7. Network
The server's public bandwidth. The base bandwidth is included in the price.
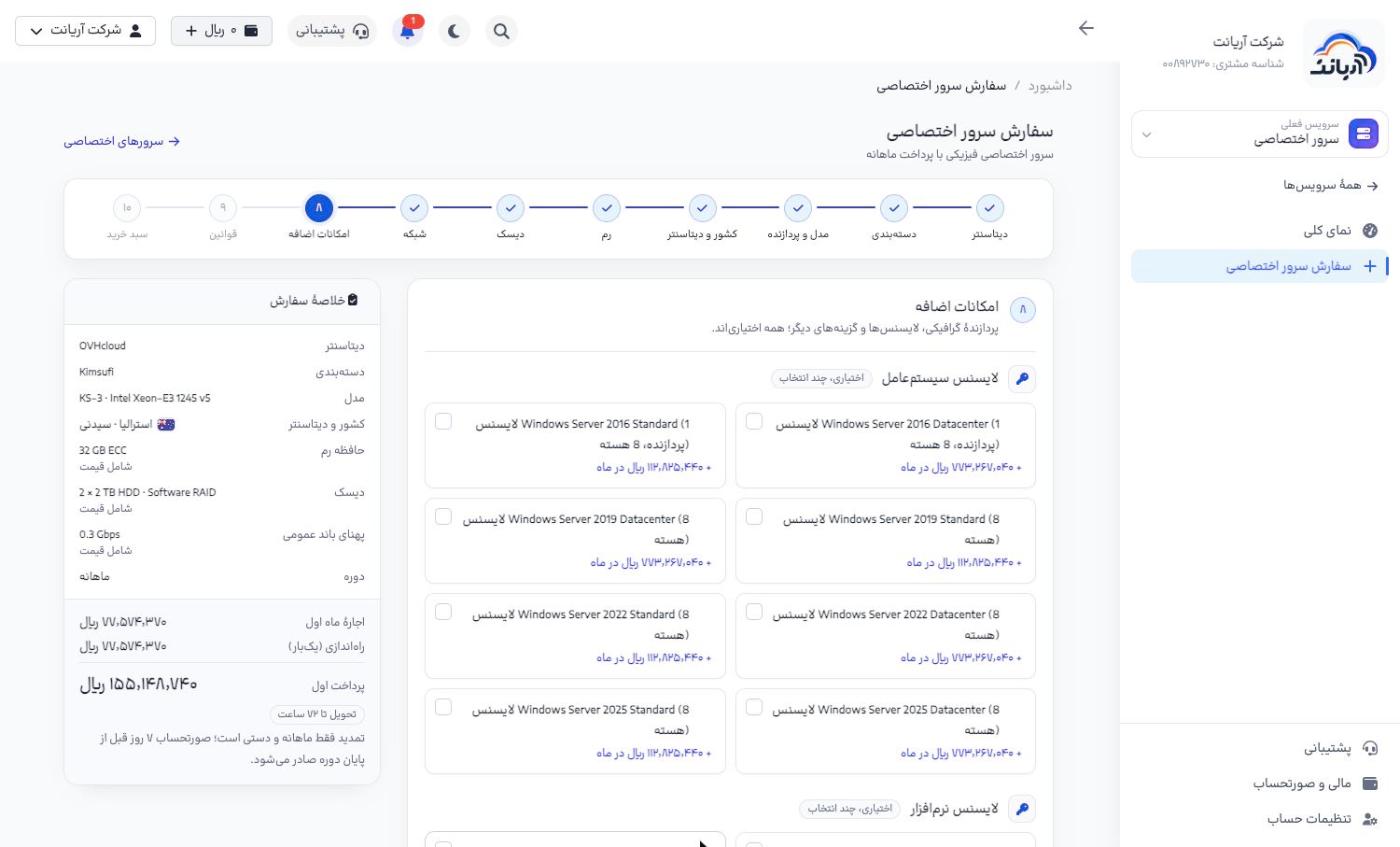
8. Extras (optional)
Operating system licenses (such as Windows Server), software licenses and other extras. Each option's monthly cost is shown next to it. If you don't need any, click Continue without selecting anything.
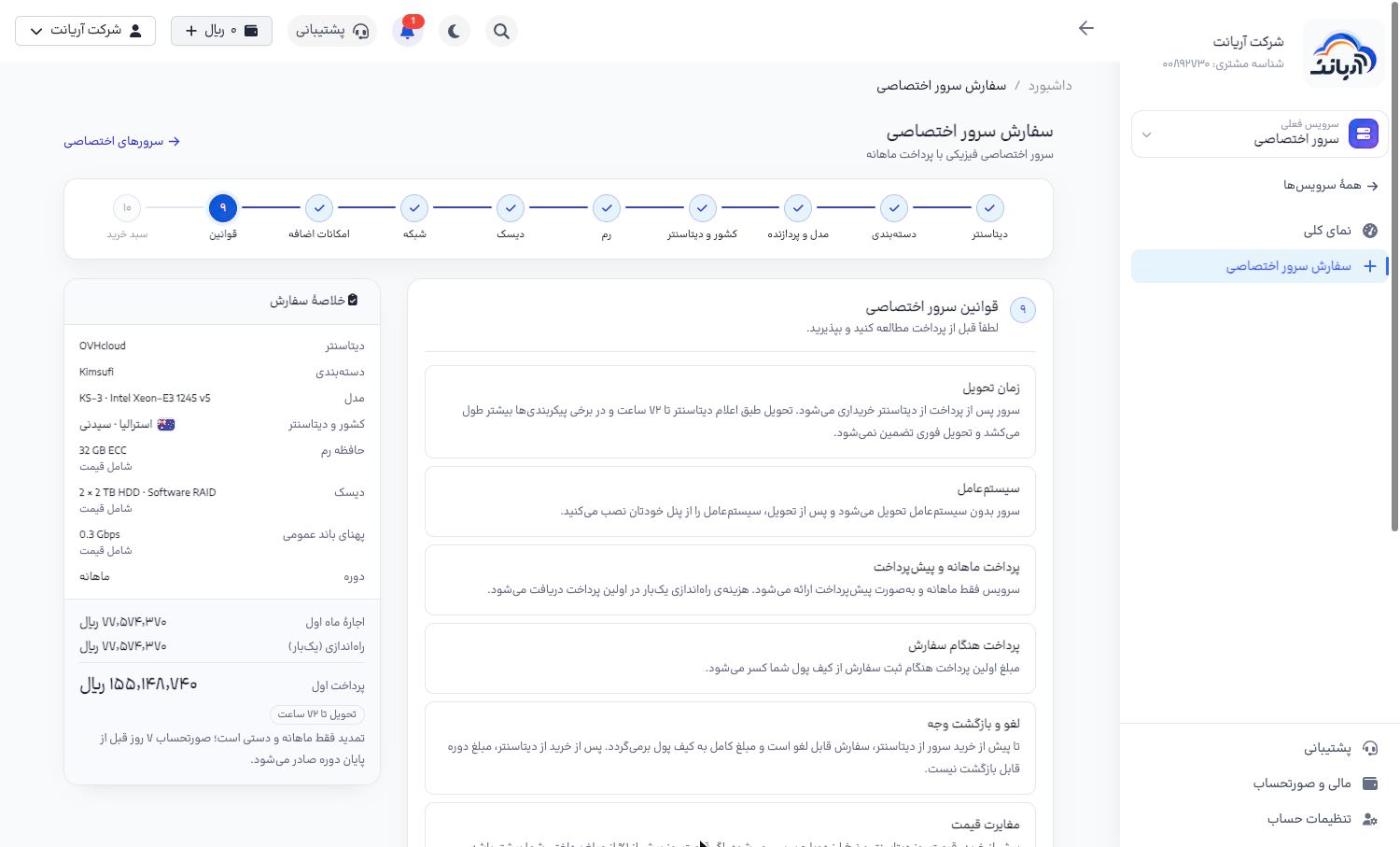
9. Rules
Read the dedicated server rules in full, tick I have read and accept the rules («قوانین را خواندم و میپذیرم») and click Continue.
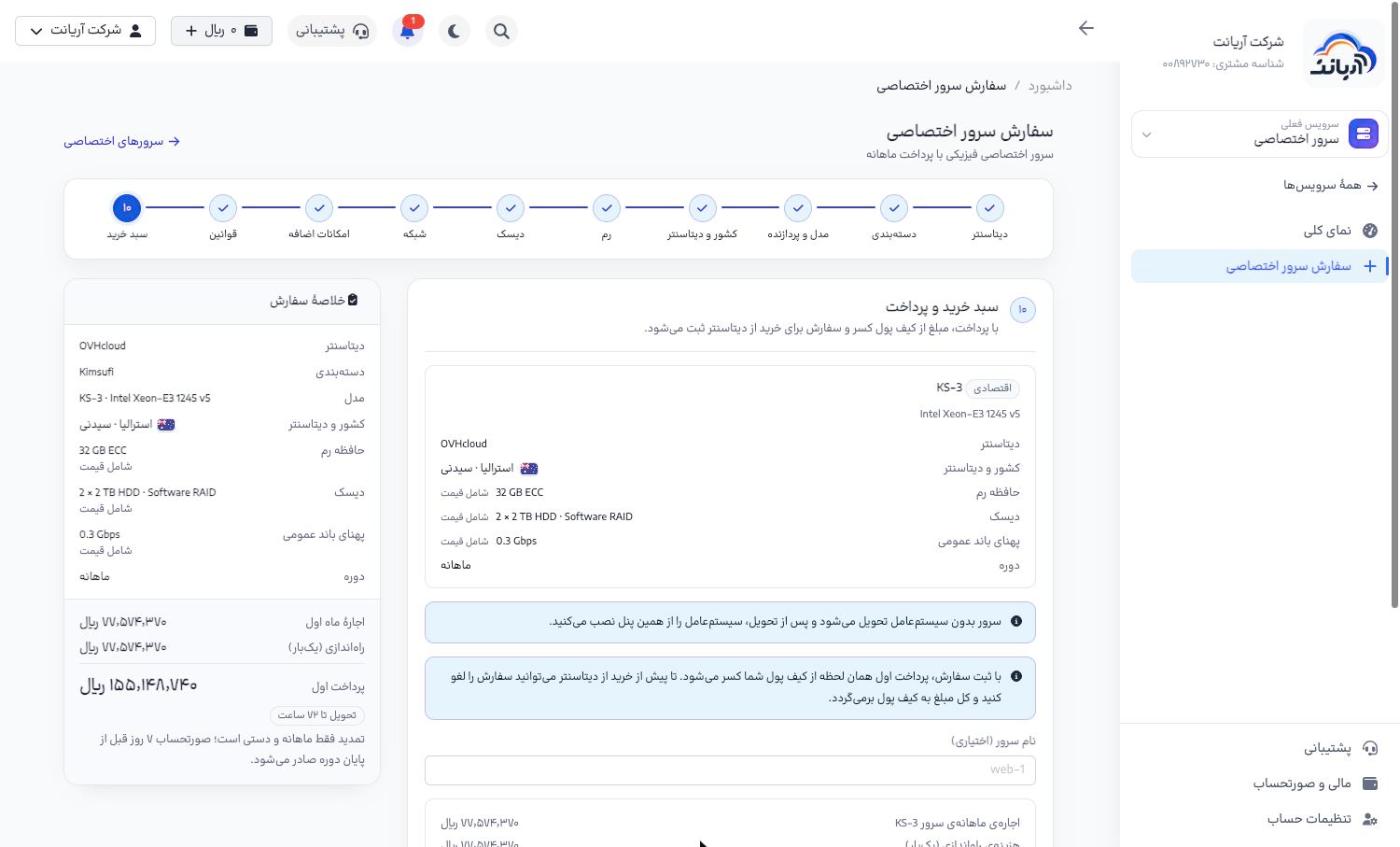
10. Cart and payment
The full order summary and amount are shown. Optionally enter a Server name (optional) («نام سرور (اختیاری)») and click Pay from wallet («پرداخت از کیف پول»).
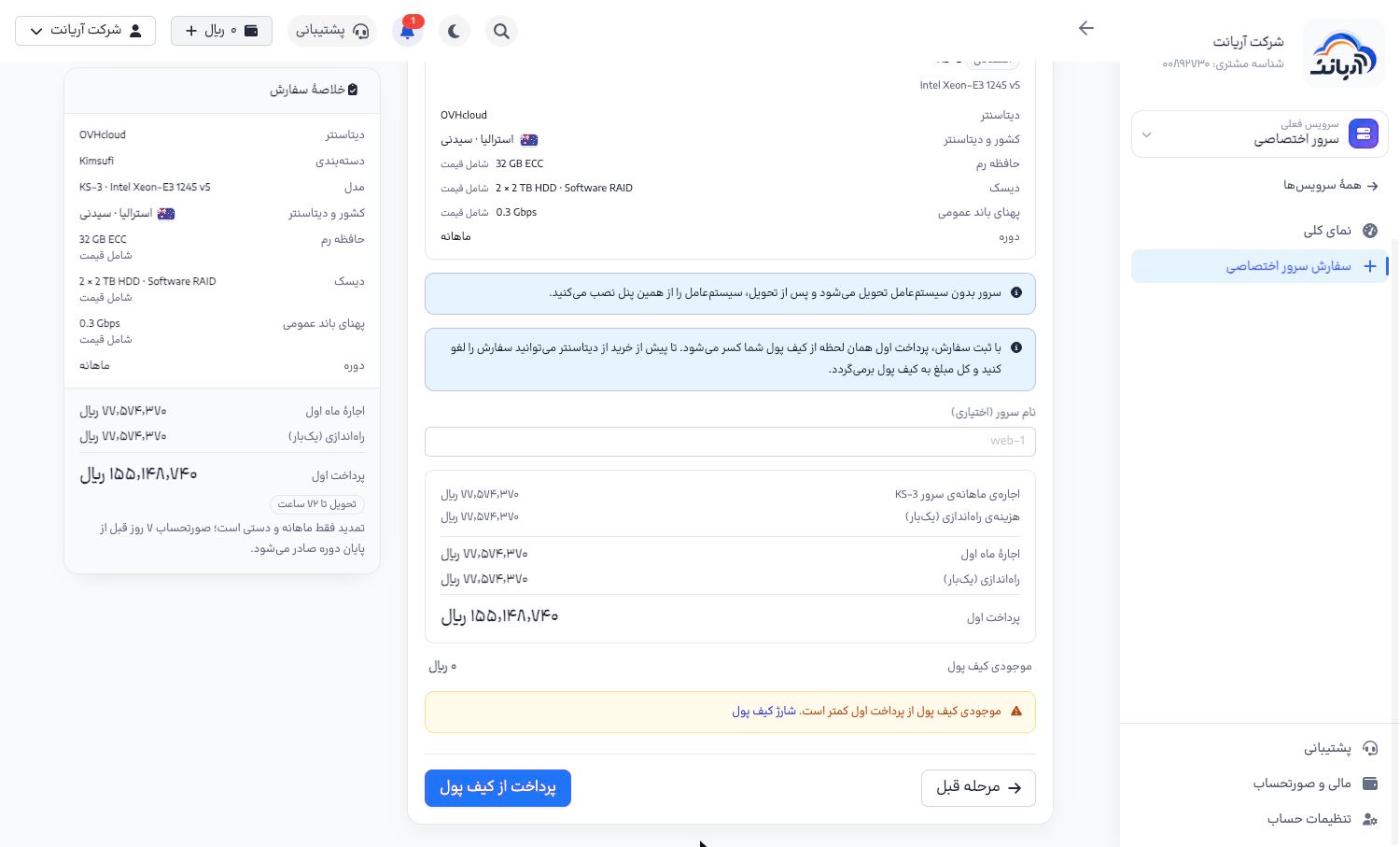
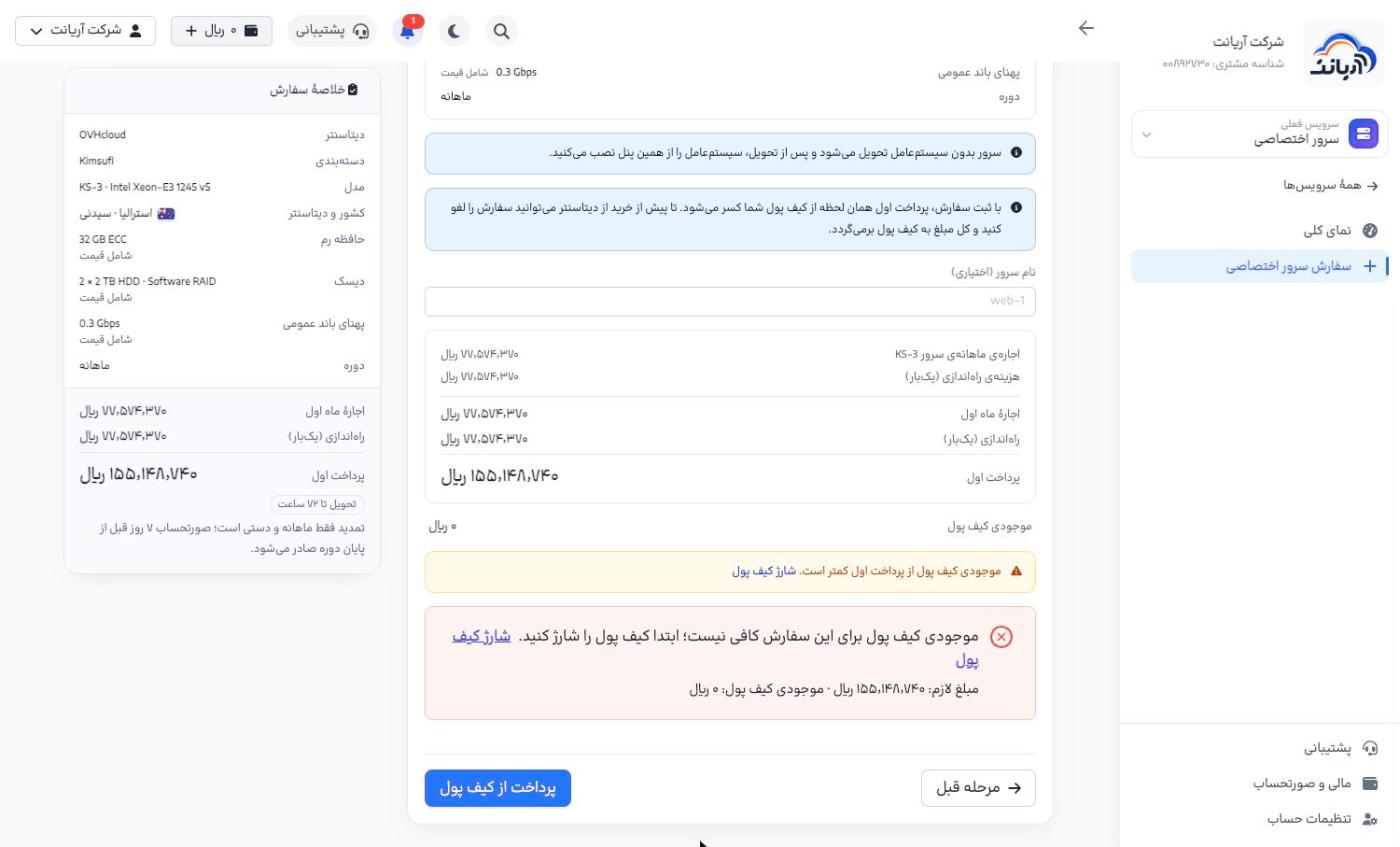
If your wallet balance is less than the First payment, the order is not placed and the message Your wallet balance is not enough for this order («موجودی کیف پول برای این سفارش کافی نیست») is shown with the amount needed. Top up with the Top up wallet («شارژ کیف پول») link and click Pay from wallet again; your choices are kept.
Tracking the order
After you pay, the order page opens. The same page is also available from Dedicated servers → Orders («سرورهای اختصاصی ← سفارشها»), or from the server page with View order and its stages («مشاهدهٔ سفارش و مراحل آن»). The Order status («وضعیت سفارش») shows the same stages our staff see, and you are notified of every change:
- Paid, waiting to buy from the data center («پرداخت شد، در انتظار خرید از دیتاسنتر»)
- Buying from the data center («در حال خرید از دیتاسنتر»)
- Order placed with the data center («سفارش در دیتاسنتر ثبت شد»): from this stage on the order cannot be cancelled.
- The data center is preparing the server («دیتاسنتر در حال آمادهسازی سرور»)
- Received, final preparation in progress («تحویل گرفته شد، در حال آمادهسازی نهایی»)
- Active («فعال»): the login details are ready on the server page. Click Manage server («مدیریت سرور»).
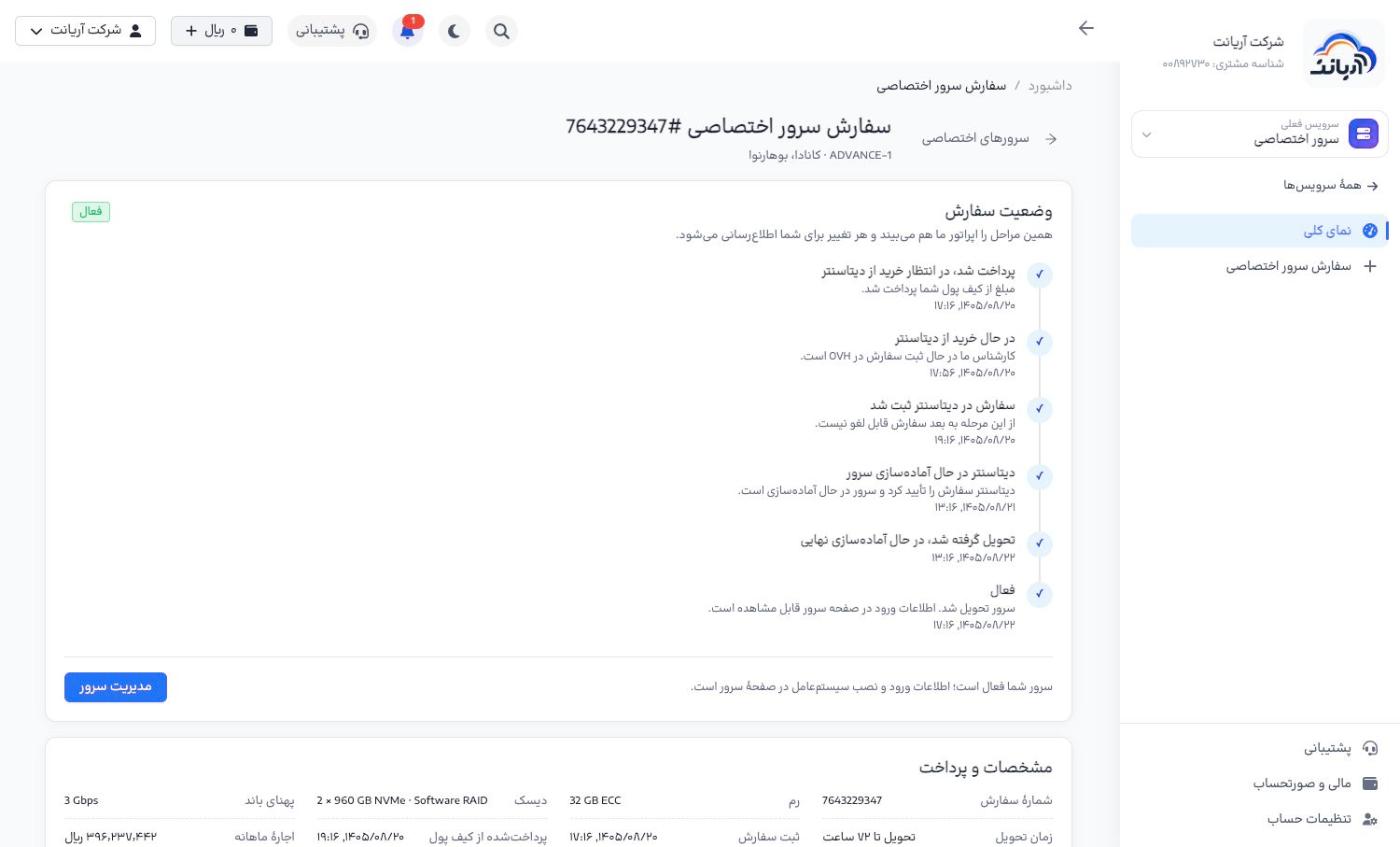
Until the Order placed with the data center stage, the Cancel order and get a full refund («لغو سفارش و بازگشت کامل وجه») button is active and the whole amount is returned to your wallet. Once the server has been bought from the data center, the period's amount is non-refundable.
Before buying, the data center's current price and the exchange rate are checked again. If the current price is more than 1% above what you paid, the order is paused and the order page gives you two options: Pay the difference from wallet («پرداخت مابهالتفاوت از کیف پول») or cancel the order with a full refund.
Managing a dedicated server
Dedicated servers («سرورهای اختصاصی») lists your servers with status, IP, location, model and period end date. Click a server.
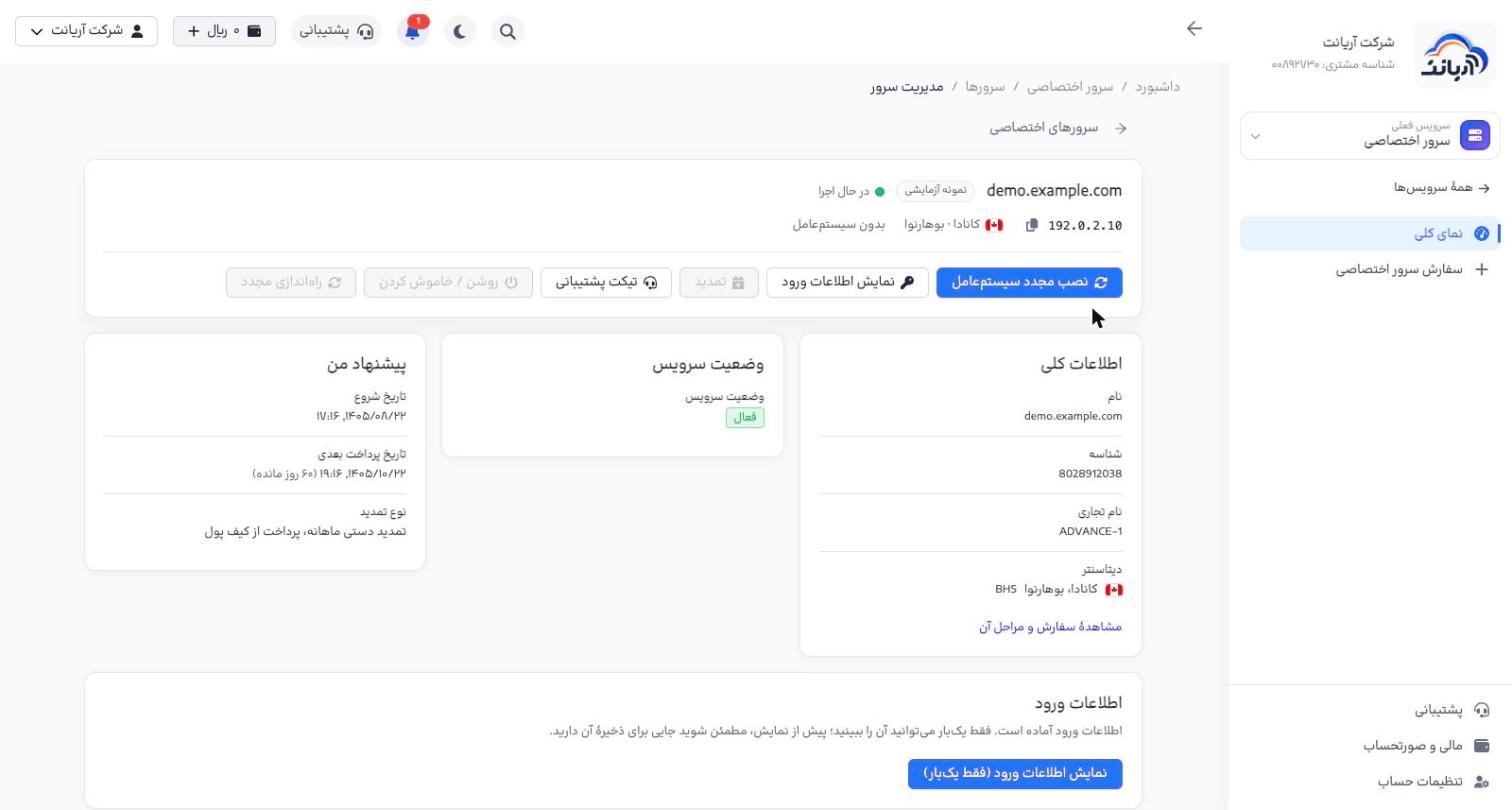
The top of the page shows the server's name, status, IP and location, and the main buttons: Reinstall operating system («نصب مجدد سیستمعامل»), Show login details («نمایش اطلاعات ورود»), Renew («تمدید»), Support ticket («تیکت پشتیبانی»), Power on / off («روشن / خاموش کردن») and Restart («راهاندازی مجدد»). The My offer («پیشنهاد من») card shows the start date, the next payment date and the renewal type.
The screenshots on this page show a Test sample («نمونه آزمایشی») label because they were taken from a sample server. Your real server does not have this label.
Login details
The login details (IP, username root and password) are shown only once.
- In the Login details («اطلاعات ورود») section, click Show login details (one time only) («نمایش اطلاعات ورود (فقط یکبار)») and click Show details («نمایش اطلاعات») in the confirmation window.
- Copy each item with the copy button next to it and save it right away somewhere safe (for example a password manager).
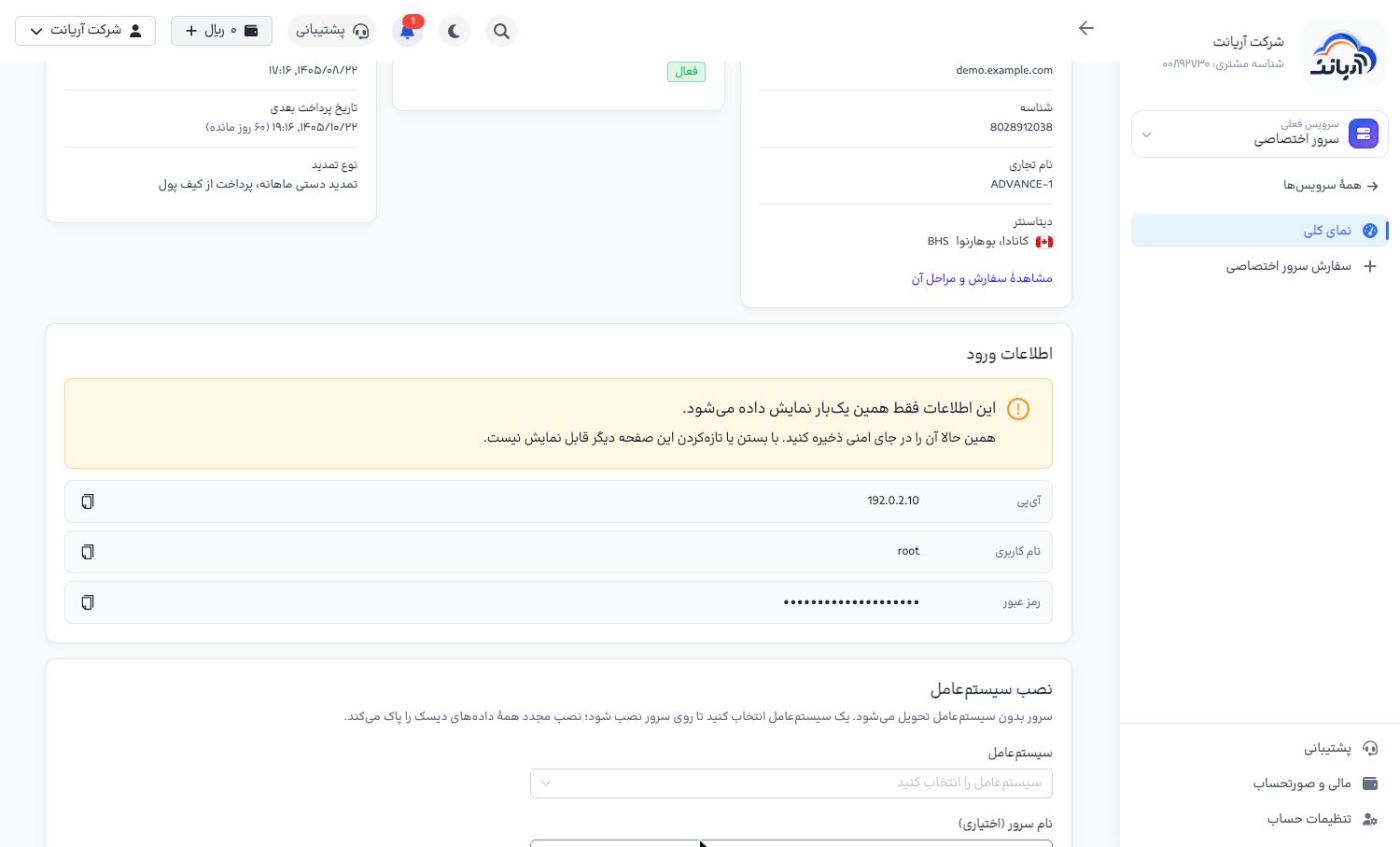
Once you close or refresh the page, the login details are no longer shown. Change the root password after your first login.
Installing an operating system
- In the Install operating system («نصب سیستمعامل») section, choose an operating system (such as Ubuntu, Debian, AlmaLinux, Rocky Linux or Proxmox).
- Optionally enter a Server name (optional) («نام سرور (اختیاری)») and an SSH public key (optional) («کلید عمومی SSH (اختیاری)»). With an SSH key you can sign in without a password. Creating an SSH key
- Click Install operating system («نصب سیستمعامل») and confirm Install operating system again in the warning window.
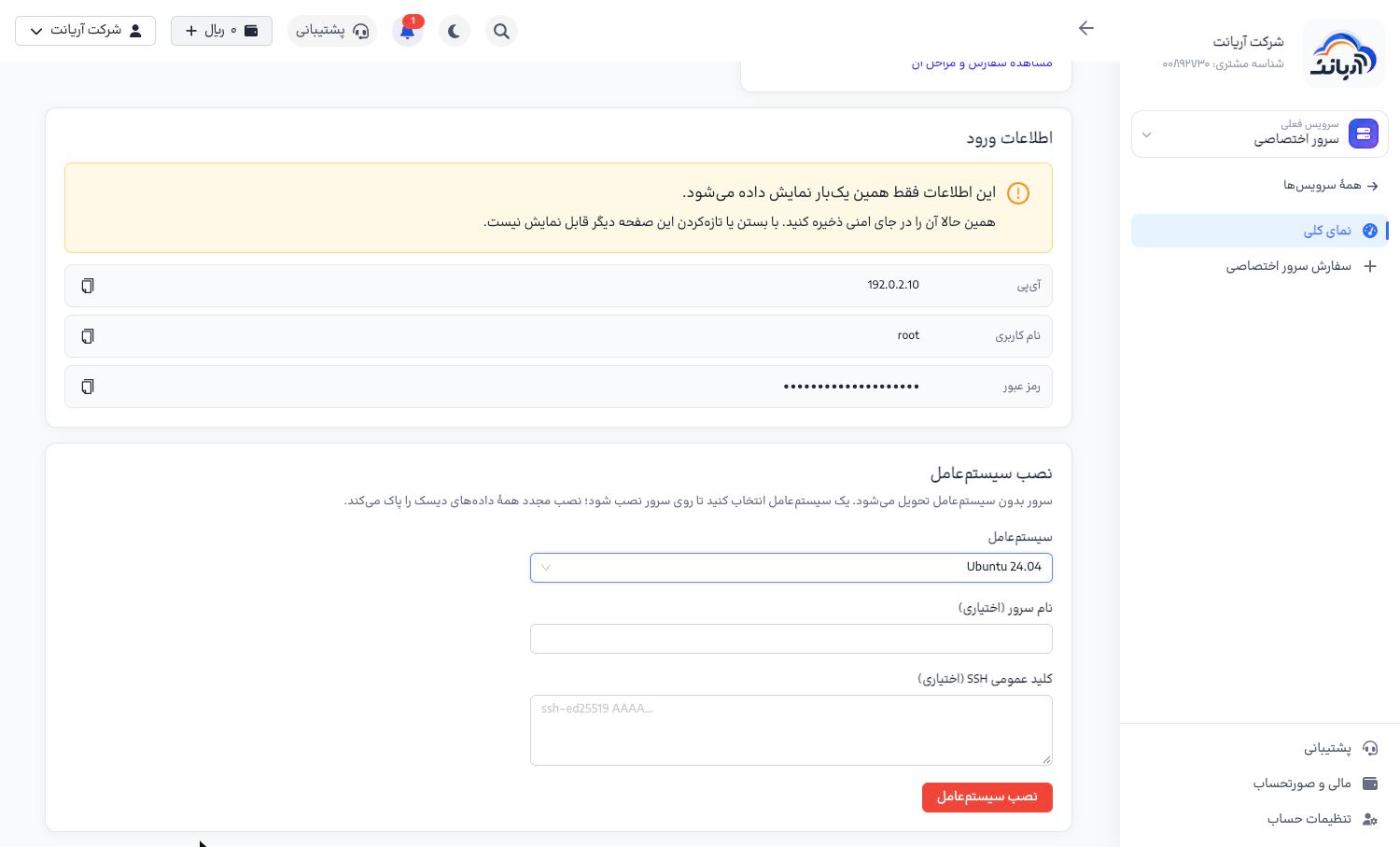
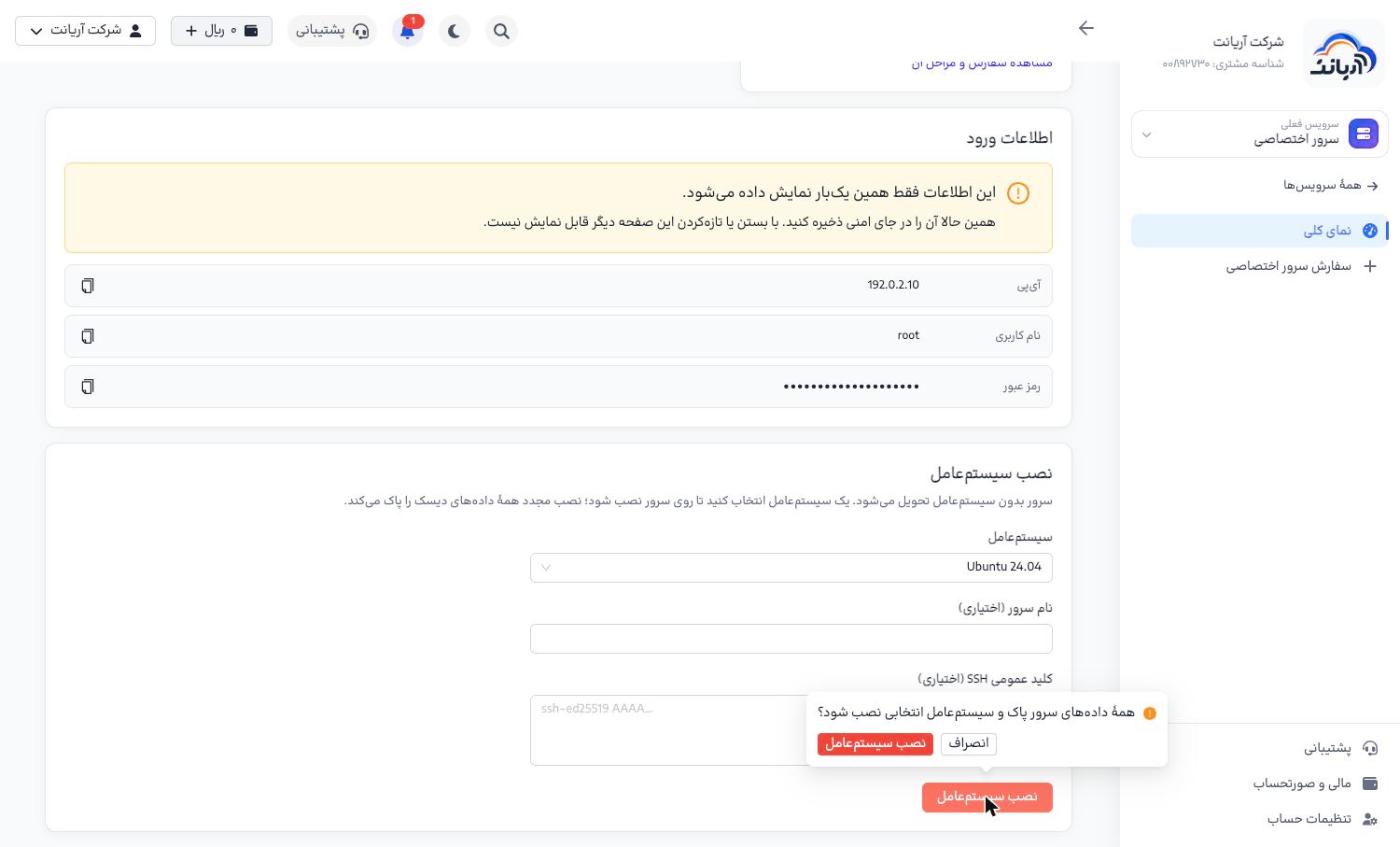
The message The operating system is being installed; this takes a few minutes («سیستمعامل در حال نصب است؛ این کار چند دقیقه طول میکشد») is shown.
Installing or reinstalling the operating system deletes all data on all disks and cannot be undone. Back up your data before reinstalling.
Renewal
- The renewal bill is issued 7 days before the end of the period and you are notified.
- Renew («تمدید») on the server page pays the amount from your wallet.
- If it is not paid by 3 days before the end of the period, the server is not renewed.
A server that is not renewed is suspended at the end of the period and deleted according to the data center's deadline. All data is deleted and cannot be recovered. Backups are your responsibility.
Important notes
- Any attack, spam, scanning, phishing or illegal content is prohibited and leads to the service being suspended without a refund. Abuse center
- For any problem, use the Support ticket button on that server's page so the ticket is linked to the server. Support tickets
- Keep track of the next payment date on the My offer card, and keep balance notifications turned on in your profile.